
Since I am very new to Android Studio, I was having a very difficult time with the whole build process.
This is just a quick tutorial for those who have no clue about the setup needed for generating an Android build using Android Studio for Cocos Creator Projects.
Step1 - Install JDK and Setup JDK_HOME Path
Download the latest version of JDK SE from JDK SE Link.
Make sure it is JDK and not JRE that you are downloading.
JRE - Java Runtime Environment
JDK - Java Development Kit.
Once downloaded and installed, go to the JDK install directory usually something like (C:\Program Files\Java\jdk-14.0.1)
Copy the path and add this path to your environment variables as JAVA_HOME.
You can google setting up JAVA_HOME on how to do this if you are not very familiar with environment variables.
Step2 - Install Android Studio
Download the latest version of Android Studio from Android Studio Link.
The installation might take a while because of all the components and libraries included. Make certain that the " Virtual Device " checkbox is checked during your install, if available. You can choose all of the default settings during the installation. When you first run Android Studio, there are further questions and downloads of various components; you may again use all of the defaults for this part of the process.
Here’s a link which might help you with more in-depth explanation of the whole JDK and Android Studio Setup.
Step3 - Android SDK Settings
Settings can be found by clicking on Configure.
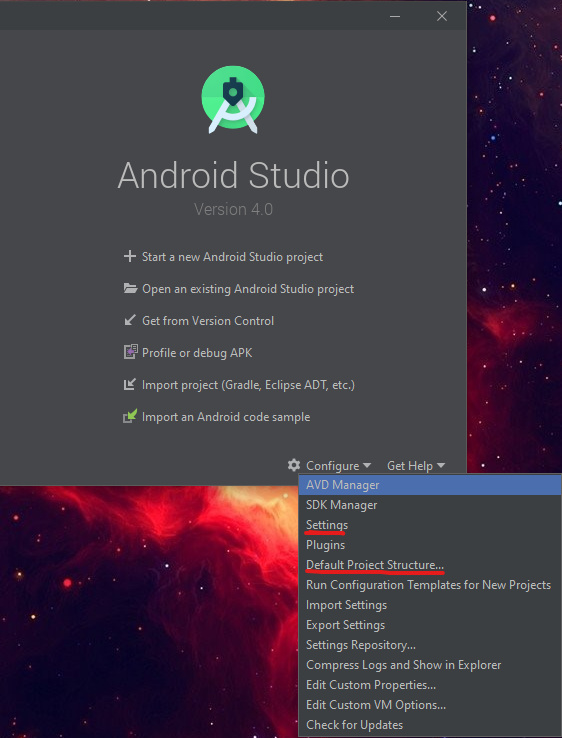
As of this wriiting these are the settings which worked for me to generate the build.
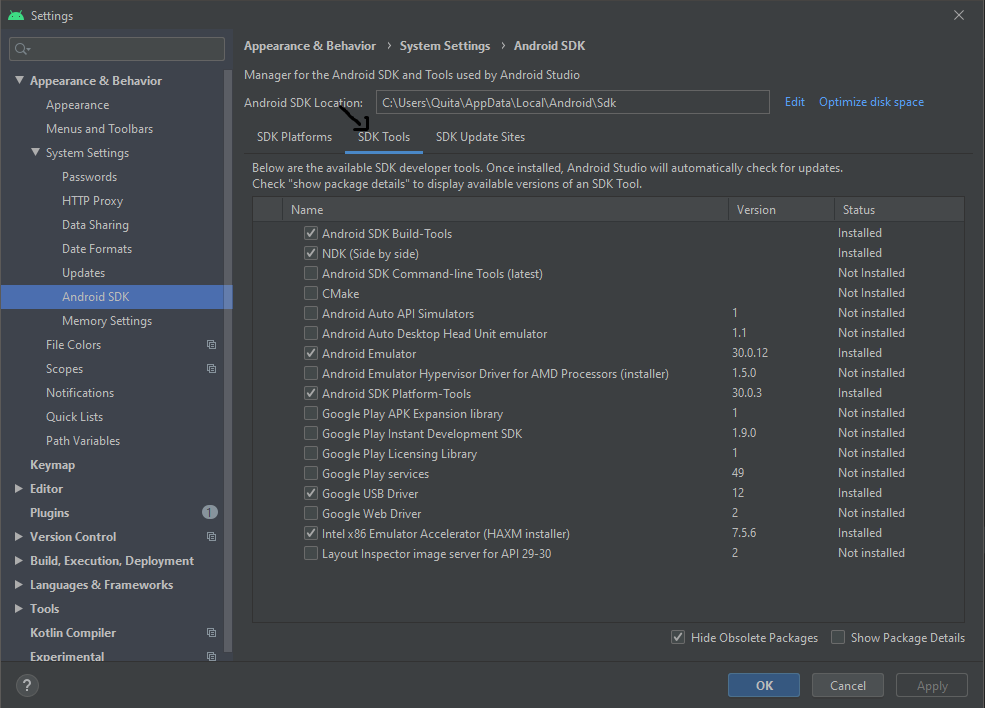
SDK Tools
Some of these tools might be redundant, so if any of the forum members point out that a certain tool is required or not required please take that into consideration.
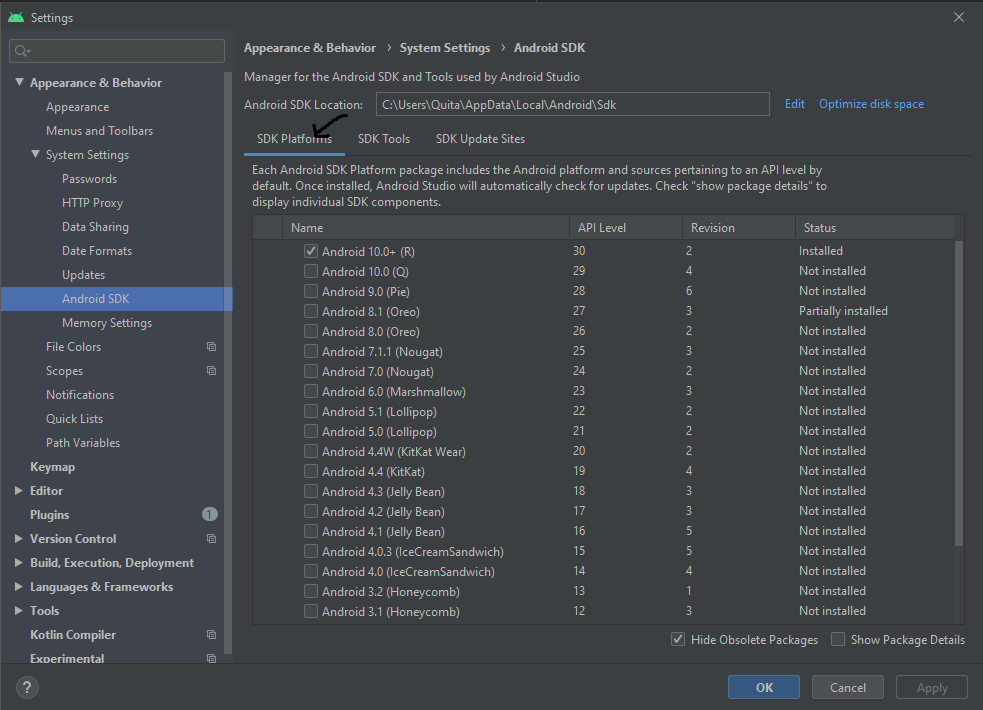
SDK Platforms
Install the android platforms that you want the project to be compatible with, usually the latest available
Step4 - Default Project Structure
Default Project Structure can be found in the same configure drop down menu. Please refer the first image from Step3
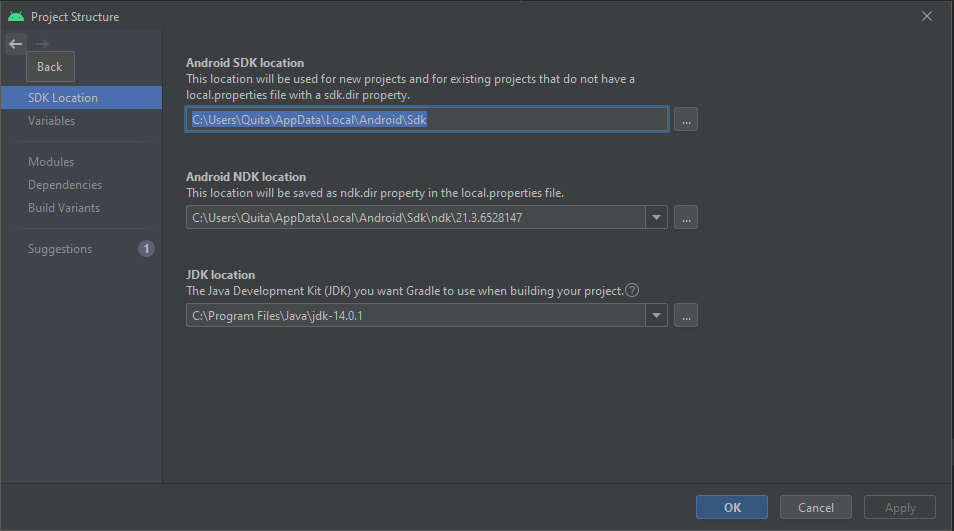
Here is the project structure with the SDK, NDK and the JDK path (location) setup
(Note:- I’m using the JDK path and not the default JRE path which shows up usually).
If I use JRE rather than JDK sometimes I get a warning saying something like :-
Using different JDK locations may spawn multiple Gradle daemons if Gradle tasks and SDK use different JDK versions.
Since we have setup JAVA_HOME environment variable (in Step1), just click on the drop down box like shown and select JAVA_HOME.
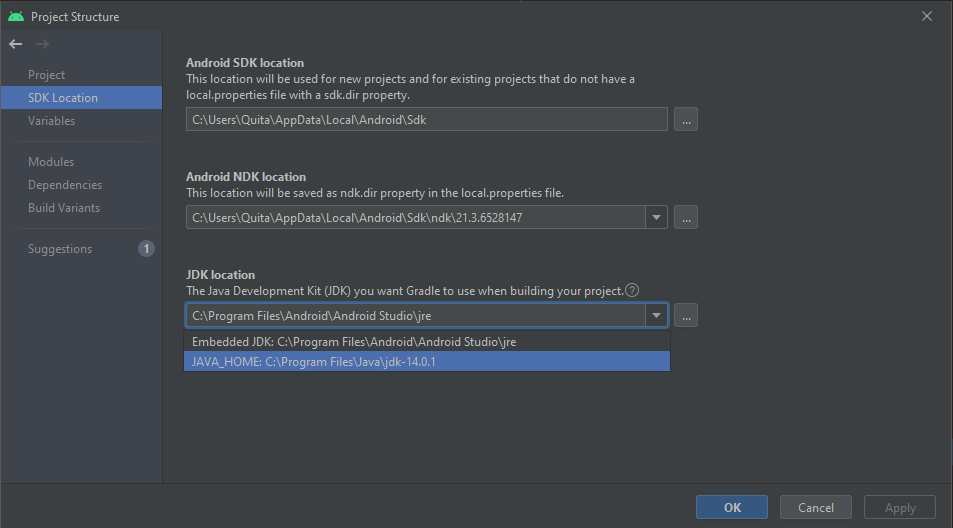
Make sure NDK is selected (usually selected by default) else click on the drop down box and select it.
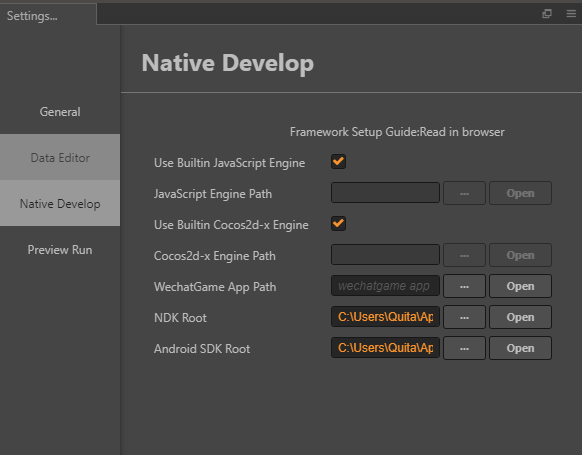
Step5 - Add the NDK and SDK path in Cocos Creator
Similar to what was done in the previous step, open your project and
click on File->Settings->NativeDevelop. Here add the NDK and SDK location similar to what is there in the Project Structure of Android Studio.
Step6 - Generate the build files using Cocos Creator
Open your project then on the top panel click on Project → Build.
OR just use (Ctrl+Shift+B) shortcut to open the Build Panel.
Do a further study on the options in the build panel to get the result your want.
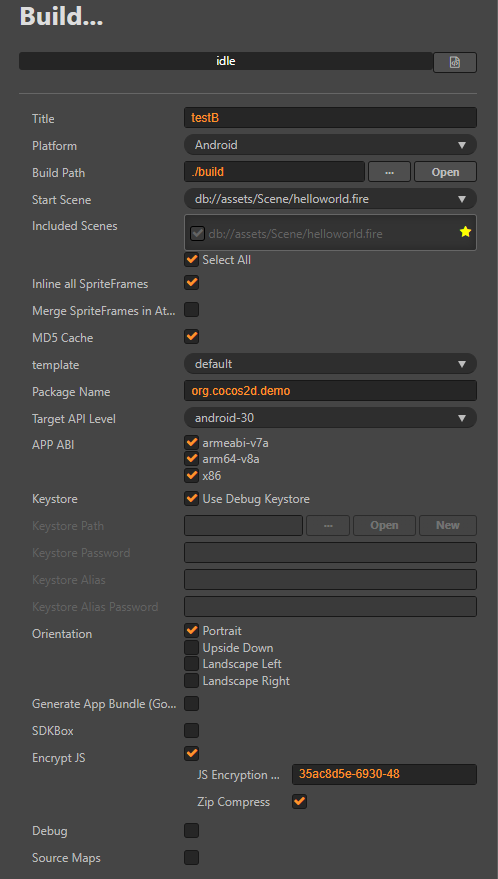
NOTE: In the above image in the APP ABI option, I have checked all three. This will increase your build times, so just check the armeabi-v7a for now.
Once you ready, you just need to click on build and wait for build files to be generated. The build files will be generated in the build folder of your project directory.
Step7 - Import Project to Android Studio
Once the build is successful, open Android Studio and Click on Import Project and select the proj.android-studio folder of your project located in {Your Project Location}\build\jsb-default\frameworks\runtime-src\proj.android-studio
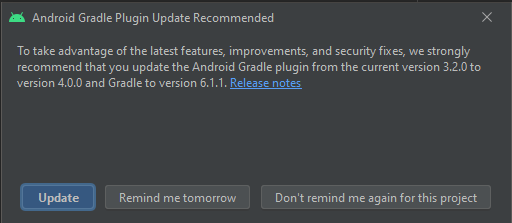
Please Note:- As of this writing Android Studio comes with Gradle Plugin(3.2.0) and Gradle(4.10.3). But Android Studio throws a popup saying that it is recommended to update Gradle and Gradle Plugin like shown below. But the problem is that I ended up encountering a lot of Issues after the update. So ignore the update and close it
Step8 - Rebuild Project in Android Studio
Click on Build in the toolbar of Android Studio and select Rebuild Project.
Wait for a while for this to complete.
Once done you can connect to your Android Device and click on run to test the build.
Or you may add a Virtual Device (Tools → AVD Manager → Create Virtual Device) and click on run to test the build.
 .
.
Step9 - To Test Using an APK
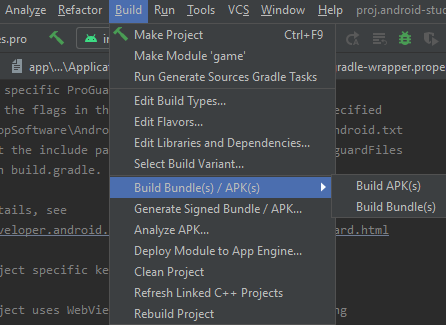
The APK will be generated in proj.android-studio\game\build\outputs\apk\feature\debug.
Or you can just click on locate on the popup which notifies once APK is generated.
Hope this tutorial saved your time. Thank you.
Versions Used:-
Cocos Creator - 2.3.3
Android Studio - 193.6514223
JDK - 14.0.1
Gradle - 4.10.3
Gradle Plugin - 3.2.0
Note to Forum Members to kindly correct any mistakes found in this tutorial.