
Demo open source丨Cocos Creator quickly realizes 2D dynamic lighting
There is a cool effect in my mind, but I don’t know how to achieve it? I can’t find the Cocos Creator tutorial I need on the vast Internet?
In fact, many enthusiastic developers and the official technical team of the Cocos engine have been continuously outputting their exploration results of Cocos Creator in forums, GitHub, public accounts, and other places. Coco’s evangelist, what a coincidence, “c” & Zhe Feng collected some high-quality open-source Demo projects, and will share some common effect technology implementation solutions for Cocos Creator 3.x games with you one after another.
Let’s start with 2D dynamic lighting today, and let’s talk about “shadows” in the next chapter.
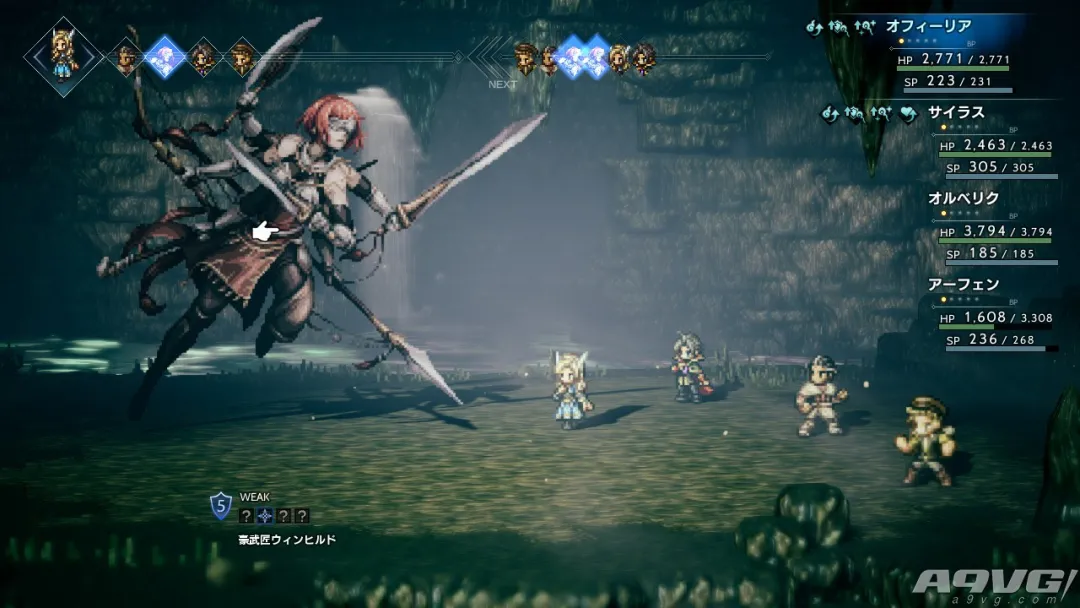
In the game, good lighting is an excellent way to set off the atmosphere. Most of the previous 2D games did not have any dynamic lighting, but with the advancement of graphics and hardware, now more and more 2D games are beginning to use dynamic lighting to enrich the performance of the game, such as the famous “Eight Way Traveler”, “Tara Ria” and so on.
It just so happened that the technical support team of Cocos Creator recently released a 2D dynamic lighting demo based on Cocos Creator 3.3.2. Today we will take a look at how to add dynamic lighting to our 2D games based on this demo.
Note: see the end of the article for the demo and resource posts of 2D dynamic lighting, please pull down ↓
Normal map
First, look at the demo preview effect. It can be seen that when we move the position of the light source in the Demo, the villain and the scene will also show different lighting scenarios (the case material comes from CODEWEB)
So what is the difference between it and ordinary Sprite?
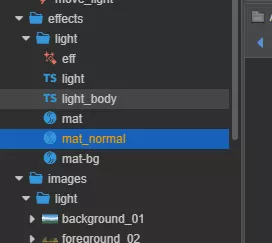
By comparison, it is not difficult to see that their differences are mainly concentrated on the material. The villain uses a custom mat_normal material.
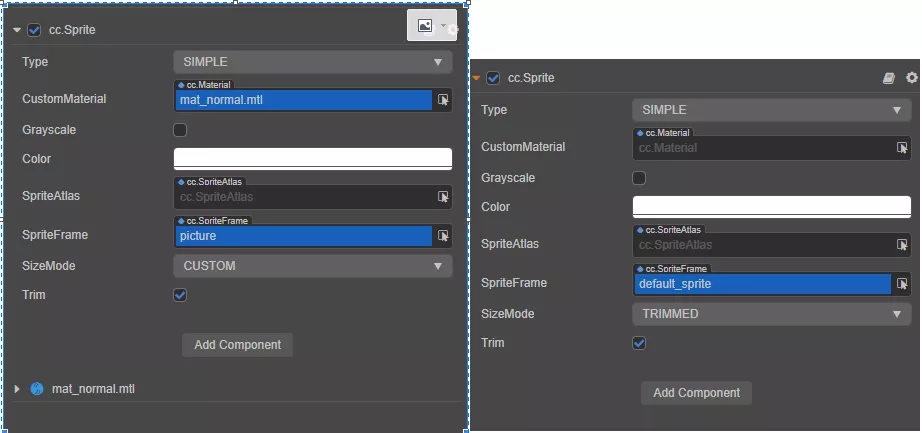
Note: in Cocos Creator, we can define the style of object rendering through different materials.
For sprites with lighting, he added an additional option called USE_2D_NORMAL and USE_2D_LIGHT, and an additional normal map called normal.
Just adding such a small normal can achieve the lighting effect, which is the magic of graphics.
So how to make a normal map?
-
If your project is 3D to 2D, the production of normal maps is not too difficult, as long as the art boss of the project team exports the corresponding normal maps at the same time as the pictures;
-
But if your project is hand-painted, it will be more troublesome if you want the lighting effect, after all, you need to hand-paint the normal map;
-
Of course, there are also algorithms that can generate normals from pictures [2], but the effect is not as good as a manual adjustment after all. If you want good results, you still need to manually adjust the normal.
Once you have prepared your normal map, you can enable 2D lighting.
Add dynamic lighting
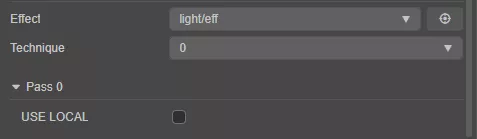
The first step is to create a new material for the Sprite.
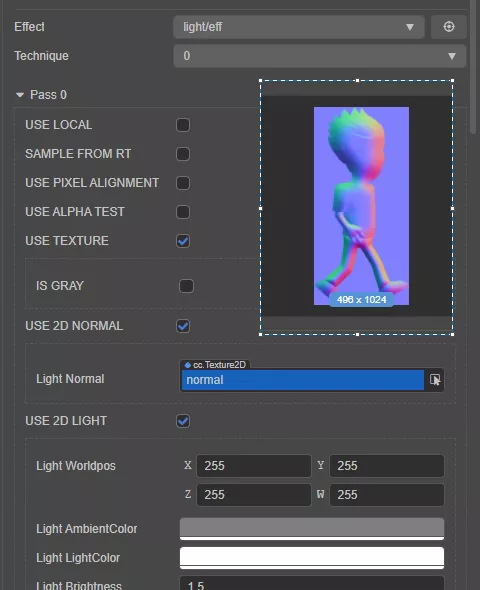
The second step is to select light/eff as the effect of the material in the material.
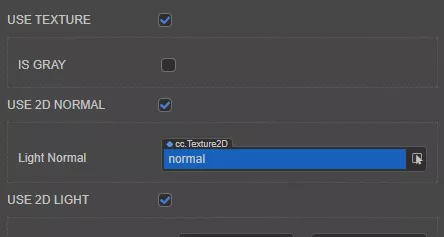
In the third step, check USE_2D_NORMAL and USE_2D_LIGHT and assign the prepared normal map to the Light Normal attribute.
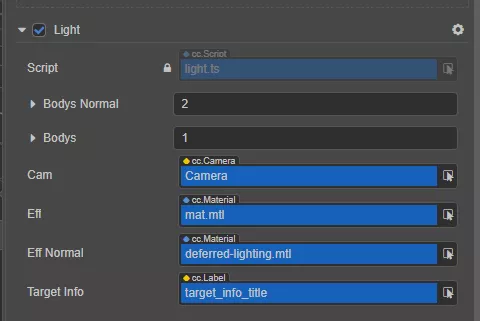
Finally, we need to create a light source. 3D light source is not acceptable. What we need to create is a light source component light/Light.ts that comes with the Demo.
So far we have successfully added dynamic lighting. Next, let’s briefly understand the realization principle of lighting, which can help us better understand the realization of lighting effects.
Realization principle
In the physical world, the color of the object we see is actually the color of the light reflected by the object itself. Because the material of the object is different, it will absorb some different color components and cause the color of the object we see to be different.
The process of simulating light is actually simulating the entire process of light propagation.
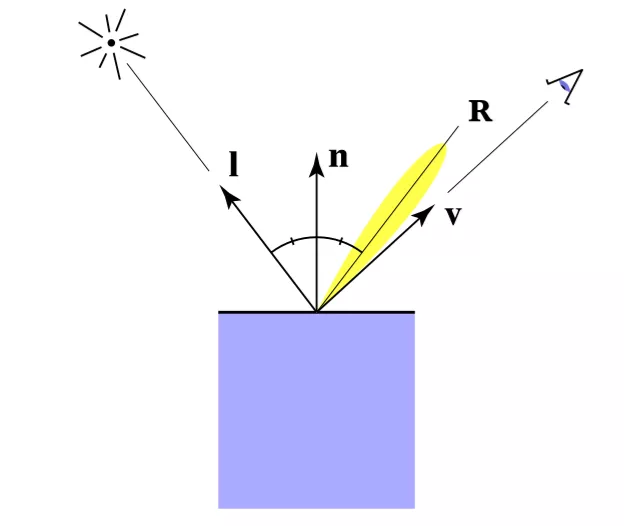
I is the incident light
R is reflected light
n is the normal
v is the vector from a certain position on the surface of the object to the viewpoint, which is the camera
Generally speaking, we can simply divide the light into the following three categories:
-
Diffuse. Diffuse reflection describes the reflection of light on rough and matte surfaces. A common model is the Lamber model, which describes the physical phenomenon of reflection of incident light after it hits the surface of a rough object. The direction of the reflected light is determined by the angle between the incident light and the normal. The larger the angle, the greater the energy loss and the darker the objects seen. At the same time, the farther away from the light source, the greater the energy loss.
-
Specular reflection. Specular reflection describes the reflection of light on a smooth surface.
-
Ambient light (Ambient). Ambient light represents the light that diffuses the entire space after the light spreads in the scene in a complex manner.
The final light color calculation satisfies the following formula:
![]()
I is the final light color
Id is diffuse light
Is is specular reflection light
Ia is ambient light
In the lighting model of graphics, almost most of the lighting algorithms are derived from the expansion of the above formula.
Shader analysis
Let’s go back to the Demo to see how the lighting is implemented.
For diffuse reflection, we need to define the position of the light source, so pass the position of the light source to the shader in the light/Light.ts script:
spr.getMaterial(0).setProperty('light_worldpos', lightPos);
Among them, lightPos is the calculation of the world coordinate position of the light source node light.
In the shader, the energy attenuation of the light is calculated by calculating the distance between the position and the light source.
Then use the angle between the vector from the light source to the position point and the normal to calculate the intensity of the reflected light.
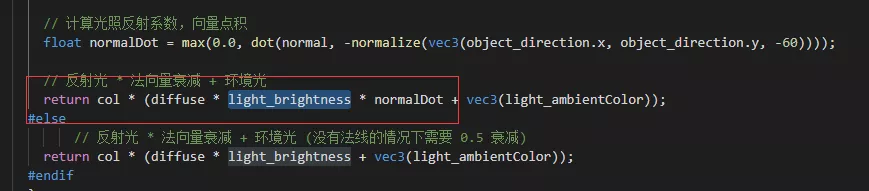
// Calculate the light reflection coefficient, vector dot product
float normalDot = max(0.0, dot(normal, -normalize(vec3(object_direction.x, object_direction.y, -60))));

// Reflected light * Normal attenuation + ambient light
return col * (diffuse * light_brightness * normalDot + vec3(light_ambientColor));
Usually, the ambient light will not change much, so a constant is used instead, and the code uses light_ambientColor to describe it.

Finally, multiply the color col of the object itself and the color of the light to get the color of the fragment.
In the Demo, we can see the process of calculating the brightness change of the illumination by calculating the angle between the incident light and the normal of the object.
The normal here comes from the value sampled from the normal map, which is why we need to provide a normal map when implementing 2D lighting. After all, for ordinary Sprite, it does not contain any normal information.
// Get the normal vector
 vec3 normal = texture(light_normal, uv0).rgb;
  normal = normal * 2.0-1.0;