
Many friends associate post-effects with AAA 3D games, but in reality, their application is also extensive in 2D game development.
Properly utilizing post-effects can significantly enhance the visual quality of a 2D game by several levels.
Today, we have invitedwing, an experienced Cocos game developer in our Cocos community to share some technical key points related to 2D post-effect frameworks.
What are Post-processing Effects?
Post-processing effects, are used for further processing of rendered results to achieve various advanced and special effects.
In simple terms, it involves applying after-effects to game visuals and is an essential feature in game development, often utilized to enhance the visual quality and presentation of games.
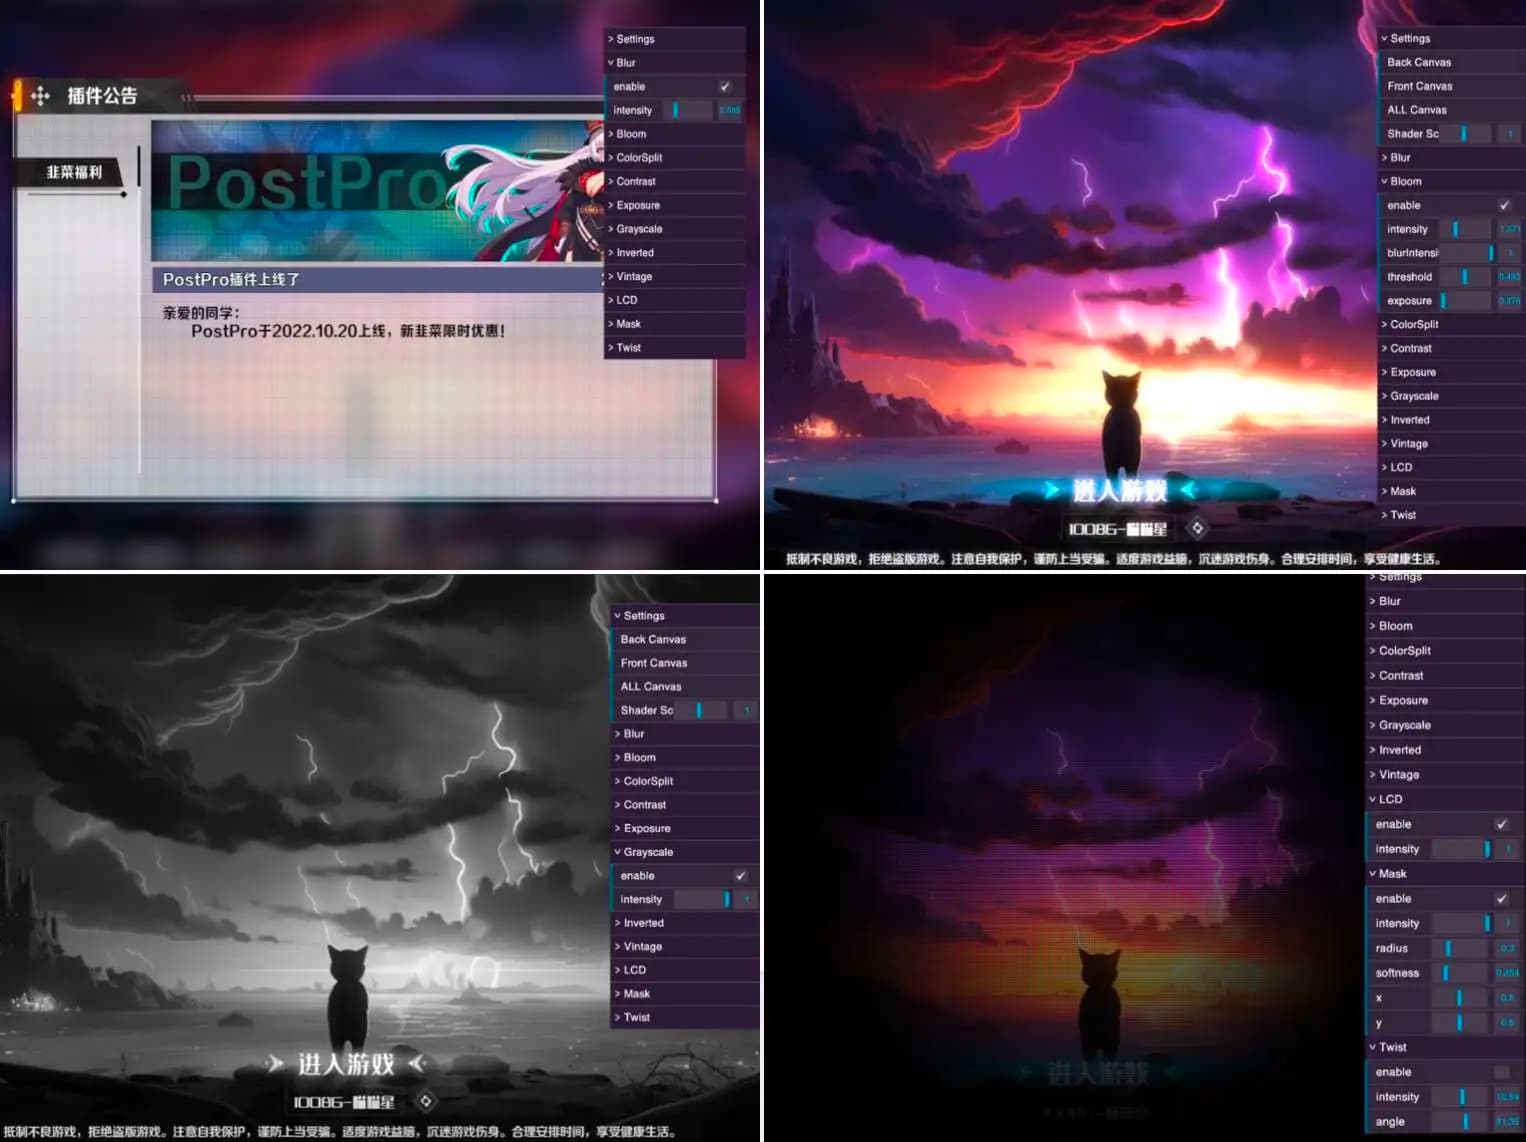
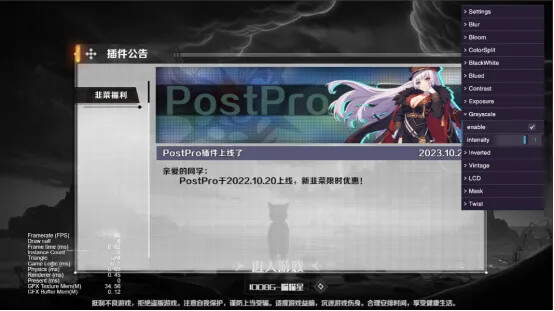
Here are some commonly used post-effects:
-
Blur Effect: Used to achieve effects like depth of field and motion blur. -
Glow Effect: Enhances the luminance of game elements, boosting the visual impact of the game. -
Color Grading Effect: Adjusts the color style of the game, expressing different emotions and atmospheres. -
Distortion Effect: Creates unique deformation effects, adding artistic and creative elements to the game. -
Color Correction Effect: Adjusts the overall color tone and contrast of the game, making the visuals more vibrant and lively.
Analysis of 2D Post-Processing Solutions
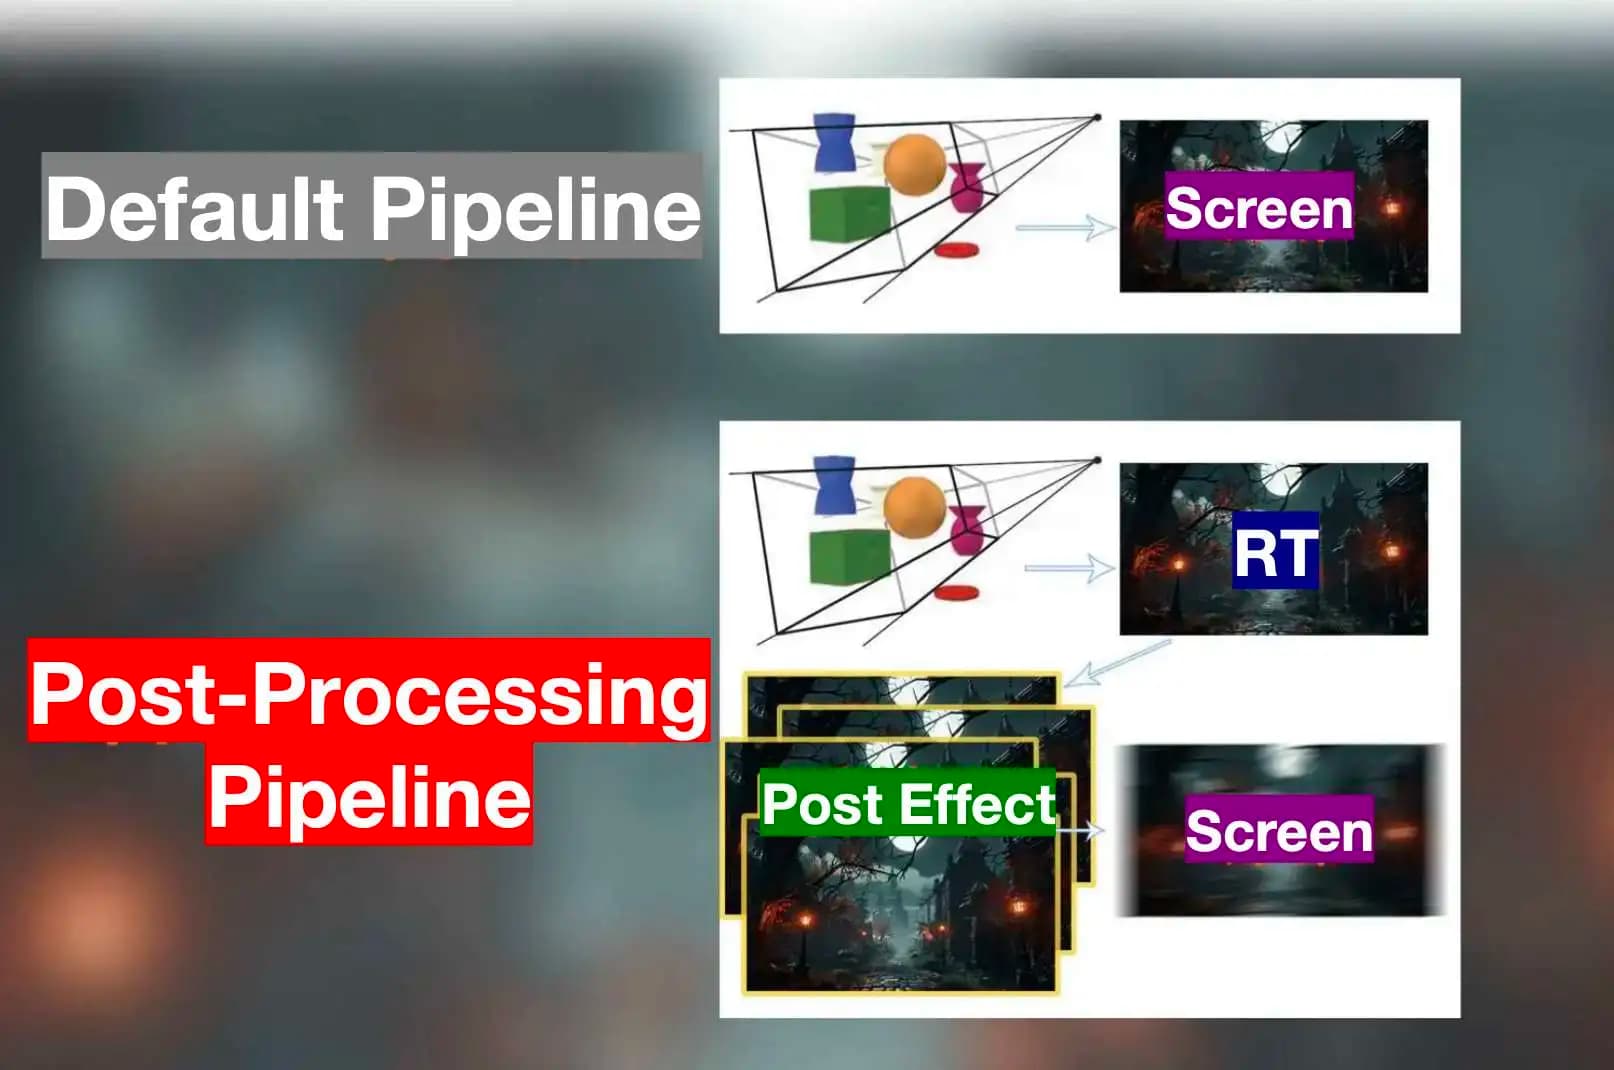
Cocos Creator currently lacks built-in support for post-processing in the 2D render phase, requiring developers to explore various approaches to achieve the rendering goals.
The most commonly used method involves rendering the camera to a RenderTexture (RT) and then displaying it on a Sprite.
While this is a classic and practical solution, it can impact the development process and may not appear as elegant.
Taking inspiration from community experts @gamemcu and @iwae for the ultimate solution, we can use code to directly display the post-processed RT rendered by the camera onto the final window. Since we create a rectangle rendered at the top layer through code, users(who use this solution) won’t notice it, making it both elegant and convenient.
The rendering process is illustrated as follows:
Here is the key code snippet:
    let device = director.root.device;
    let renderPipeline = director.root.pipeline;
    let pso = PipelineStateManager.getOrCreatePipelineState(device, pass, pass.getShaderVariant(), __renderPass, __quad);

    let cmd = renderPipeline.commandBuffers[0];
    cmd.beginRenderPass(__renderPass, destination.window.framebuffer, renderArea, __clearColors, 0, 0);
    cmd.bindDescriptorSet(pipeline.SetIndex.GLOBAL, renderPipeline.descriptorSet);
    cmd.bindDescriptorSet(pipeline.SetIndex.MATERIAL, pass.descriptorSet);
    cmd.bindPipelineState(pso);
    cmd.bindInputAssembler(__quad);
    cmd.draw(__quad);
    cmd.endRenderPass();
Alright! Now after understanding the principles, do you feel it is quite simple? With the core technology in place, the remaining task is how to organize it, making it more user-friendly. Hence, we have the following set of generic interfaces PP_Graphics:
/**
 * Generic post-processing interface, processes an input texture to a target texture using a material pass
 */
blitP(source: RenderTexture,
      destination: IRenderTexture,
      pass: renderer.Pass,
      renderArea: gfx.Rect = null)

/**
 * copy texture
 */
blit(source: RenderTexture,
     destination: IRenderTexture,
     renderArea: gfx.Rect = null )

/**
 * clear rt using singole color
 */
clear(destination: IRenderTexture,
      color: IVec4Like,
      renderArea: gfx.Rect = null)

/**
 * flip texture
 */
flip(source: RenderTexture,
     destination: IRenderTexture,
     flipX: boolean,
     flipY: boolean,
     renderArea: gfx.Rect = null)
The entire post-processing rendering framework is based on the above interfaces. Let’s continue refining the process for ease of direct use or extend more additional rendering effects:
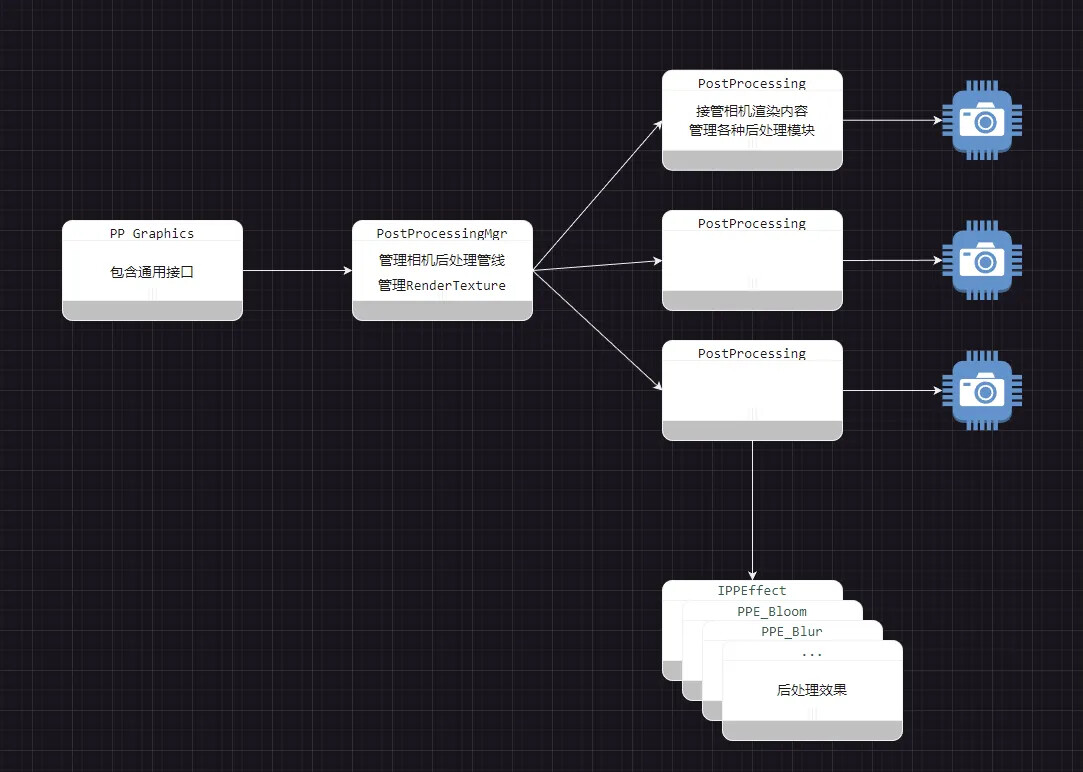
Where:
-
PP_Graphicsapplies various foundational interfaces mentioned above. -
PostProcessingMgrmanages PostProcessing and the RenderTexture used for post-processing. -
PostProcessingis attached to the camera, takes over the camera’s rendering result, applies various effects using RT, and ultimately outputs to the screen. -
IPPEffectrepresents the final effect processing module, allowing combinations according to specific needs.
How To Use
Based on the above process, the framework includes more than 10 basic effects, and it’s relatively simple to use. Here’s an example of adding a blur effect to a window background:
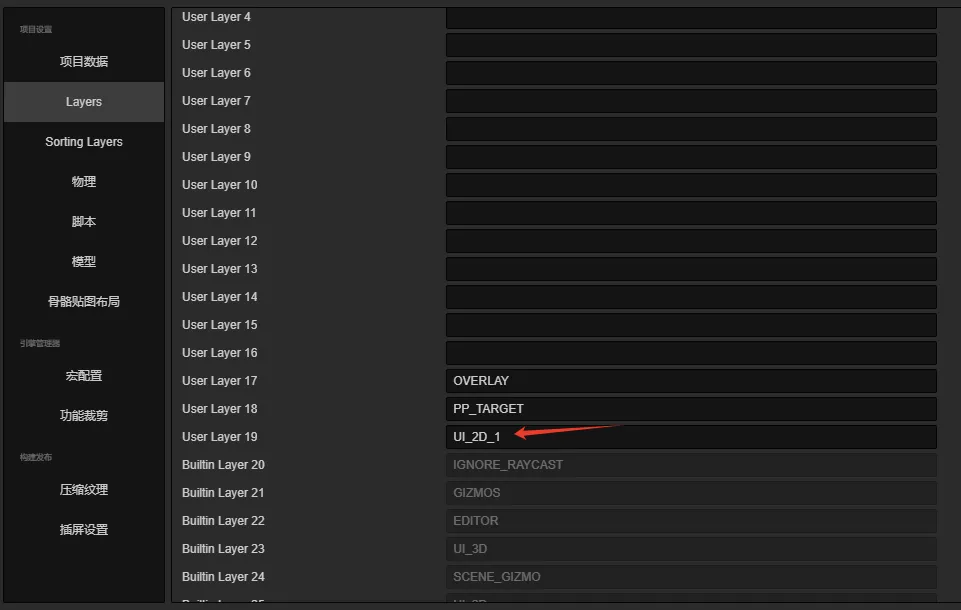
1. Add Layer
Start by adding a UI layer to separate objects rendered by different cameras. Here, I added a layer named UI_2D_1:
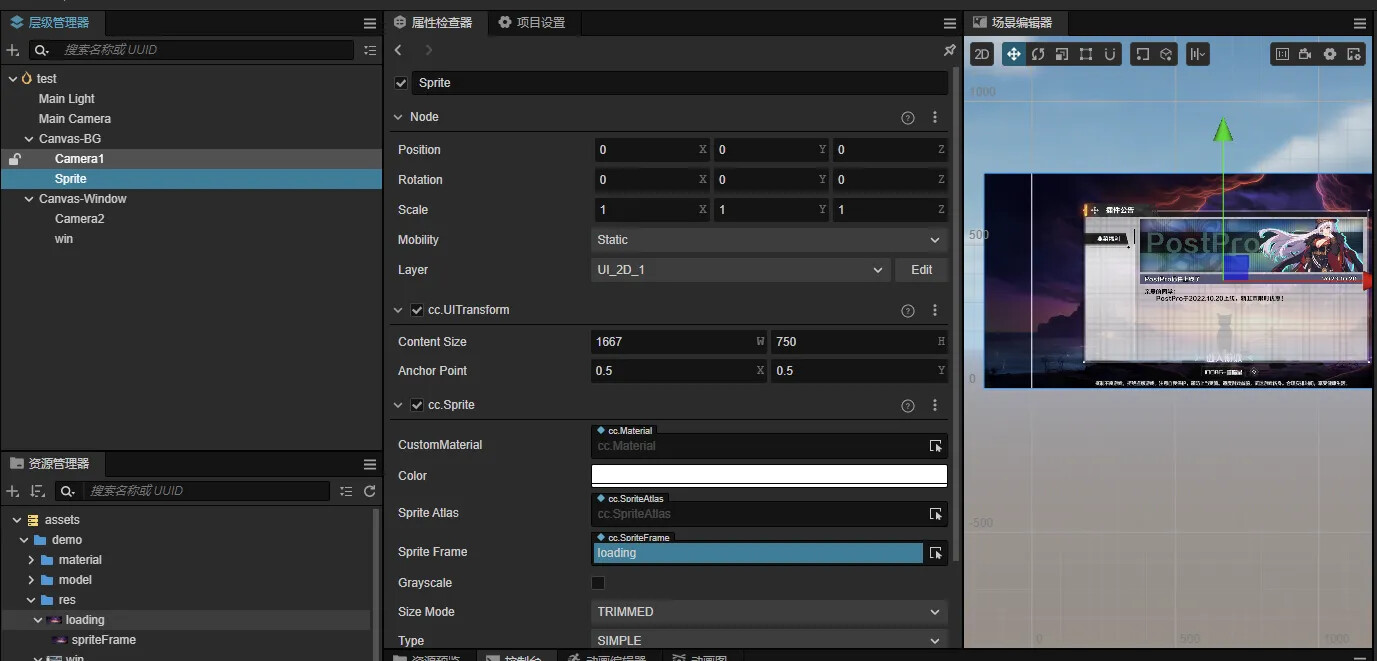
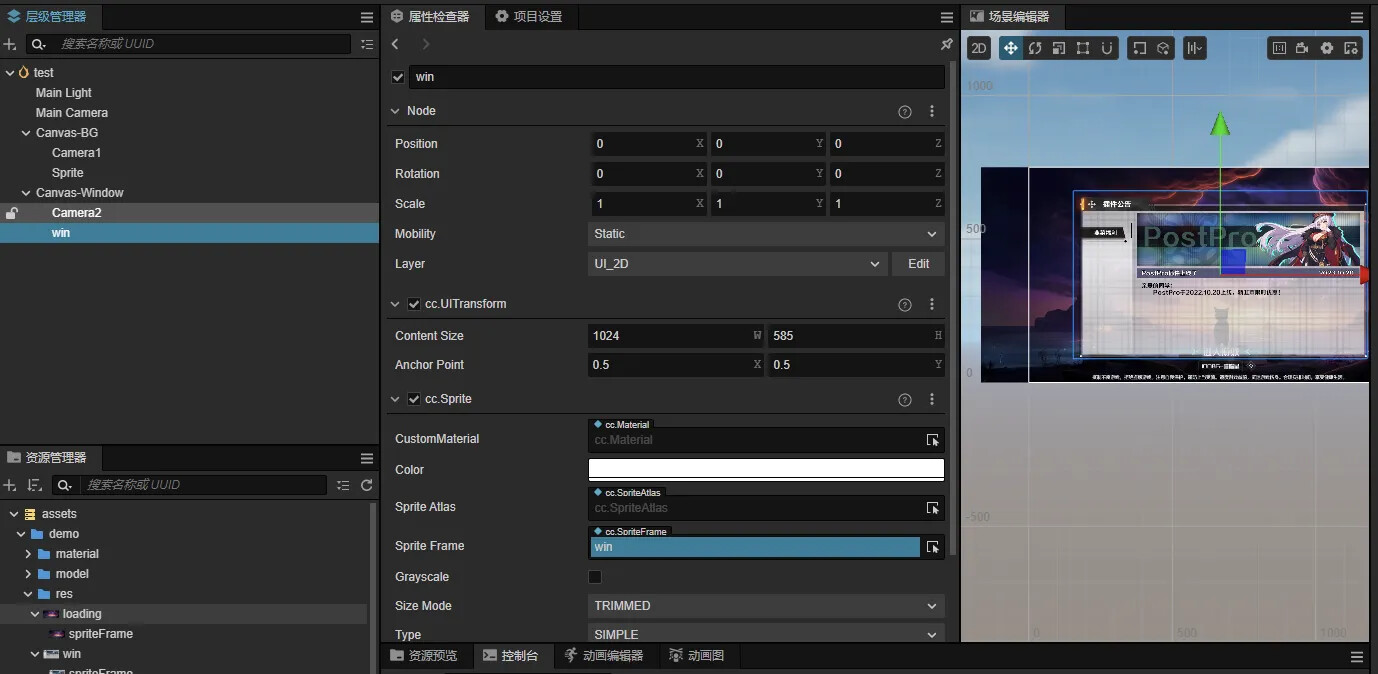
2. Create Two Canvases
Create two canvases and place them in different layers:
Place the background in the UI_2D_1 layer for blurring:
Place the popup in the UI_2D layer:
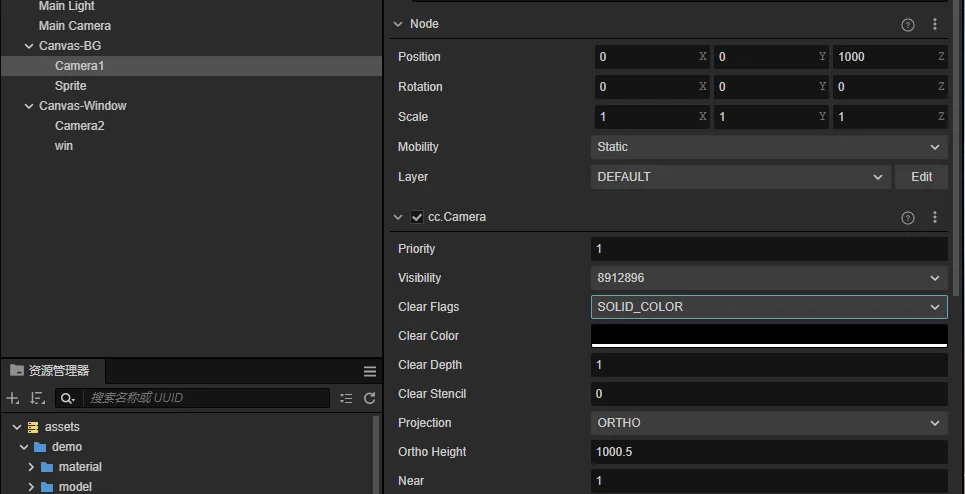
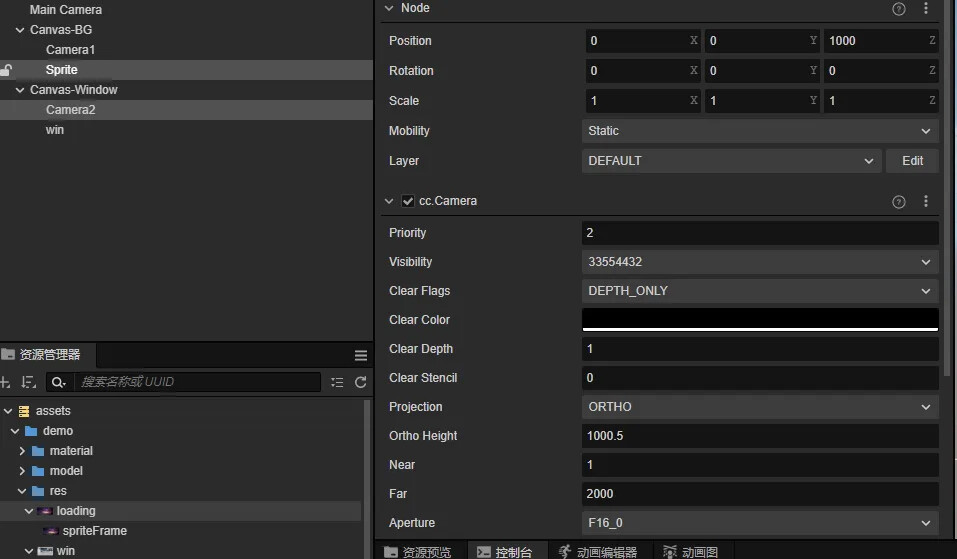
3. Adjust Camera Visibility
Cameras under the canvas only need to render the layers within their respective canvases.
Note: Typically, at the start of a process (2D or 3D), the clear mode should be set to
DEPTH_ONLY. However, if there’s no rendering by any cameras initially, you’ll needSOLID_COLOR. Setcamera 1to be visible as SolidColor andcamera 2as DepthOnly:
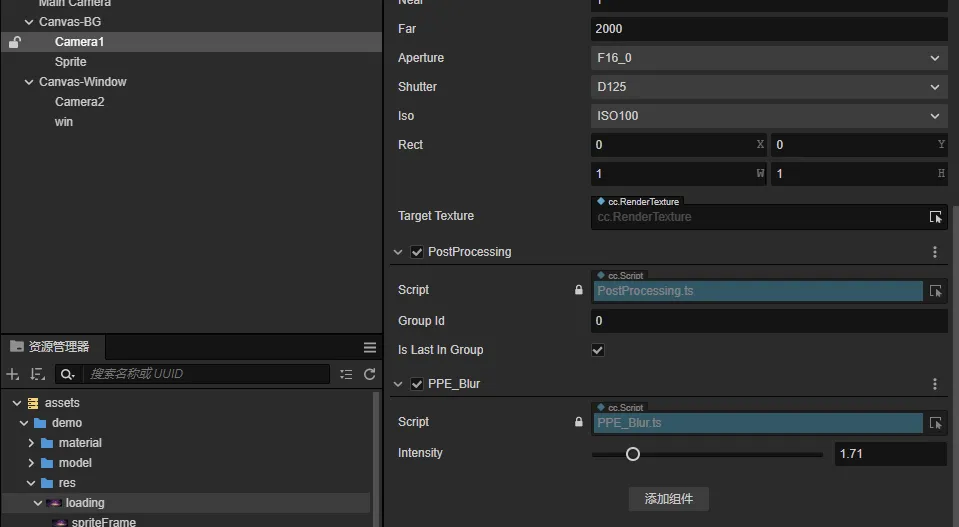
4. Apply Post-Processing to the Camera
For the blur effect on the background, apply post-processing to camera 1 by adding components.
Add PostProcessing to enable post-processing, and PPE_Blur for blurring:
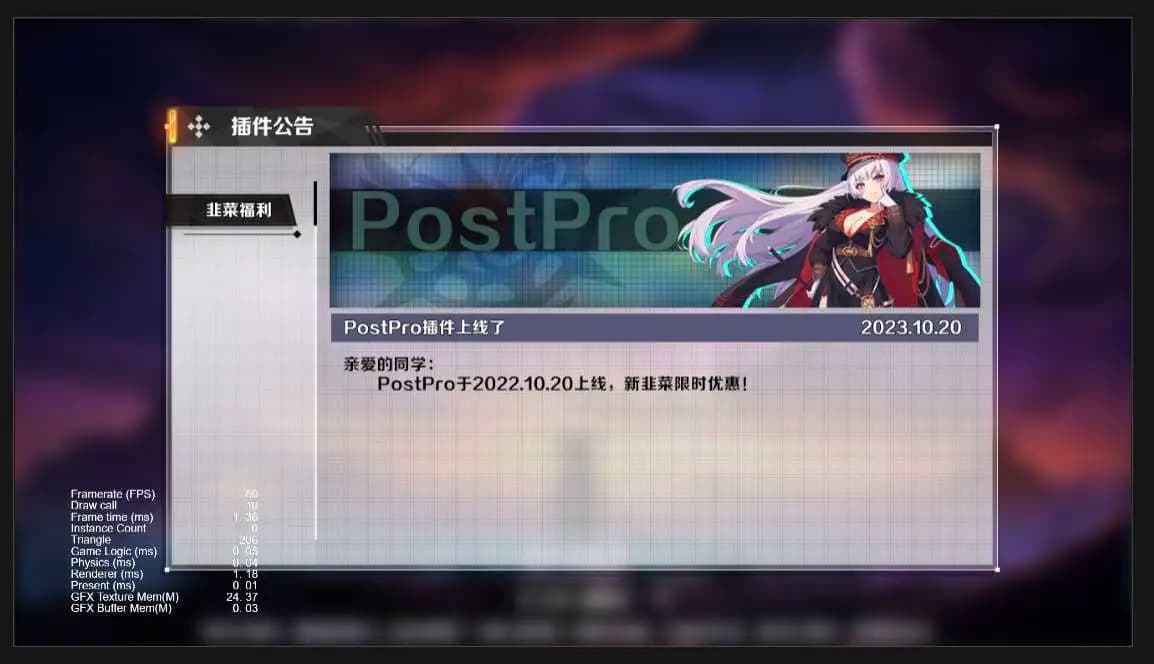
Preview the scene, and you’ll see the blur effect applied:
Customize Post-Processing Effects
Extending post-processing is also straightforward. You just need the following resources and code:
- A post-processing shader
- A material with the shader bound to it
- A post-processing extension TypeScript file for passing parameters to the material
Let’s use an example of creating a screen grayscale effect:
1. Add a Post-Processing Shader
precision highp float;
  #include <pp-shared-ubos>

  in vec2 v_uv;
  uniform sampler2D mainTexture;
  #pragma define intensity matParams.x

 const vec3 weight = vec3(0.2126, 0.7152, 0.0722);
  vec3 Grayscale(in vec3 o, float value){
    float lumin = dot(o, weight);
    vec3 final = mix(o, vec3(lumin), value);
    return final;
  }

vec4 frag() {
    vec4 pixel = texture(mainTexture, v_uv);
    pixel.rgb = Grayscale(pixel.rgb, intensity);
    return pixel;
  }
2. Add and Write Script
Write the corresponding post-processing script to control material parameters, perform multiple graphic processing, and expose relevant properties.
In the framework, the post-processing component only needs to inherit from the PPE_Base class.
Below is the implementation of a post-processing component that turns the image grayscale. Find the relevant material and set its properties in the apply function:
**
 * grayscale
 */
@ccclass('PPE_Grayscale')
export class PPE_Grayscale extends PPE_Base {
    @property({ range: [0, 1], slide: true, step: 0.01, override: true })
    intensity: number = 1;

    get materialPath() {
        return "materials/pp-grayscale";
    }

    public apply(source: RenderTexture, destination: IRenderTexture): void {
        let pass = this.material.passes[0];
        PP_Graphics.setUniform(pass, "intensity", this.intensity);
        PP_Graphics.blitP(source, destination, pass);
    }
}
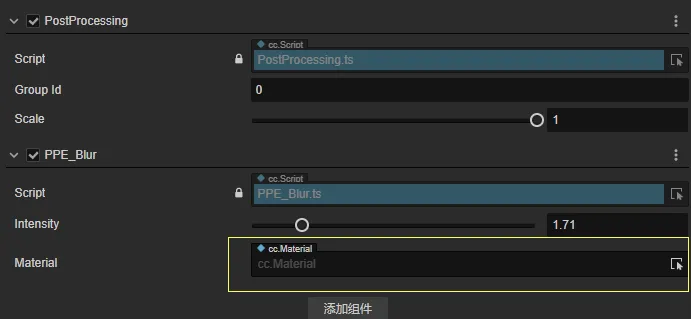
3. Create Material
Create materials using the corresponding shaders and place them in a unified material folder for easy loading by the post-processing framework.
You can also drag the material into the module’s material slot in the editor.
4. Adjust Parameters and Preview
After adjusting the parameters in the component, start to preview, and you can get what you want.
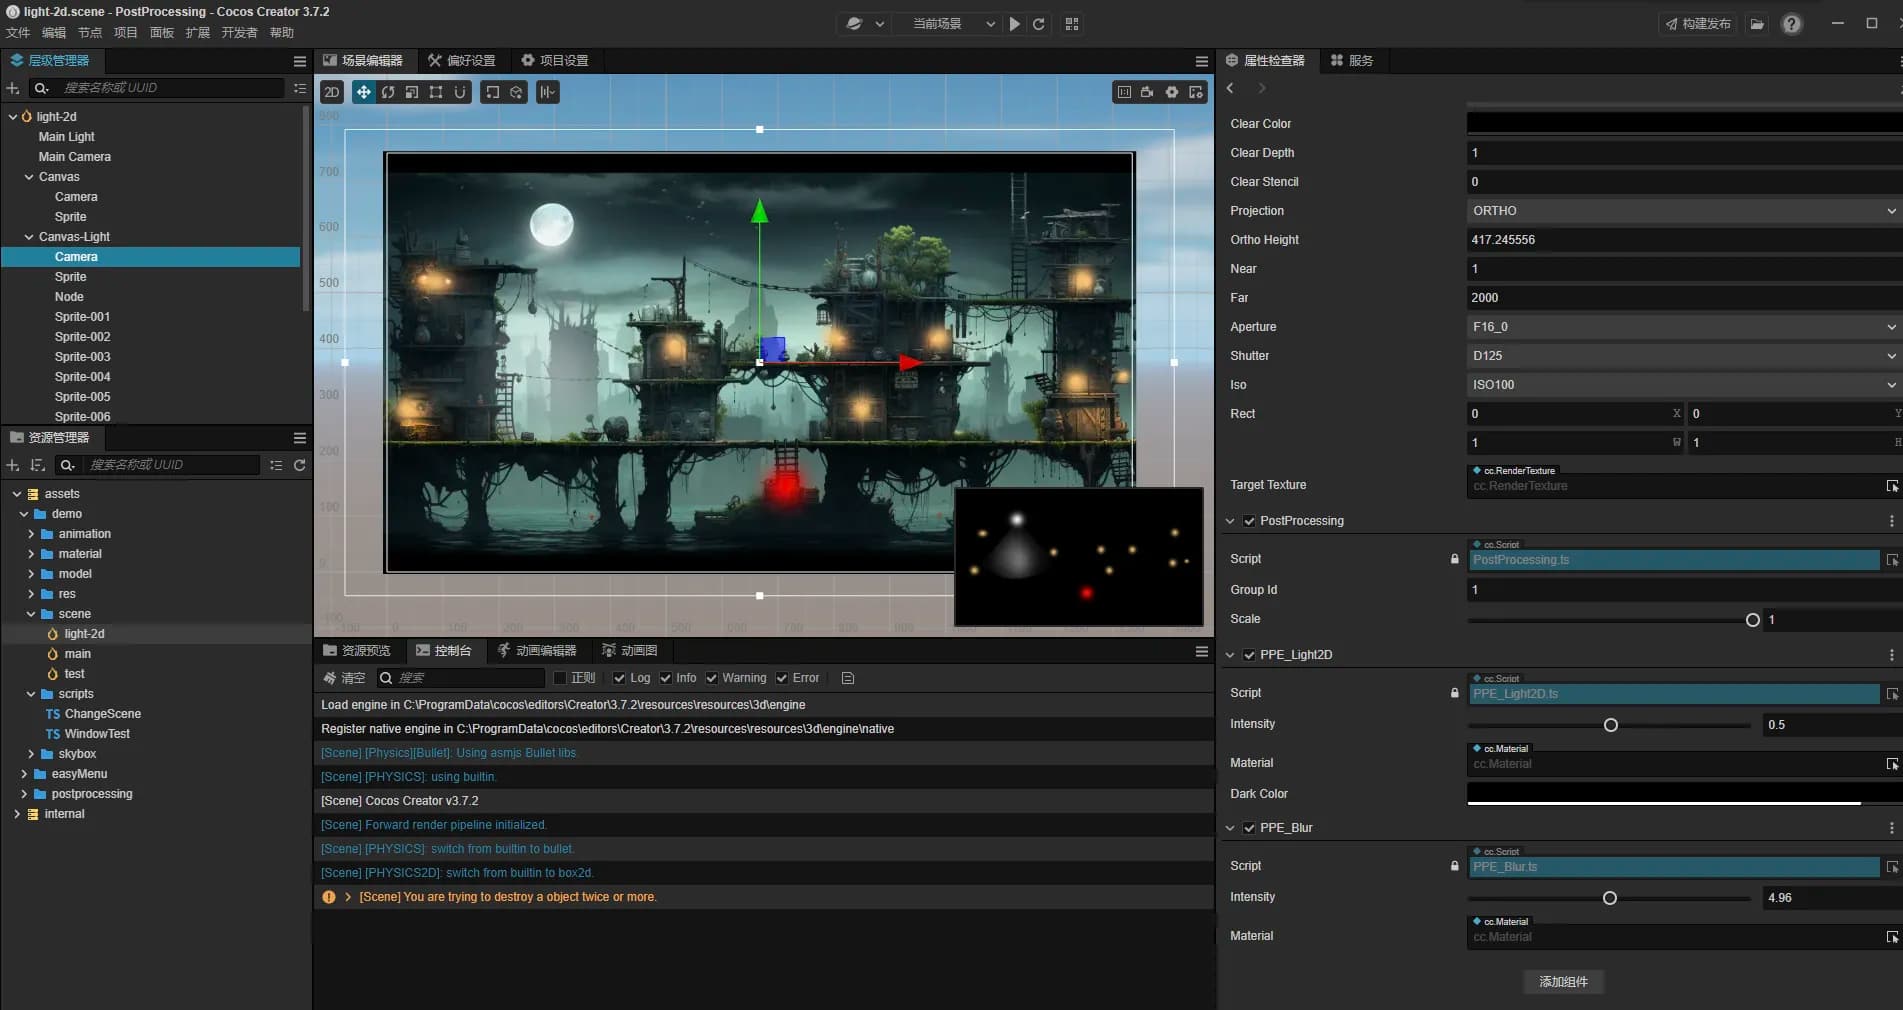
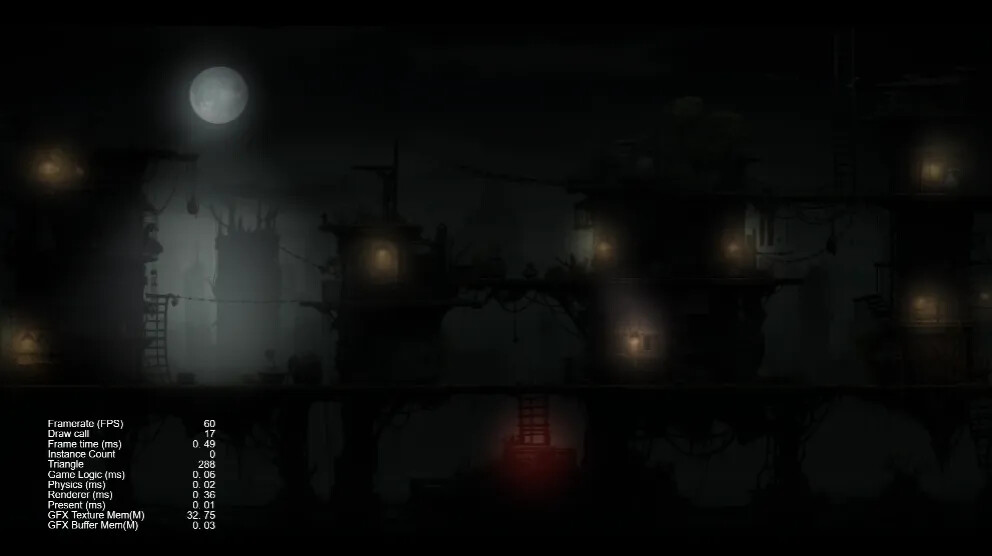
Surprise - 2D Lighting Effects
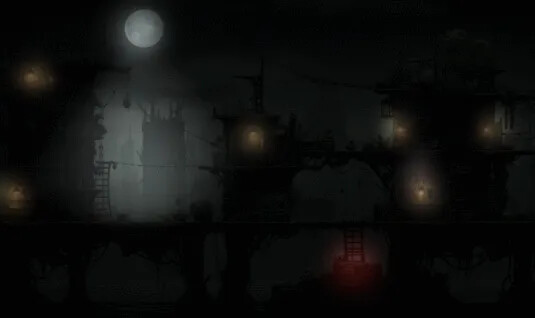
I believe that not long ago, some people had already seen this animated image.
This is a 2D lighting effect created with Cocos Creator.
Although it’s not a formal lighting system, it’s more than enough for many projects. After all, light is just a localized brightening of the image.
Many people on the forum have long needed to add 2D lighting, and the solutions provided by everyone are adding lighting points in post-processing.
The technology is not complicated, but the number of points is more or less limited, and debugging is also troublesome.
One day, after I created the 2D post-processing framework, I suddenly thought of this issue.
Since the mask has been implemented, why not create a proper lighting effect? The only limitation is the quantity, as it currently supports only one light.
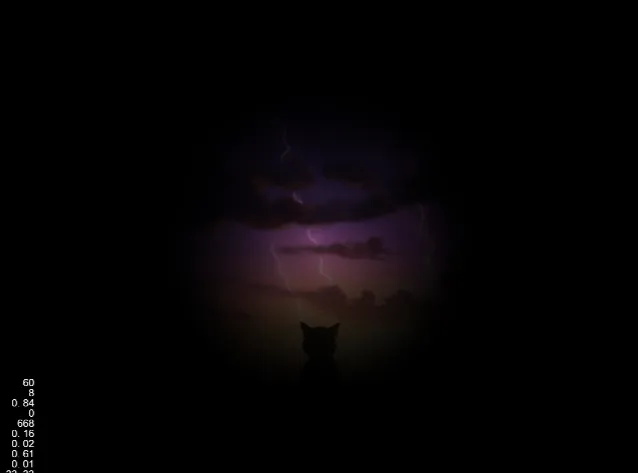
If I use an image as the mask for masking, would the number of lights be unlimited? This is essentially the logic behind deferred rendering!
Based on this idea, I conducted a series of tests that evening. This technical solution is even simpler, and it succeeded in verification in no time (of course, there were color overlay pitfalls that required some debugging).
Now the process has become:
Now we have a 2D lighting system for Cocos Creator. I tested it with an image.
Hey, the effect is pretty good. Not only does it support an unlimited number of lights, but particles can also serve as light sources.
It even supports various irregular lighting effects:
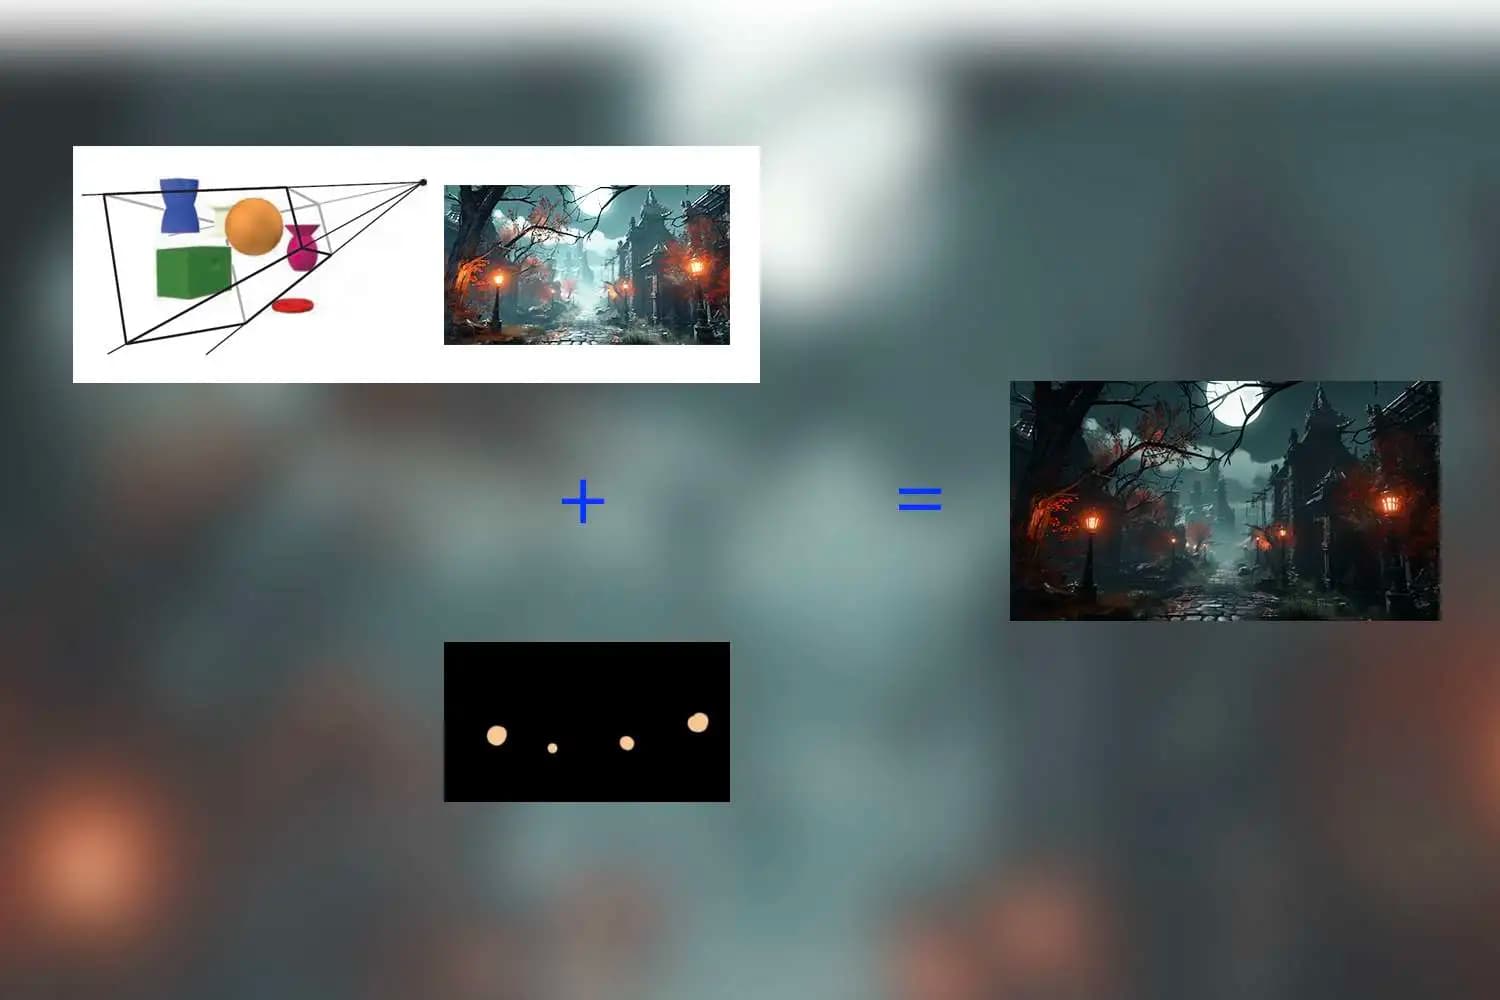
-
Render the background with a camera
-
Another camera exclusively renders lighting and is attached with a post-processor, adding a 2D lighting post-processing module.
-
Preview to see the effects.
Conclusion

Hello everyone, I’m Wing, based in Chengdu, a senior game developer with over 15 years of experience. I’ve traversed various game engines, and currently, my primary choice is Cocos.
In my usual work, I focus on solving technical challenges for my company’s projects. In my free time, I explore and accumulate various technical solutions to make my company’s Cocos framework more versatile.
This project initially started as a casual endeavor, just to address a small issue in my project. @iwae suggested turning it into a universal solution, believing it would provide a better understanding of the engine’s rendering process. So, I gave it a try.
Surprisingly, I found post-processing to be such an enjoyable endeavor. It allows me to shape the visuals according to desired effects, merely by controlling various parameters.
The final surprise was the 2D lighting effect, providing me with a skill upgrade. And I’m also very happy that I can make a small contribution to the community, offer a shortcut for developers and projects needing this feature to convey game atmospheres.
Thank you all for reading, and I hope it brings some help to developers in need!