
Introduction
Decal Effects in Cocos Game Development
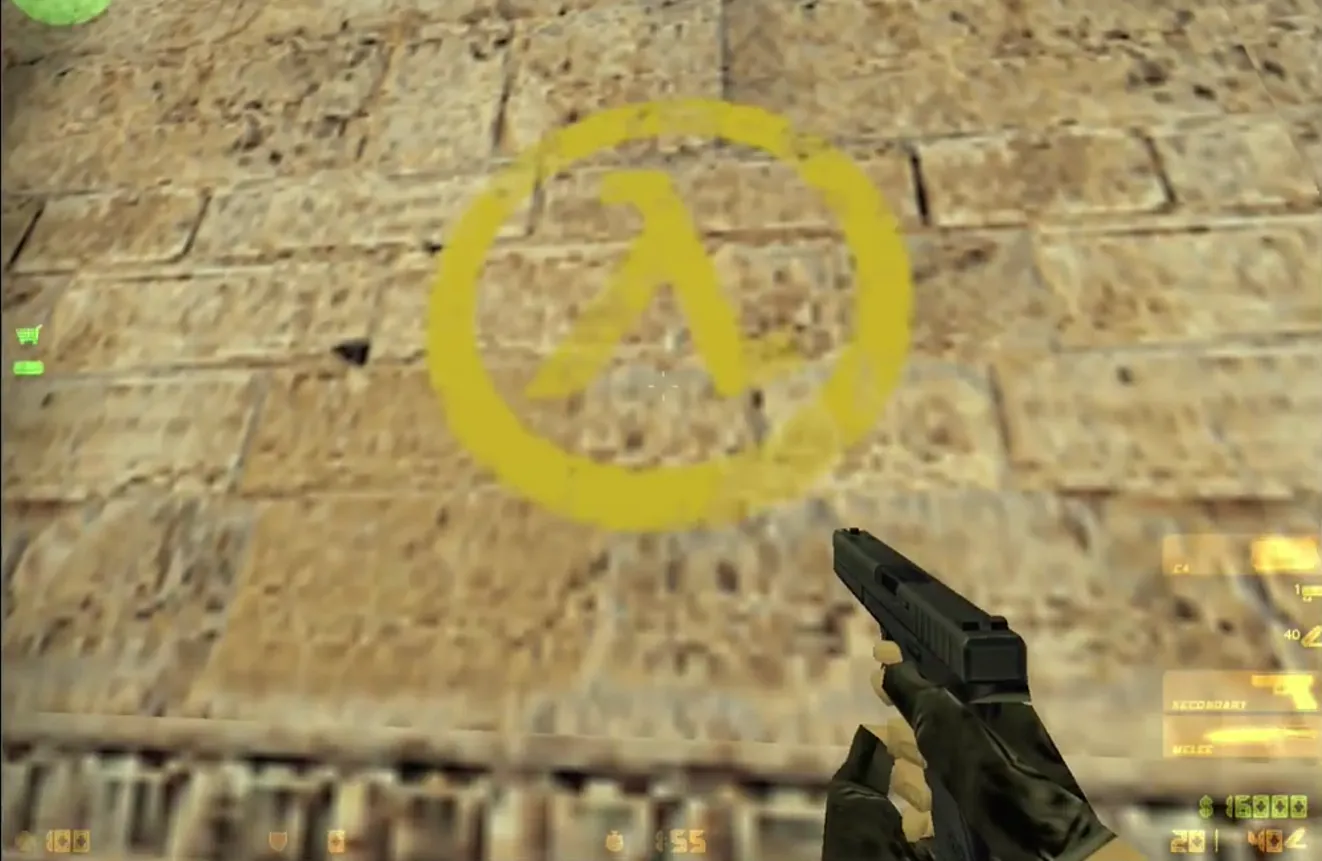
Have you ever played the game CS? I can vividly recall playing with friends in an internet cafe, furiously pressing B41 and B51 to spray at each other.
In this classic FPS game, there’s a particularly interesting system, which is the spray paint (decal) system. It’s a feature that allows players to spray graffiti on walls, floors, and various surfaces.
Getting back on track, how do we implement such an interesting and fun feature in our game development?
Today, I’ll introduce how to implement decal effects in Cocos game development. Thank you for your continuous support, reading, and sharing.
1. What Are the Methods to Implement Decals?
Decal Effects are commonly used in game development for graffiti, bullet holes, tattoos, etc.
However, unlike 2D games, in 3D game development, implementing 3D decals requires considering the depth and perspective effects of objects.
This means that when implementing decals, we need to take into account factors such as vertex positions and normal directions.
Below are a few methods I have thought of for implementing decal effects in 3D games:
Using Quads: We can make the image into a quad and place it at the specified coordinates in the game scene, adjusting the rotation accordingly. The downside is that it only supports flat surfaces like walls and floors.
Dynamic Mesh Creation: We can use rays and cuboids to cut and trim the model’s
Meshto obtain the requiredMeshinformation, then map our decal texture onto it, and create it usingutils.MeshUtils.createMesh.Using Shaders: We can use depth maps to reconstruct world coordinates, achieving screen-space decal effects.
This article focuses on introducing screen-space decal effects.
2. Screen-Space Decals
Screen-space decal effects are quite ingenious but require some time to understand.
The principle is to use a cuboid object to intersect with models in the scene, then map the decal texture onto the surfaces of the scene models.
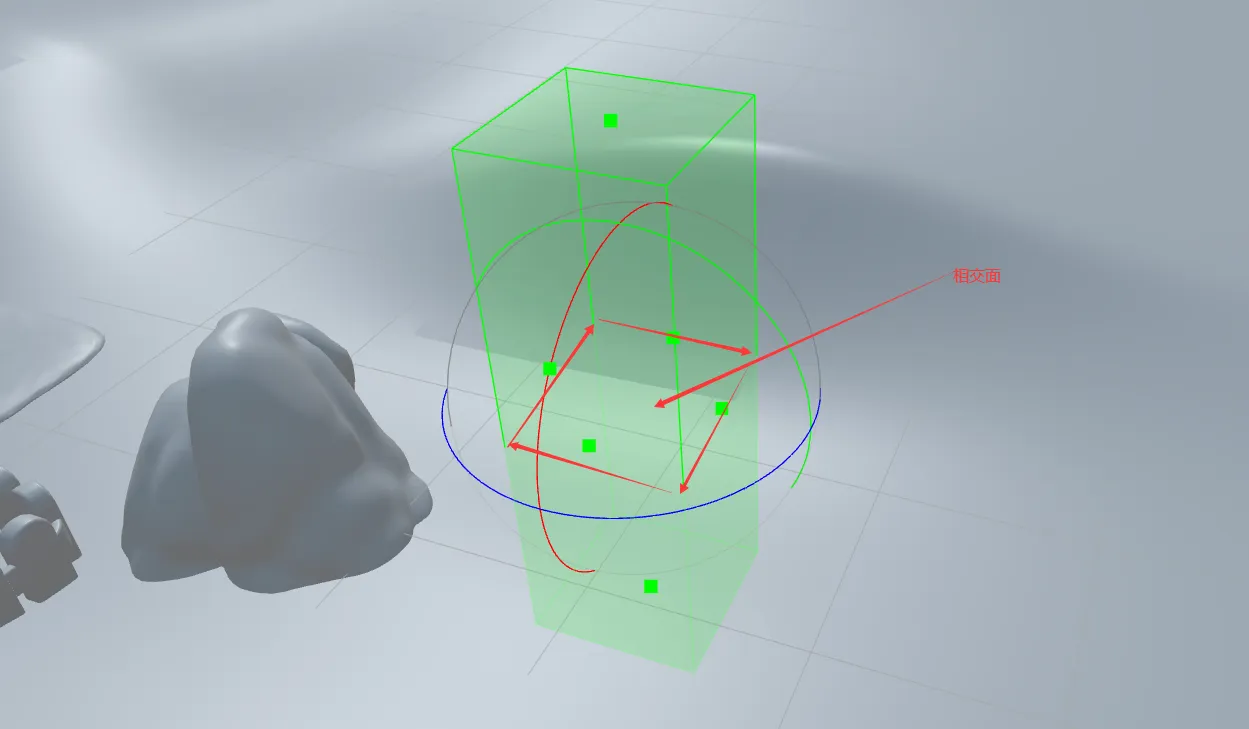
We need to use the depth map in the fragment shader to calculate the position in world space corresponding to the screen space coordinates, and finally transform it back to model space for cuboid clipping and texture mapping.
Those familiar with rendering principles may know that our normal rendering process is roughly as follows:
Vertices in model space → through transformation matrix M → world space → through transformation matrix V → view space → through transformation matrix P → clip space → through perspective division → NDC → through screen mapping → fragments in screen space.
If we reverse the above process, we can transform screen space coordinates back to model space.
The core issue here is how to reconstruct world coordinates from the depth map.
You can search for keywords such as Yutu, Cocos, depth map, world coordinate reconstruction, Shader, decal, and Decal to get an understanding of the core principles involved, which will make it easier to comprehend the principle behind decal implementation.

3. Let’s Implement the Decal Effect
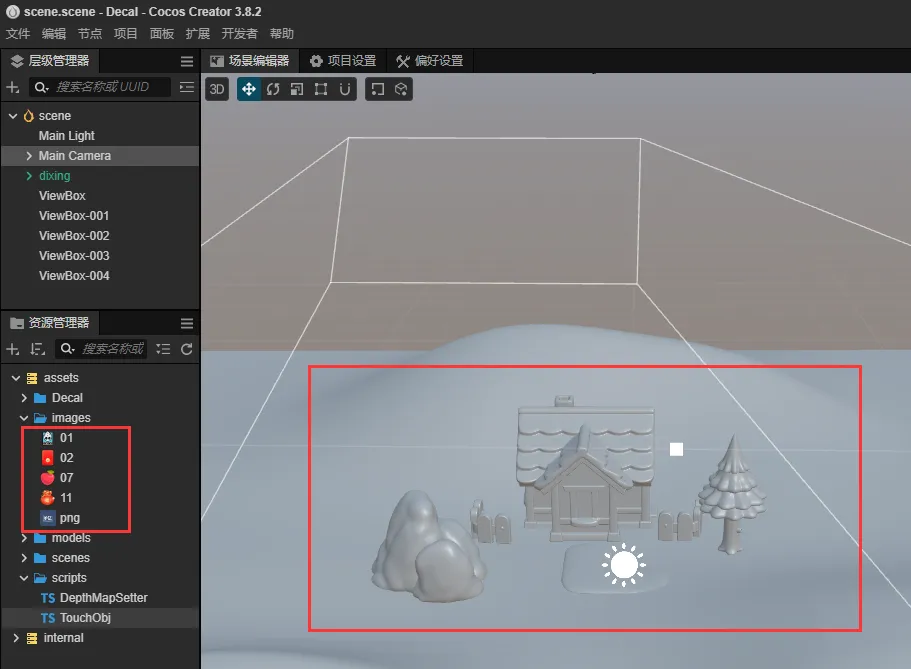
1. Resource Preparation
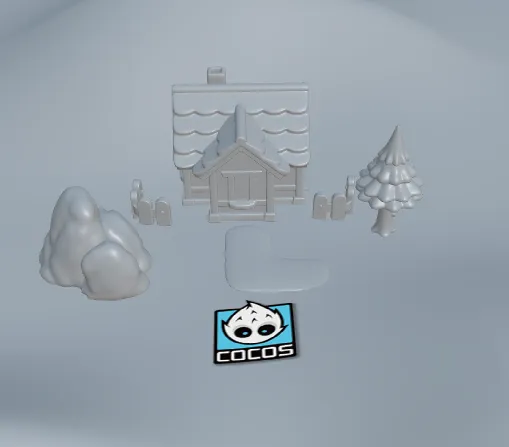
First, we need to get some decal textures and a simple scene from the artists, preferably with uneven surfaces to better showcase the decal effect.
- Environment: CocosCreator
- Version: 3.8.2
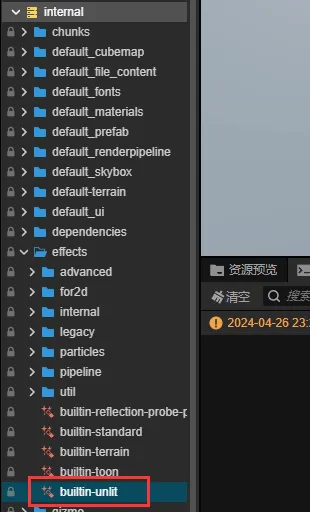
2. Constructing the Shader
First, we copy builtin-unlit.effect to quickly create and customize our Shader.
Then, in the vertex shader, add a v_screenPos to pass the coordinates to the fragment shader for processing.
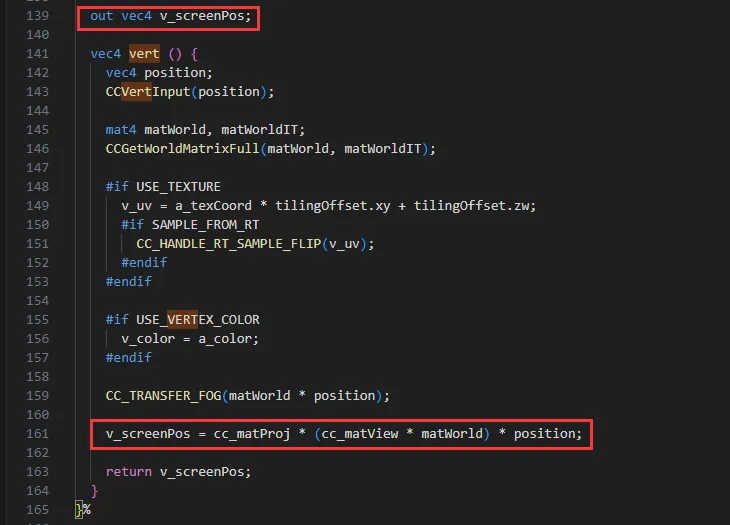
Next, in the fragment shader, receive v_screenPos and process it according to the following snippet:
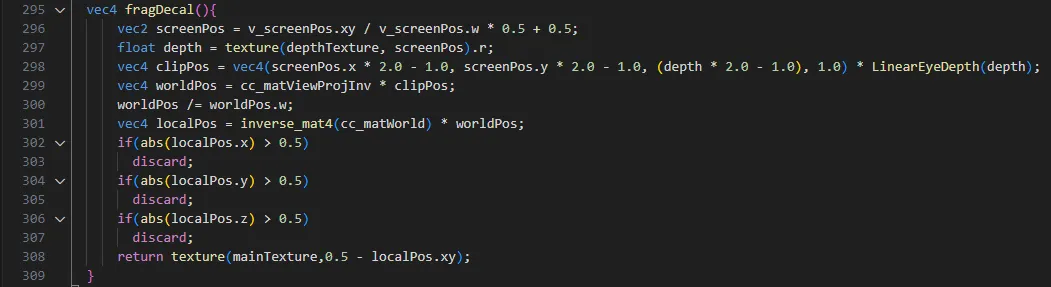
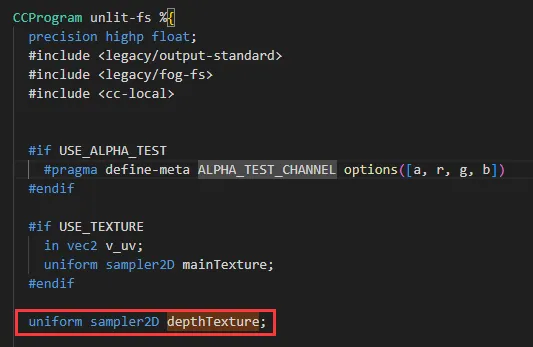
Here, depthTexture is our depth map. Since we can’t directly obtain it in the Shader, we need to do some extra operations in the script to pass the depth map to the Shader. This process is somewhat cumbersome.
3. Obtaining the Depth Map
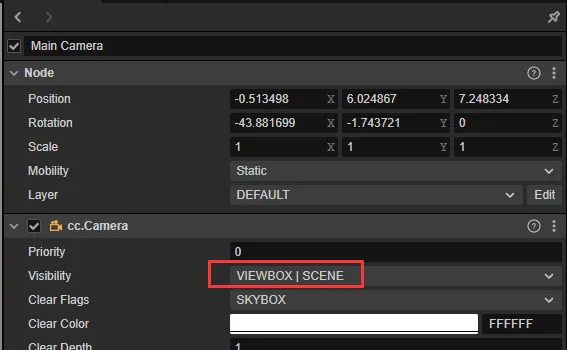
First, divide the scene and the cuboid used for decals into different layers, namely SCENE and VIEWBOX.
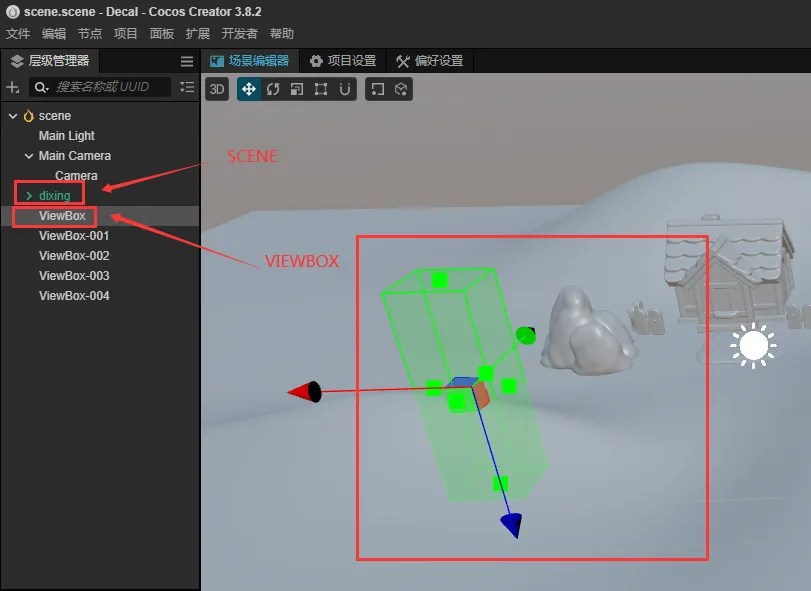
Change the visibility of the main camera to SCENE and VIEWBOX.
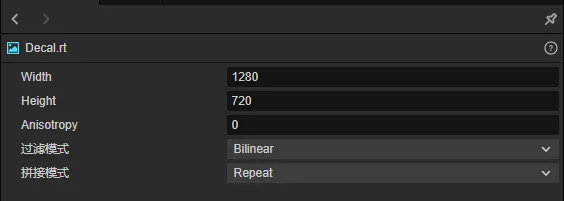
Add a RenderTexture to receive the depth map rendered by the camera.
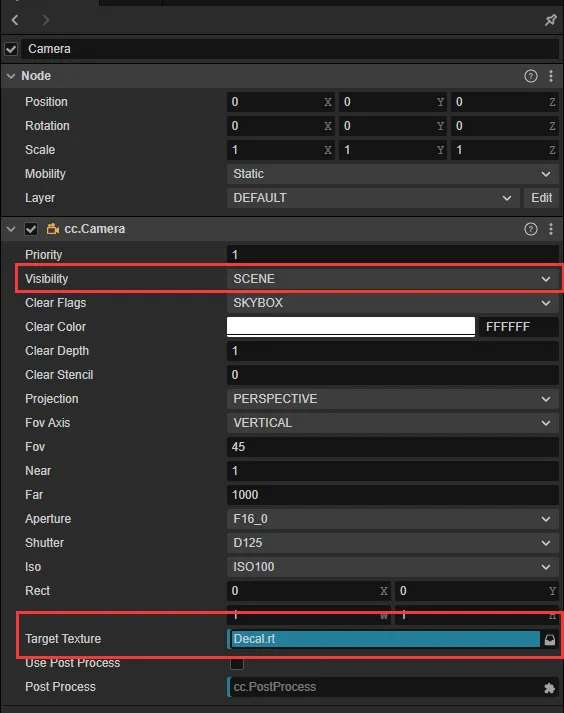
Add a sub-camera under the main camera, set its visibility to only SCENE, and bind the RenderTexture to it. Keep other parameters the same as the main camera.
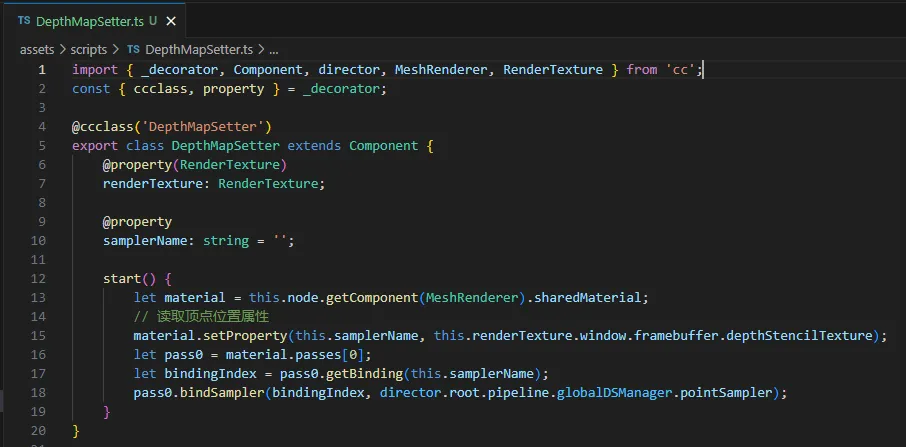
Finally, write a simple script to pass the depth map to the Shader.

Add the script and material.
4. Notes
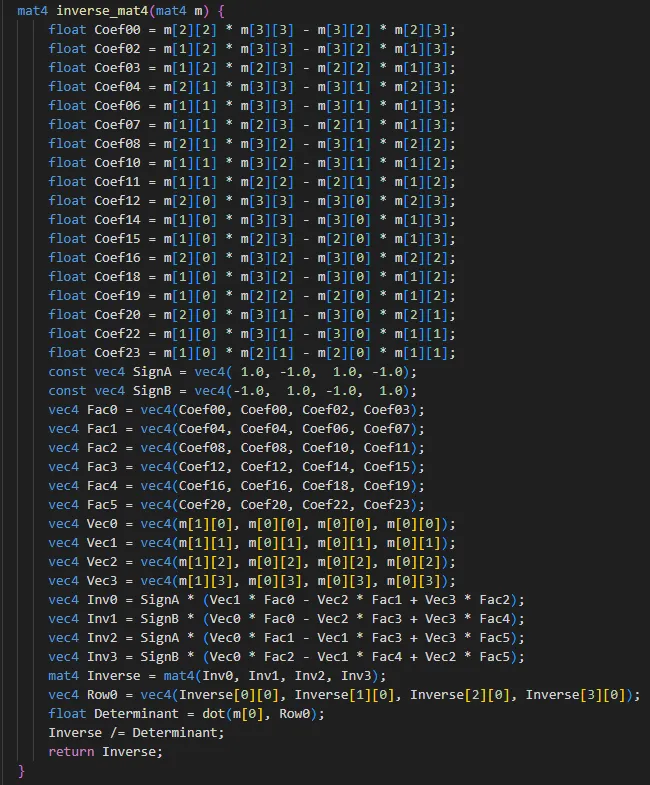
Since there is no direct method to get the inverse matrix of cc_matWorld in the Shader, we need to calculate it ourselves.
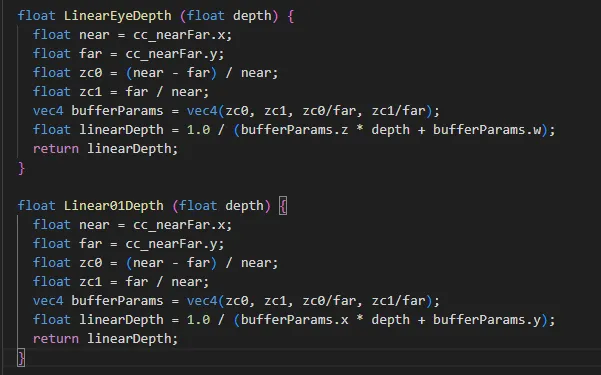
In the process of learning about depth maps, you will also encounter linear and non-linear depth. It’s worth learning about these concepts.
5. Demonstration
Now we’ve successfully applied our decals to the uneven ground.
Since the effect might not be very intuitive, we add a dragging script and collider to enable simple dragging.
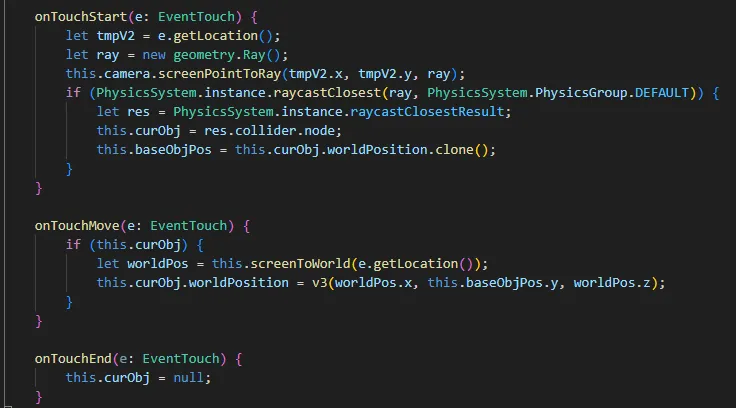
Now our decals can move around.
Various types of decals.
Link
link : Cocos Store