
There are many plug-ins available on the Cocos Store, but sometimes we need to create some plug-ins ourselves. This time, the developer, muzzik, will share the process and experience of v3.x plug-in development. So let’s make plug-ins together!
First of all, why develop plug-ins?
Any repetitive mechanical labor is meaningless, all mechanical labor can be automated, and plug-ins can help us achieve automation.
What can plug-ins bring to us?
The first is time. Of course, the most significant benefit of solving the automation problem is saving us extra manual operation time. So saving time is the most significant value of the plug-in.
The second is the revenue. We can release the developed plug-ins to the Cocos store to bring convenience to others in the process and additional income to themselves.
The third is ecology. All kinds of plug-ins cover all aspects of development and will help more developers. Each of our plug-ins can add to the Cocos ecology.
The fourth is technology. The technologies required for plug-in development, including but not limited to HTML, CSS, NodeJs, Vue, and the development of plug-ins, can also help us expand our technical scope and increase our personal competitiveness.
This time, through this article, I will share with you the process of developing Cocos Creator 3.x plug-ins from the beginning, advanced and in-depth, and the experience I have accumulated in actual development.
Getting Started
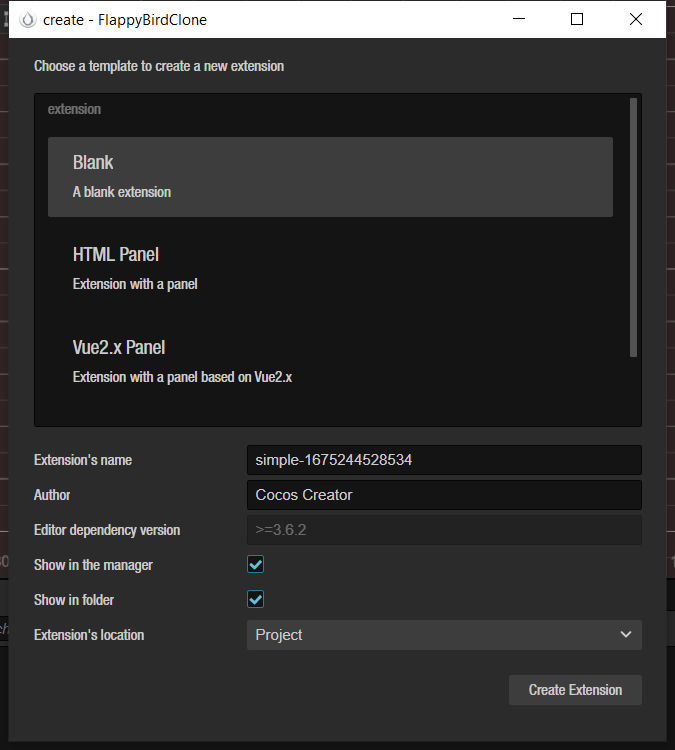
1. Create plug-in
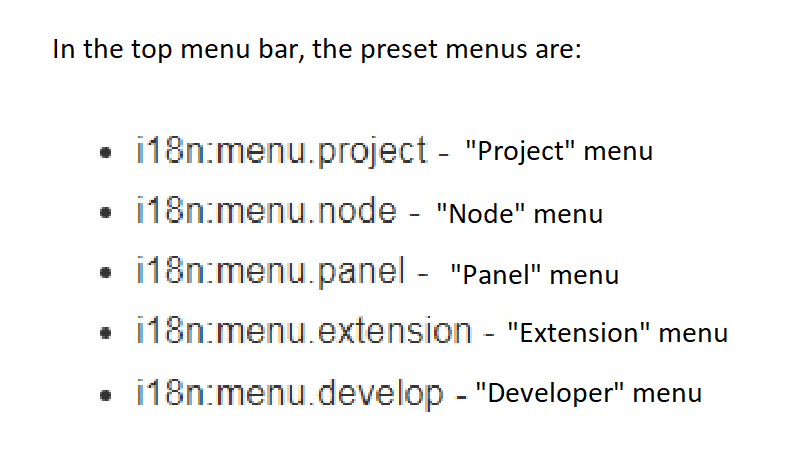
To open the plug-in creation panel, we can open Extensions/Create Extensions from the top menu bar.
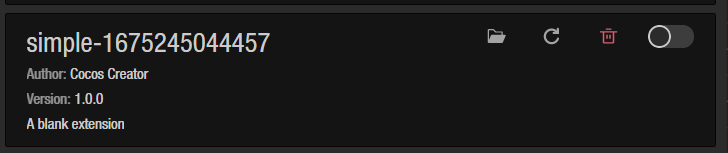
Where are the plug-ins located? From the top menu bar, open Extensions/Extensions Manager to find our plug-in. Click Open Folder to open our plug-in root folder.
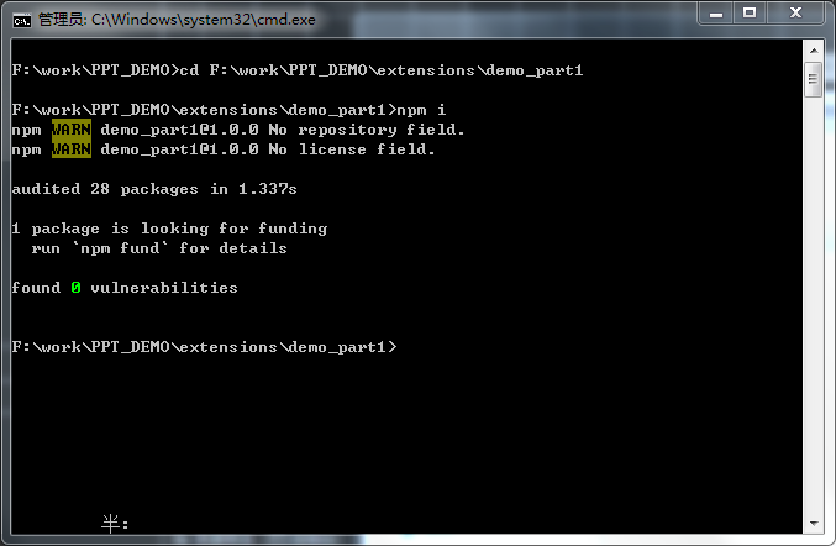
Since our plug-in may initially rely on some of the npm modules, it will need to be initialized with.
cd to the plug-in root directory.
npm i.
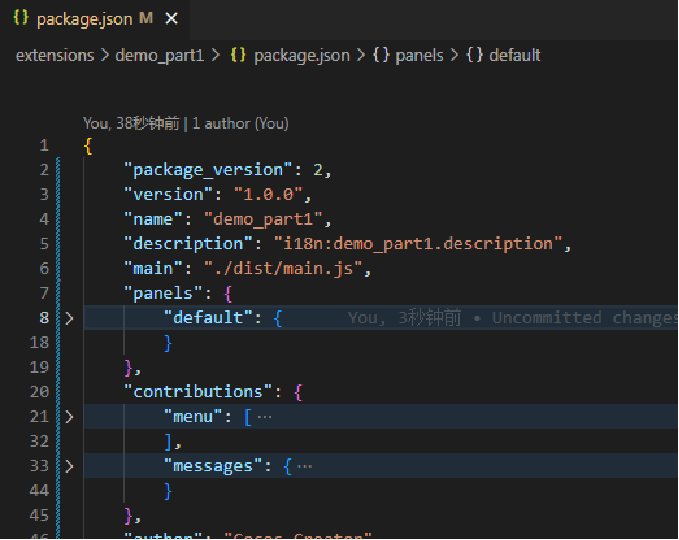
2. package.json Brief description
package.json is a file in the root directory of the plug-in, which contains a lot of information equivalent to the identity card of the plug-in, where the three most important configurations are:
-
main: related to whether the plug-in can be started properly -
panels: the panels can be displayed appropriately. -
contributions: Most of the plug-in’s configuration is here.
3. Multilingual plug-in
In development, we often use multiple languages. How can plug-ins be implemented in various languages? In fact, it is created by an i18n folder placed in the root directory of the plug-in. The file name stored in the file is the language code, and the content is an exported object
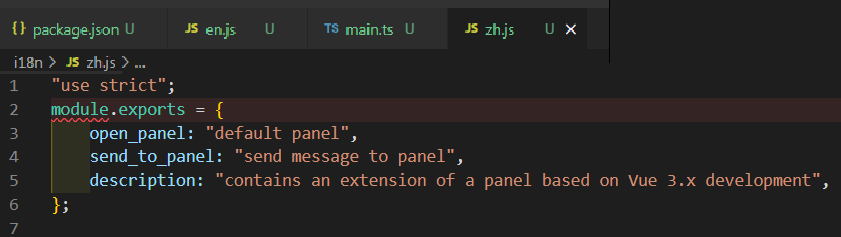
The basic usage of plug-in multilingual is:
- Used in the script: let str = Editor.I18n.t(‘first-panel.open_panel’); - often used for dynamic display content.
- Used in HTML: ; - often used in panels.
- Used in JSON: “description”: “i18n:first-panel.description”; - used in package.json.
4. Launch the plug-in panel by message
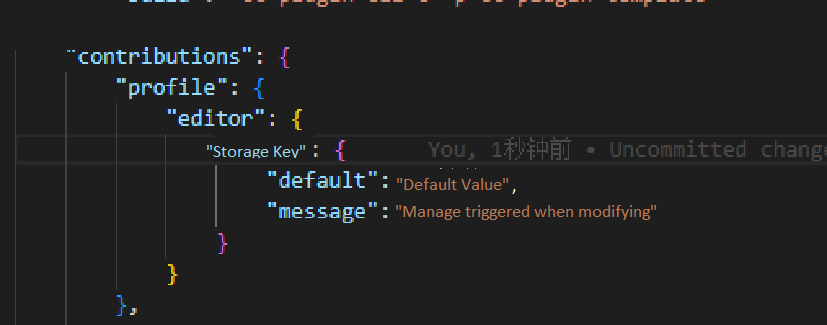
First, we need to start the plug-in panel to register a menu item in the package.json contributions.menu section, write a path, label, and message properties containing the data.
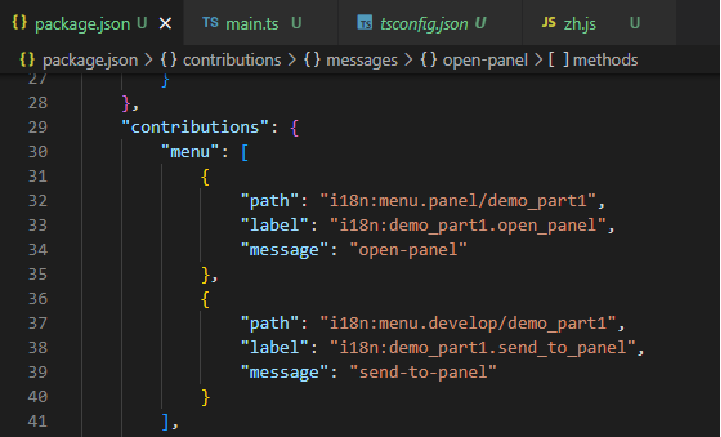
What do these elements represent?
- Menu path: path + label = extension/demo_part1/default panel.
- The message triggered by the menu click: message.
Listening to messages
We can write the names of the messages we listen to and an array of methods to trigger in contributions.messages in the package.json file.
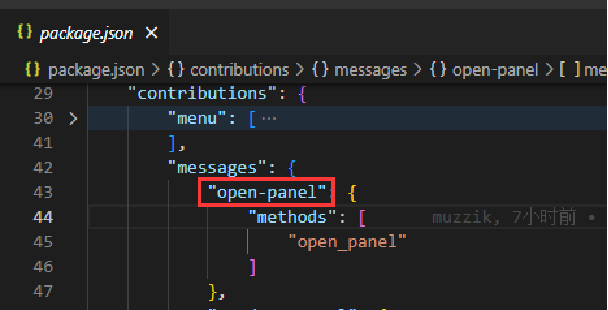
All our events are registered in messages. Here open-panel is the event we registered, and open_panel is the name of the triggering method. Since the panel name is not specified, so the trigger is the method inside the main. Next, we see what the open_panel method does.
See what the callbacks have done
Inside open_panel, we call Editor.Panel.open, which is the method to open the panel and show the panel name.
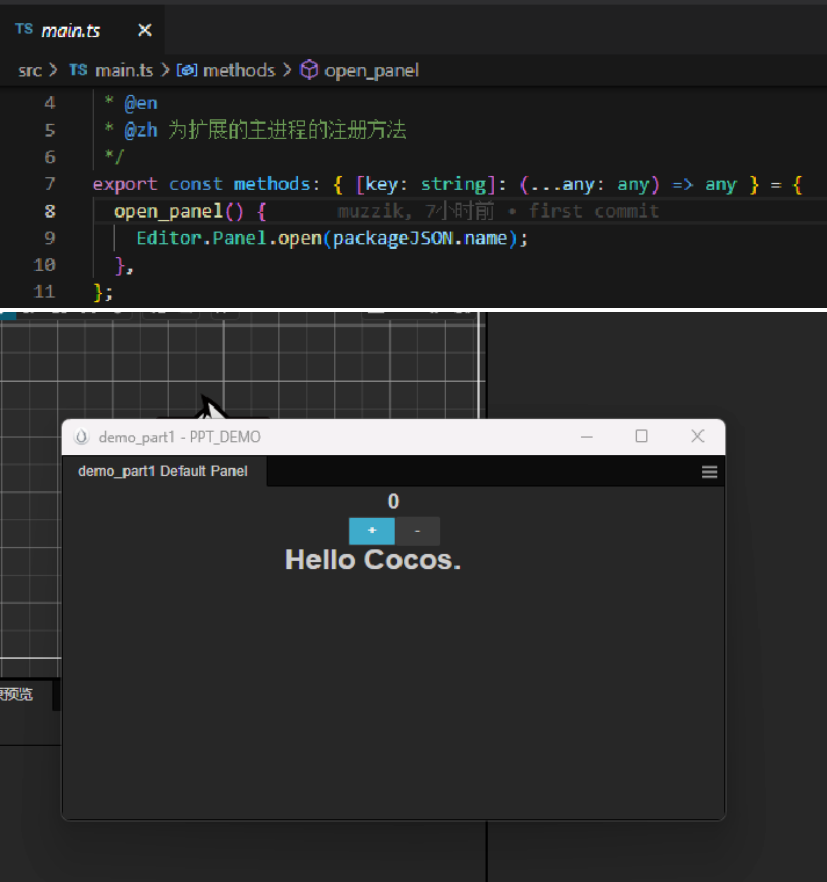
Click on the menu here, and our plug-in panel opens.
5. The content of the plug-in panel is written
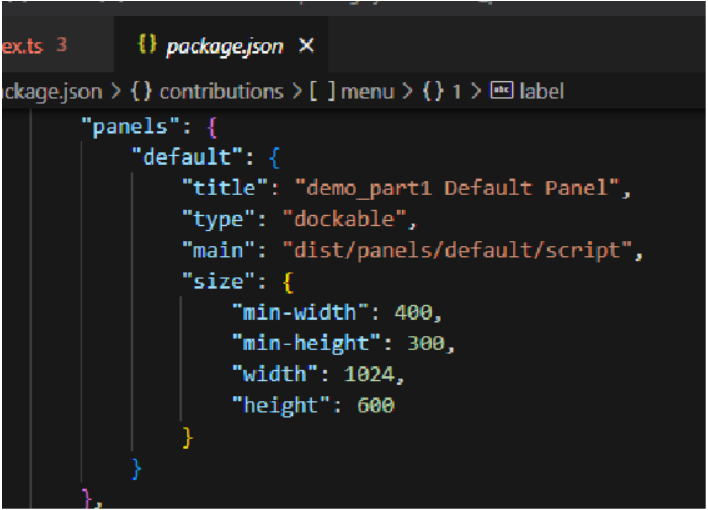
First of all, we defined some basic properties of the panel in the contributions.panels within the package.json.
-
title: the title of the panel. -
type: dockable | simple (non-dockable). -
main: panel entry script folder, default file name is index.js. -
size: size information of the panel.
How does the panel display content control?
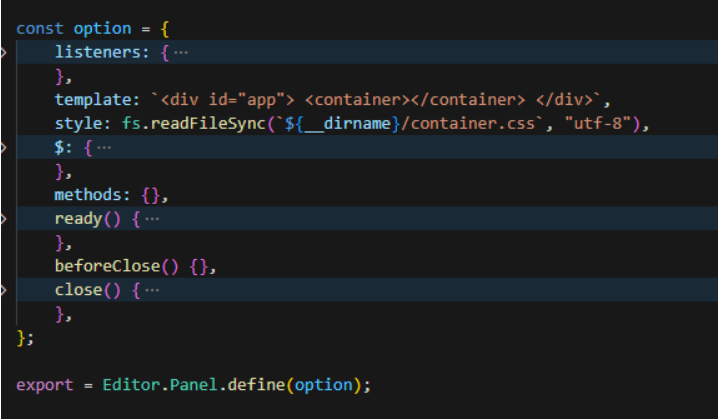
In the index.js file, we export the object, template of the html content, and style is the css content. This piece of content is relatively deep.
6. Message system
Earlier, we talked about how to listen to a message. Here we look at how to send a message.
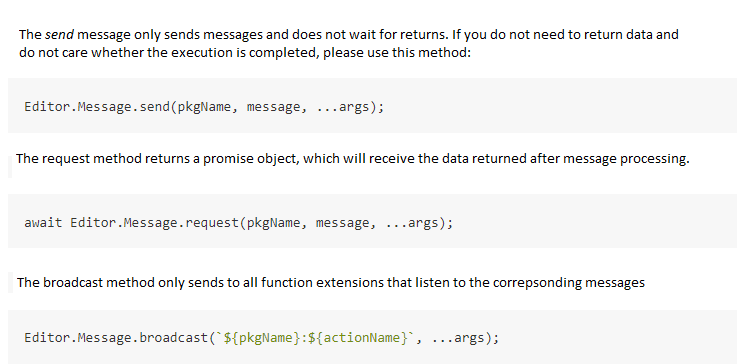
There are three interfaces for sending messages: send, request, and broadcast, which can be found in the official documentation.
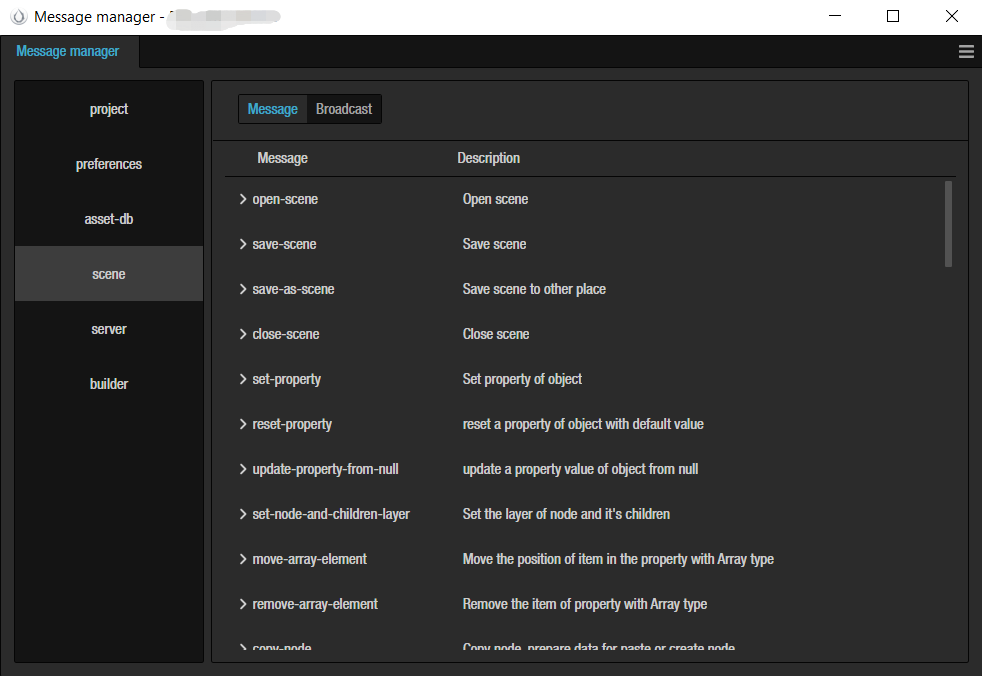
View the default defined messages
Open the menu Developer → Message Manager List to view them.
Debug message
The messages in the message manager are not all the messages that exist in the editor, so how do we know what messages are triggered by our operations? Just use the message debugging tool, menu developer/message debugging tool:
- Click the play button (the button next to the broom icon) before starting.
- Click the Pause button when the operation is complete.
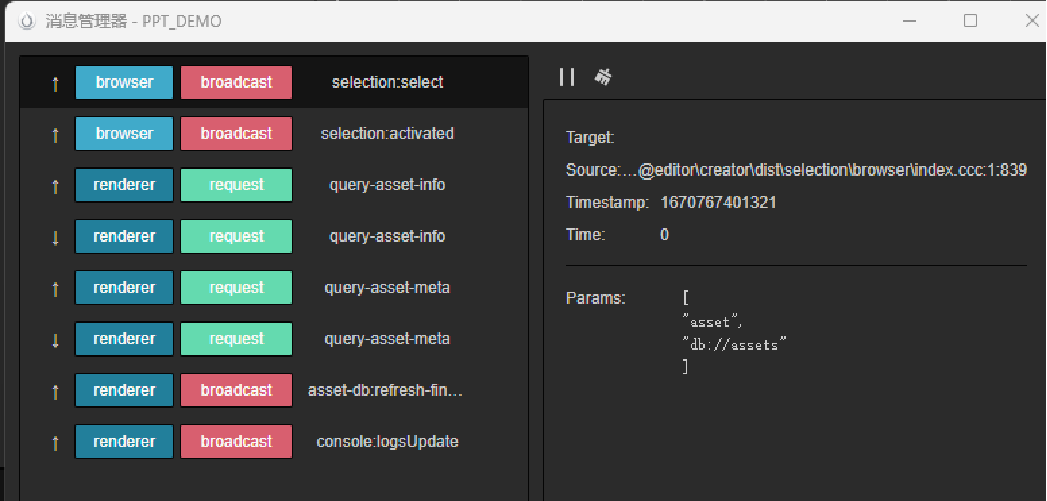
This allows us to see all the messages triggered by this operation, including the content of the message parameters.
7. Scene script
Simply speaking, a scene script is a script in the same process as the environment in which the editor script runs. We need to use it when we need to call the engine interface, such as loading resources, getting nodes, etc.
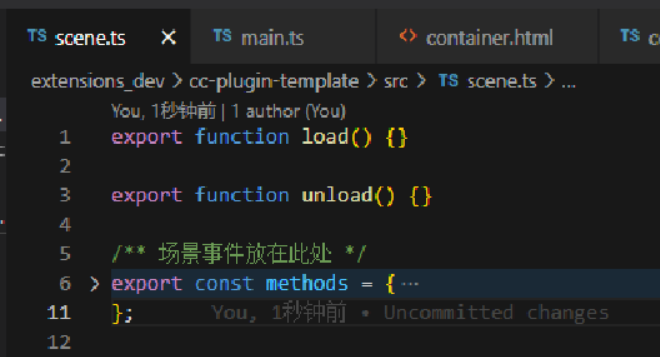
The definition of scene script in package.json

Scene script structure:
-
load: load callback. -
unload: unload callback. -
methods: the location of the scene script event function.
Communication with scenario scripts
We can communicate through messages defined by default in the messaging system:
-
name: Extension. -
method: the name of the event function to be triggered. -
args: event argument.

8. Configuration system
The configuration system is a file reading and writing tool used to read and write files in the editor environment.

We can use it within the script without any prerequisites, but note that it must be undefined the first time we get the value before we write the file. We can configure the default value via package.json.
9. Plug-in compilation
Writing plug-ins with TypeScript naturally requires compiling them to JavaScript to use them. How to compile TypeScript scripts? There are many third-party compilers on the market. Still, here we choose to compile it with tsc (the TypeScript language’s own compiler).
We can compile the script by entering the following command at the command line:
-
tsc -b[directory wheretsconfigis located]: single compile. -
tsc -w[tscconfigdirectory]: listens for compilation (automatically compiles after the TypeScript file has been saved and changes have been made).
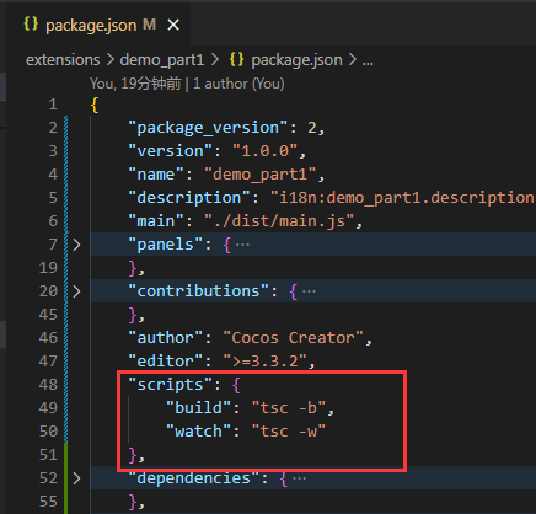
Script commands can also be configured, searched, and executed within vscode by ctrl + shift + p.
10. Publishing plug-ins
After the plug-in development is finished, we can publish it to the Cocos Store. Before releasing, we recommend you carefully read the store’s plug-in class resource release specifications:
https://store.cocos.com/document/en/cocos-store-template-extension.html
After confirming the error, log in to the Cocos Developer Center at
Click Store → Seller Center → Post New Resources. Please fill it out and leave it for two or three days for review. If there are any problems, the official team will contact you.
Advanced
1. Understanding the main process and rendering process
When you are in contact with plug-in development, you may have heard of the main and rendering processes. So what are they?
- Main process: the script running process (plug-in entry script) of the
mainattribute inpackage.json. - Render process: the script runtime of the
mainattribute incontributions.panelsinpackage.json(plug-in panel entry script).
How different processes interact
- Through the messaging system: the easiest way.
- Via
websocket: no one usually does this.
Inter-process usage misconceptions
- Inter-process data is not shared but is separate. A common mistake made here is to think that you are using the same data when it is two separate pieces of data that do not interfere with each other between different processes.
- Don’t put expensive computational logic in the main process. It is better to put it in the plug-in rendering process or open a separate sub-process.
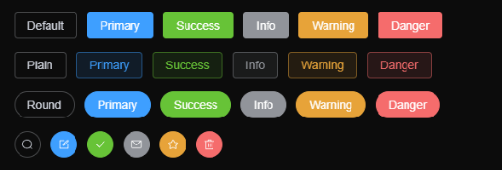
2. Use element-plus
element-plus is a common UI component library for the web front-end. Although the Cocos Creator editor also provides some plug-in UI components, they may not meet our needs, so that we can use element-plus.
3. html and css debugging skills
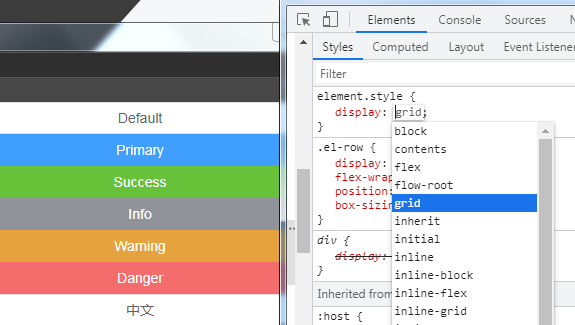
Plug-in development requires frequent changes to html and css, and we do not want to reload the plug-in every time. So how to do that?
We can open the plug-in panel, click the plug-in panel, then press ctrl + shift + i to open the developer tools. You can directly edit the html and css in it. The effect is created in real-time, and we can modify the desired effect and then move it to the plug-in source code.
4. Extend the inspector
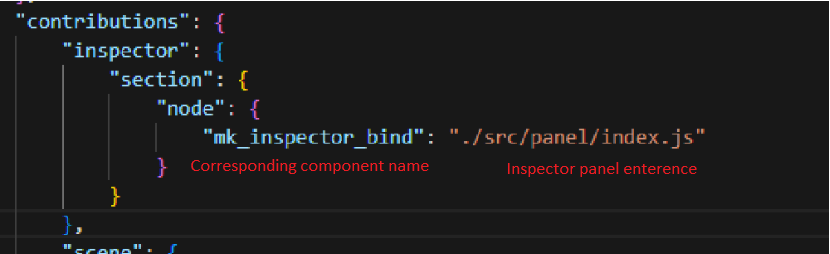
An inspector is simply the content displayed by a component in the property inspector panel. How to define inspector and declare it in contributions in package.json?
Interacting with component data
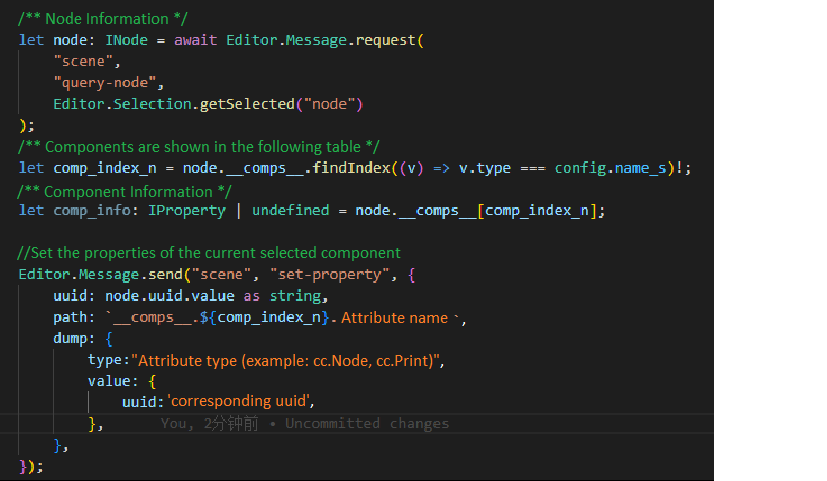
The inspector customizes the display of our component properties panel, so how do we interact with the component data? There are two ways.
-
Scene script. The scene script can get the scene root node through
getSceneand use it to find our component for data access and modification. - Message system. This is the recommended way to use the editor, as you don’t know the content of the messages, which can be obtained through the message debugger. The editor relies on these messages, such as undo operations.
5. Plug-in public code base
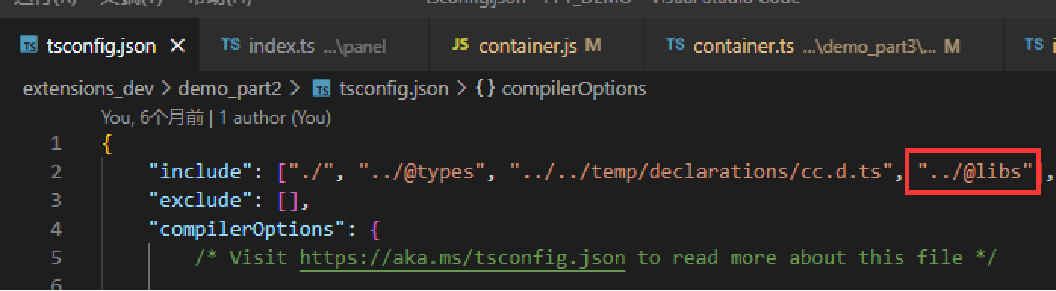
In plug-in development, we may encounter several copies of the plug-in using the same code. We want to retain only a public code. You can add our public code base path in the plug-in root tsconfig.include.
But this creates a problem: the path structure is not the same as before the compilation of the plug-in. How to solve it? Here I wrote a small tool: a plug-in compiler, which can automatically modify the path inconsistency in package.json caused by the reference to the public code base, and automatically copy the dependent npm packages to the output directory, output zip.
Plug-in compiler - download and use:
In-depth
1. Use Creator to create a plug-in UI
It looks complicated, but it’s not that hard to implement. The plug-in panel is also a web interface, and the web interface is embeddable. At the same time, Cocos Creator can also output web packages, so things are pretty simple.

The plug-in panel can display the Creator interface by embedding a link to the specified URL in the iframe tag.
- When debugging: embed the preview URL.
-
When publishing: open a local
http-serverand point to the compiled web package path.

2. Debug the main process code
You may encounter a situation that the main process reports an error, but you can’t debug it. So how do we debug the main process?
First, set the Cocos Dashboard startup options with the path followed by the project root directory.
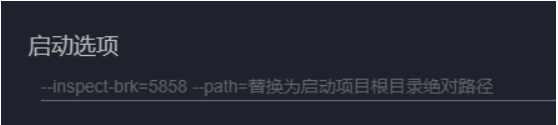
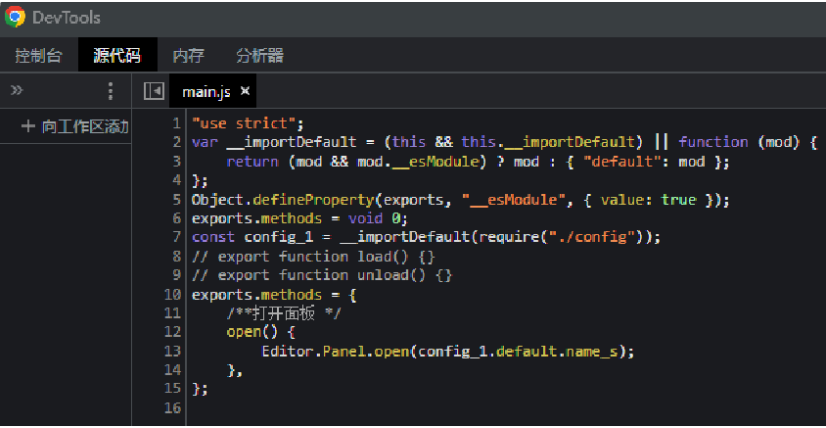
Then open chrome://inspect/#devices to configure:

- Add localhost:5858 by clicking on configure to the right of Discover network targets.
- Finally, open the corresponding project, and a new item will appear under target, click the blue inspect, then enter the main process developer tools. You can use ctrl + p to search for your own plug-in main.js for debugging:
3. The way of code encryption
- Logic on the server. The main code in the server, the plug-in panel is only responsible for the display. Even if the code is stolen, it does not matter.
- Use other languages. Using C, C++ compiled into wasm, basically eliminating the cracking of the core code.
- Obfuscation. In this method, only the gentleman is protected from the villain.
The above is all the content I can share. I hope it will help you! Finally, I recommend a few plug-ins and source code released on the Cocos Store to check out to help you learn more:
SDF texture generation tool.
Plug-in for generating node reference code based on the node name.
Editor menu extensions (used by plug-ins).