
Discovering the Best 3D Pathfinding for Cocos Creator
This tutorial comes thanks to the Chinese developer “A Rookie Moving Bricks” in our Chinese forums. We thank them for letting us share this article.

A Rookie Moving Bricks
The author has been in the game industry for more than three years and exposed to large and small projects. He has used Unity, Cocos Creator, and Laya during their three years in the industry. The main purpose of their official account of Little Rookie is to share more basic and practical game development skills. At the same time, share your learning experience.
“Pathfinding” is an indispensable feature of many games. The most commonly used in 2D games is A* pathfinding. In 3D games, A* pathfinding can also be used on simple grounds with no height. But for some games with more complex terrain, how can the pathfinding function be implemented better?
This article will analyze the three schemes: RecastNavigation, ear clipping method + A*, and NavMesh navigation, and find the best effect and the most wayfinding scheme suitable for 3D games in Cocos Creator.
RecastNavigation
I believe that friends who have learned about 3D pathfinding have heard of RecastNavigation. RecastNavigation is a powerful pathfinding system widely used in major mainstream game engines.
The basic principle of NavMesh generation:
-
Voxelization. Constructs solid height fields from source geometry to represent non-walkable space.
-
Generate regions. Combine consecutive intervals in the upper surface of the solid heightfield into regions.
-
Generate contours. Detects the contours of regions and constructs them as simple polygons.
-
Generate polygon grid. Split contours into convex polygons.
-
Generate height details. Triangulate the polygon mesh to get the height details.
Ear clipping method+A*
After understanding the principle of navigation pathfinding, I think the key to pathfinding is divided into two parts:** grid drawing and pathfinding**.

Let’s start with the most straightforward map without height. The approximate steps are as follows:
-
Realize the gridding of the map based on the ear-clipping method.
-
Pathfinding based on A*.
-
The triangle set is optimized for the path based on the funnel algorithm.
After trying, the basic pathfinding function has some problems in optimizing the path, so I decided to find some ready-made js libraries to finalize this function.
NavMesh Navigation
I found the recast.js library when I was wandering around on Github, so I learned about its specific functions and API. It took some time to move recast.js to Cocos Creator 3.x successfully.
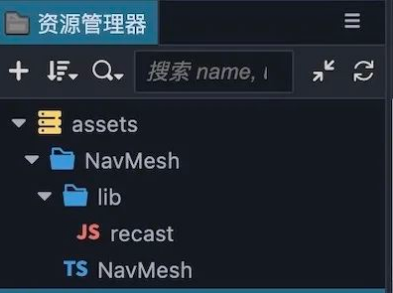
Then try to implement pathfinding with recast.js.
Initialization
import Recast from "./lib/recast.js"
...
public init(cb: Function = null):void{
  new Recast().then((recast) => {
      this._recast = recast;
      this._navMesh = new this._recast.NavMesh();
      this.setDefaultConfig();
      this._tempVec=new this._recast.Vec3();
      this._tempVec1=new this._recast.Vec3();
      this._tempVec2=new this._recast.Vec3();
      if (cb) cb();
  });
}
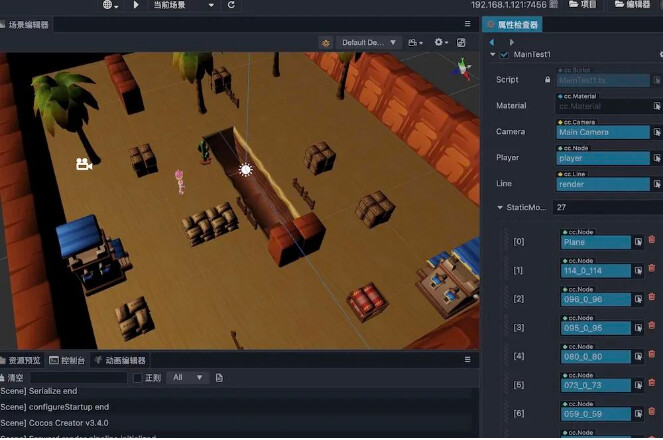
Add static objects
/**
 * Adding a static model
 */
public addStaticModle(node: Node): void {
    if(!node||!node.getComponent(MeshRenderer)) return;
    let render: MeshRenderer = node.getComponent(MeshRenderer);
    if (!render || !render.mesh) return;
    let matrix: math.Mat4 = node.getWorldMatrix();
    this.updateBaseDatas(render.mesh, matrix);
}
Some fixed things in the scene, such as the ground and obstacles, can be added through this structure. The grid information of the incoming nodes is processed in the code and processed into the format required by recast.
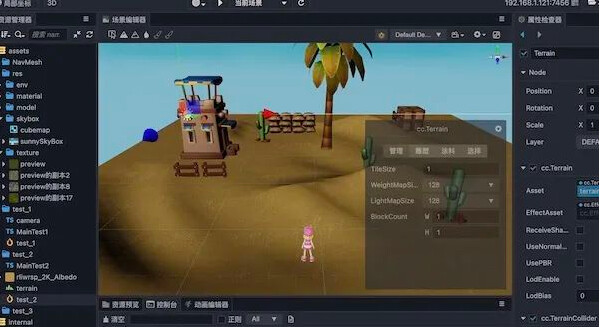
Add terrain
 /**
 * Adding cocos terrain
 * @param terrain components
 */
public addTerrain (terrain: Terrain,): any {
   ...
}
The terrain component is also commonly used in the game development process. After listening to my boss’s advice, we have supported our pathfinding for the terrain. You can see some logic for terrain data processing in this demo.
Build the navmesh
/**
 * Build navigation grid
 */
public build(): void {
    var rc = new this._recast.rcConfig();
    rc.cs = this._config.cs;
    rc.ch = this._config.ch;
    ....
    this._navMesh.build(this._positions, this._positions.length / 3, this._indices, this._indices.length, rc);
}
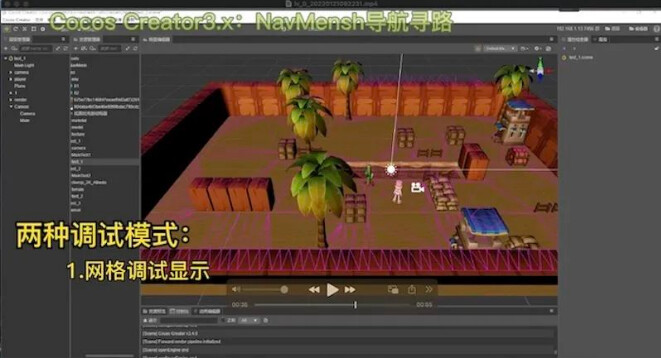
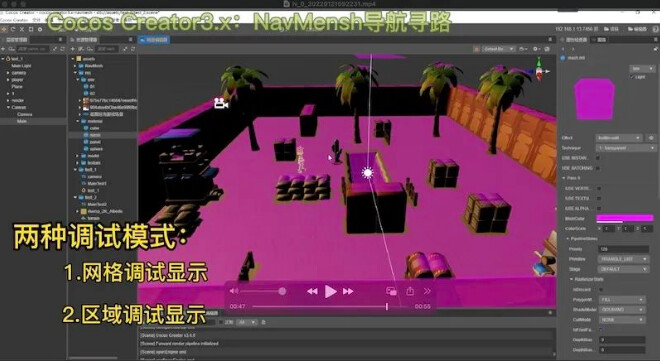
Visual debugging
After the navigation mesh is constructed, the final data is displayed visually for the convenience of debugging. The code has been processed, and two debugging methods are provided:
export enum MeshDebugDataType {
    SURFACE = 0, //Face
    LINE = 1,   //Wire
}

let navMeshData: NavMeshDebugData = this._navMeshMgr.getNavMeshDebugData(MeshDebugDataType.LINE);
this.createDebugMesh(navMeshData.positions, navMeshData.normals);
private createDebugMesh (positions: number[], normals: number[]): void {
    this.line.node.destroyAllChildren();
    let node = new Node();
    let render = node.addComponent(MeshRenderer);
    let mesh = utils.createMesh({
        positions: positions,
        primitiveMode: gfx.PrimitiveMode.TRIANGLE_LIST,
        normals: normals,
    });
    render.mesh = mesh;
    this.line.node.addChild(node);
}
Crowd and Agent
First, let me talk about my understanding of these two concepts:
-
Crowd, as you can probably guess from the literal sense, is the crowds. There can be multiple groups of people.
-
Agent, which means one of the people in this group.
I speculate that the agents in each crowd will detect the distance between each other as they move, but the Agents of different Crowds will not (not yet verified).
First create the Crowd:
public initCrowd (maxAgents: number, maxAgentRadius: number): NavMeshCorwd {
    return new NavMeshCorwd(this, maxAgents, maxAgentRadius);
}
Add an Agent:
public addAgent (pos: Vec3, parameters: AgentConfig): number {
    let config = new this._navMeshMgr.recast.dtCrowdAgentParams();
    ...
    let agentIndex: number = this._recastCrowd.addAgent(new this._navMeshMgr.recast.Vec3(pos.x, pos.y, pos.z), config);
    ...
    return agentIndex;
}
Pathfinding movement
The key point of the navmesh is to get the best path between two points.
private findPath (pos): void {
    let targetPos: Vec3 = this._navMeshMgr.getClosestPoint(pos);
    //Set the specified Agent to move to a specific location
    this._navMeshCrowd.agentMoveTarget(this._playerAgentIndex, targetPos);
}
Use the agentMoveTarget() function to top the target point of the Agent, and also need to refresh the Crowd in real-time to update the actual position of the Agent.
 update (deltaTime: number) {
    if(! this._navMeshCrowd) return;
    //Refresh Crowd
    this._navMeshCrowd.update(deltaTime);
    //Get the current location of the specified Agent
    let agentPosition = this._navMeshCrowd.getAgentPosition(this._playerAgentIndex);
    this.player.position = agentPosition;
    }
Conclusion
I hope the above content can be helpful to you. If you want to try it out, click here for the two forum posts I did over the work, and go to the Cocos Store to download the Demo.
Demo
https://store.cocos.com/app/detail/3516
Forum Posts