
INTRODUCTION
This article is reprinted from the public website “Feathers Don’t Fly,” where the author, Mr. Feathers, takes an alternative approach to custom one-click packaging to make packaging work more efficiently.
In the daily packaging work, there is often a need for the following:
- For games with multiple levels, certain levels are selected for release package content.
- Compressing resources according to different compression parameters set in different packaging channels.
- Encrypt the target resources.
- Other processing.
- Out of package.
If there are intervals between each step, they all need to be done manually. This comes with two drawbacks.
- Cumbersome, time-consuming, and relatively inefficient.
- It is easy to miss and make mistakes.
And usually, these types of requirements, once defined, are rarely modified. Therefore, making it a one-click process can increase efficiency, reduce error rates, and get twice as much done with half the effort.
Implementation method
Cocos Creator’s custom build process
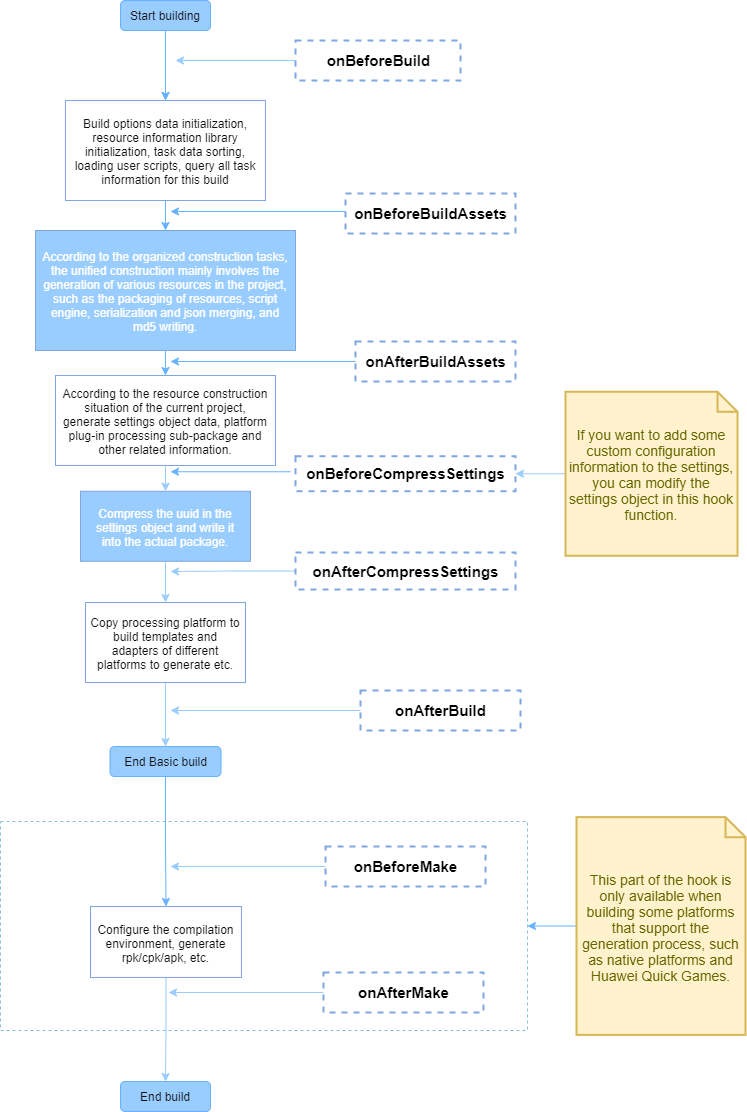
The first method is to use the custom build process provided by the Cocos Creator editor, which can be understood in the official documentation.
Official documentation
Build Process.
https://docs.cocos.com/creator/manual/en/editor/publish/build-guide.html
Custom build process.
https://docs.cocos.com/creator/manual/en/editor/publish/custom-build-plugin.html
The advantages of this method are.
- More processes can be intervened in.
- The ability to use some of the APIs provided by Cocos Creator and the ability to call the command line from within the JavaScript code.

The cross-platform effect is better.
However, this approach requires developers to have knowledge of the build process, API call methods, etc. and has some learning costs.
Shell/sh script for Win/Mac
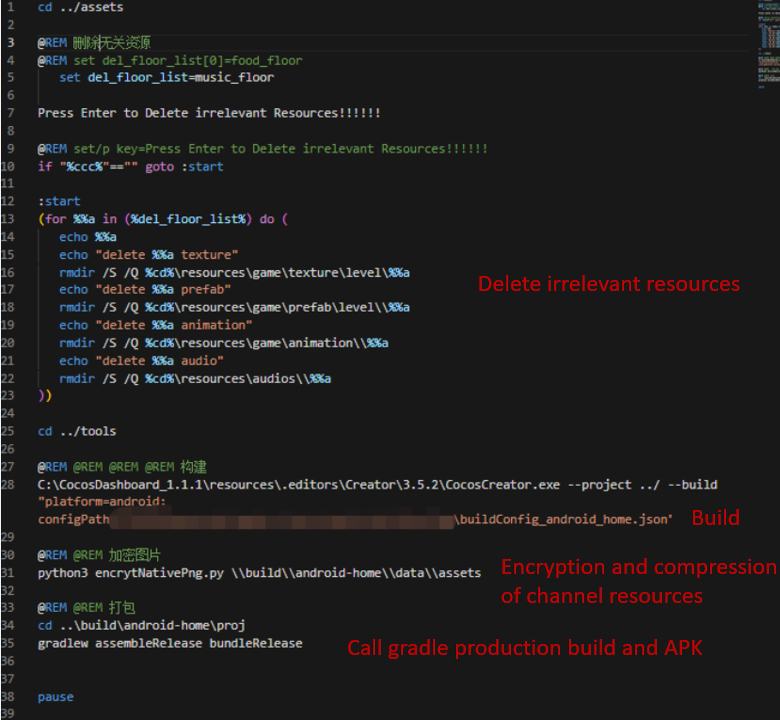
Cocos Creator provides a command line build method, which can be combined with sh, shell, etc., to achieve more custom operations.
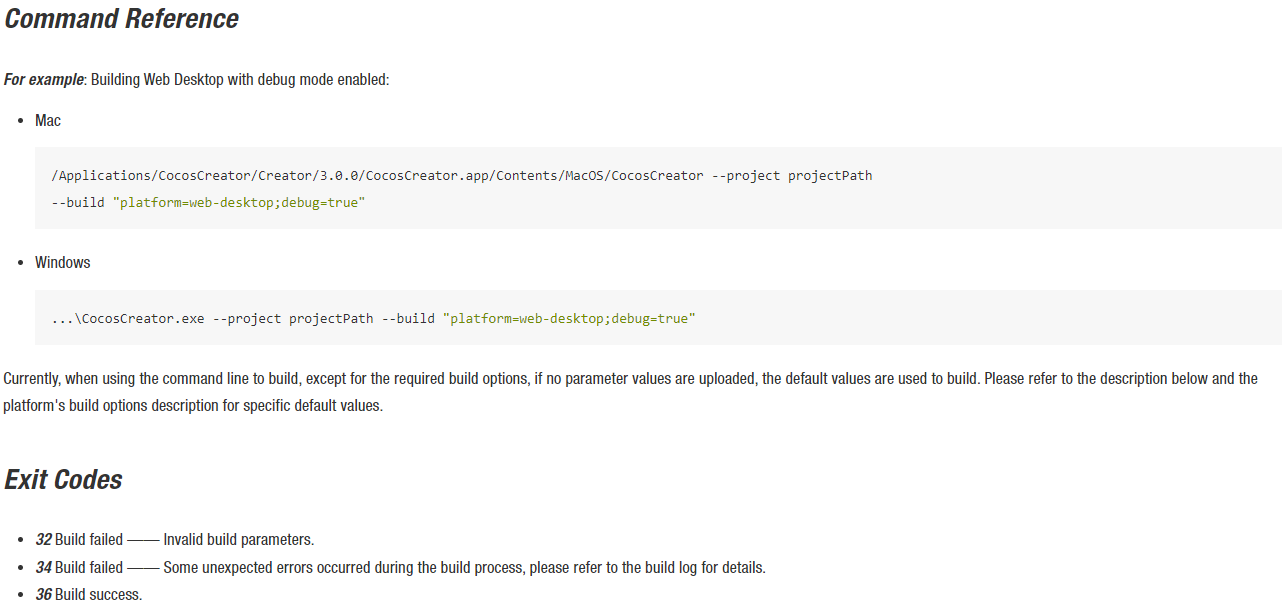
By looking at the build parameters, we can see that the parameter file path is provided here so that we can export the parameters in the editor build panel as a configuration file and then build them via the command line, which is equivalent to clicking build in the build panel.
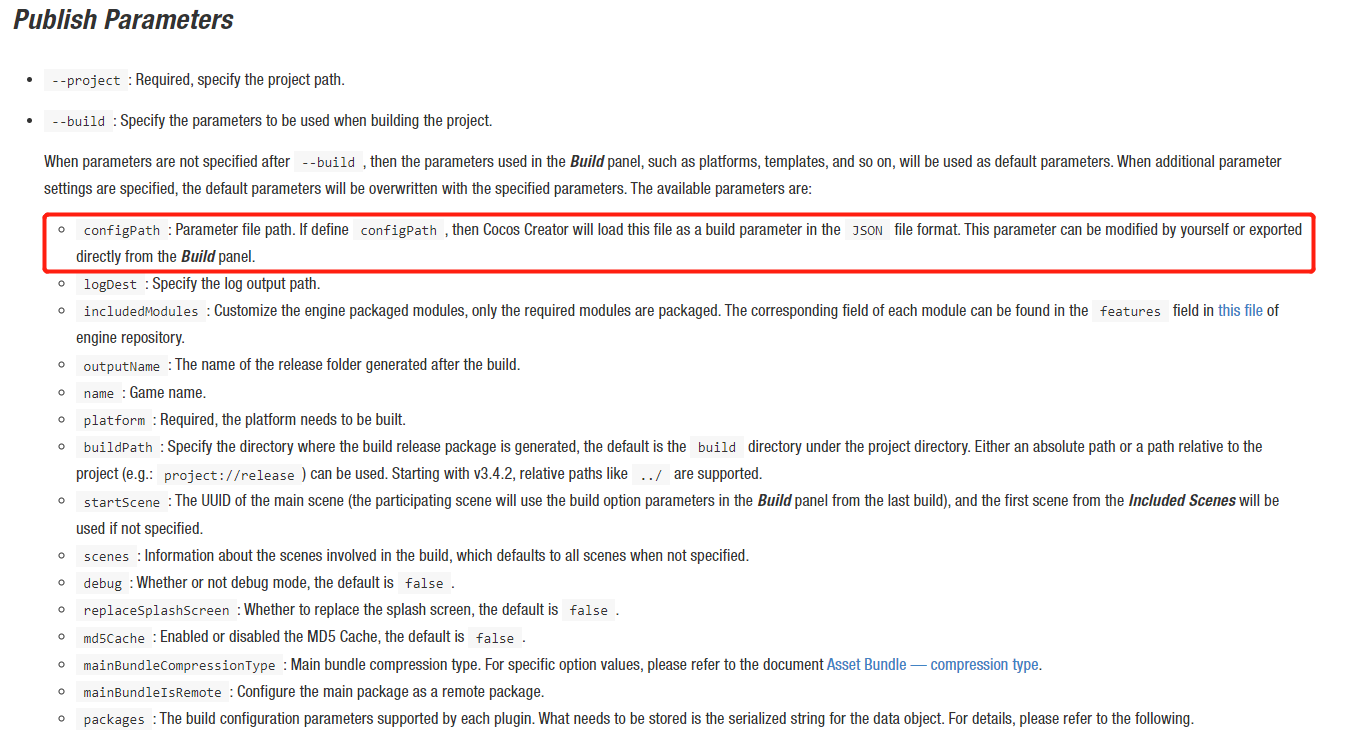
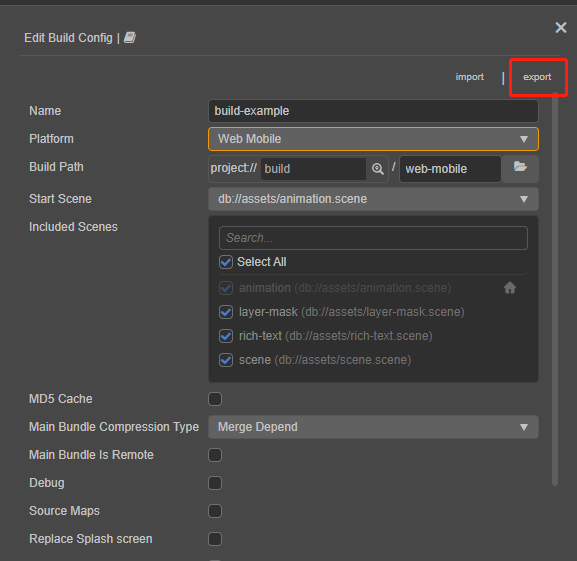
After exporting the build profile, you can customize the process with other commands in the “Before” and “After” build.
Example:
- You can move irrelevant resources to a temporary folder via the command line before the build command and back to their original location after the build completes to achieve the requirement of sub-channel and sub-resource packaging.
- You can encrypt and compress graphic and text resources, compress audio resources, etc., via the command line after the build command.
Finally, package body generation:
- For the HTML5 side, such as web/WeChat mini-games, the package body is packaged when the build command is finished.
- For the Android platform, you need to call the gradle package command to complete the package body generation.
- For iOS, you can use the xcrun command to automate the packaging.
After writing the above commands and saving them as bat/sh scripts, you can double-click them to do a series of operations such as differential processing of resources in different channels, compression and encryption of various resources, and package body generation in one click, which is error-prone and requires no interruptions and significantly improves package generation comfort.
Examples are as follows (Android).
The advantages of this approach are:
- Easy to get started and quick to implement.
- Easy to maintain and modify.
- There are many excellent off-the-shelf compression, encryption, and other resource processing tools available on the market that can be called from the command line, and different parameters can be specified when calling these tools. Different compression parameters can be selected for different channels and platforms to refine the balance between performance and speed further.
Disadvantages:
- Can only participate in some process customization pre-build and post-build (pre-generation), with no access to in-build processes.
- Windows/Mac requires separate bat/sh script files to be maintained.
Other packaging tips to share
Suppose we need to compile for multiple CPUs (armeabi-v7a\arm64-v8a\x86\x86_64) when debugging. In that case, you can specify in build.gradle to configure the debug package to compile for only one CPU, arme-v7a, to reduce the compilation time by a factor of N and not be error-prone.
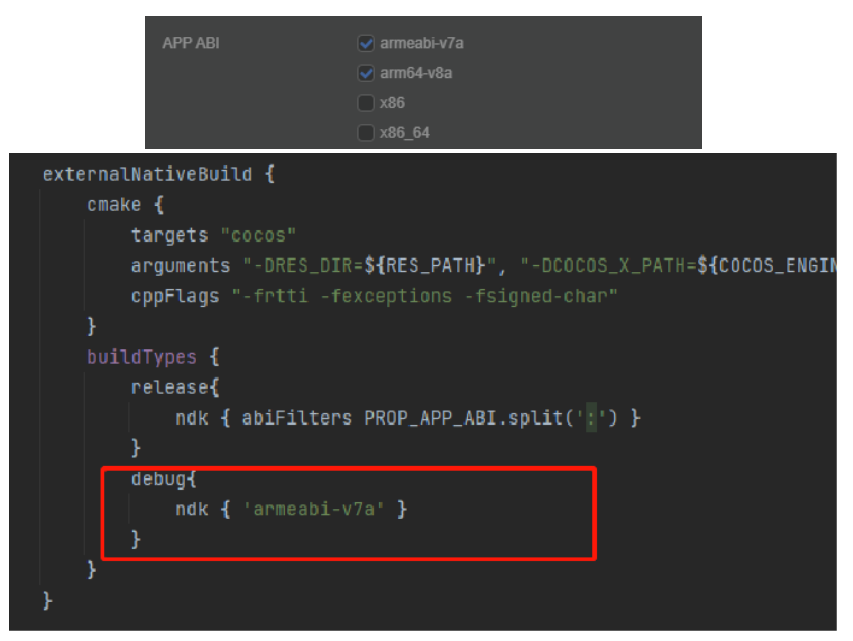
Some developers think that this can also be achieved by setting PROP_APP_ABI, but setting PROP_APP_ABI=armeabi-v7a:arm64-v8a can easily lead to errors when releasing packages if you forget to change it back. The above approach only affects the debug package, which we happen to prefer for everyday debugging.
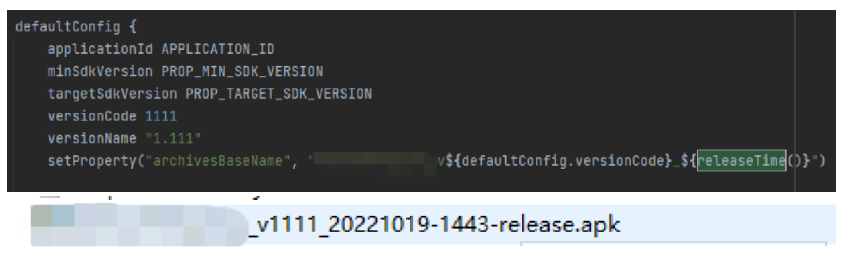
You can configure the output package body to be named according to parameters such as versionName, versionCode, etc., to facilitate package body management.
Summary
The above is a feather in the cap of two custom-build process implementation methods. The choice of method is mainly based on the learning costs, requirements, and maintenance costs you want to consider. I hope my sharing can help you in your daily development.