
This article is from the Cocos Chinese community. The developer ccbbs has implemented the basic features and gameplay of My World using v3.6.2. Here is the development diary.
Summary
“Minecraft” is a very popular game, but it wasn’t built with Cocos. So what kind of development experience will it be to implement a version with cocos?
Version Use
To follow the instructions, use the latest 3.6.2 version
Current main function
-
Generate terrain
-
Block creation and destruction
-
Character movement, collision, gravity, and simple animation
-
Terrain extension
-
Quick Items Bar
Preview video
Generate terrain
Basic concept
Block: The smallest terrain unit, with dimensions 1X1X1
Face: The elements that make up a block. A block can have up to 6 faces and at least one minimum texture for the faces.
Field: The size is 16X16X100, which consists of blocks. They are arranged in each quadrant in turn.
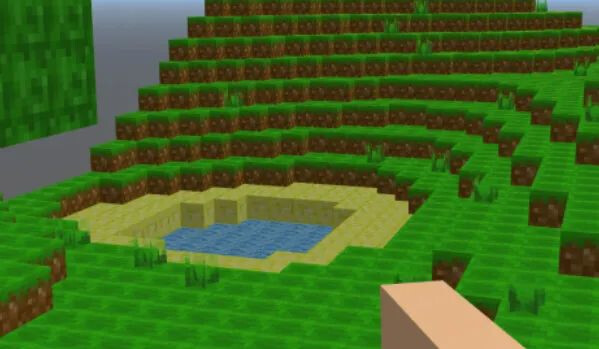
Random terrain
The terrain is randomly generated using a 2D Perlin noise function.
Enter the x and z coordinates, get the y coordinate as the ground height, then create fill blocks from the set minimum height to the ground height.
Currently, the simple setting is less than 0 for water and equal to 0 for sand. The rest are grass. The bottom layer is paved with stones.
Fill the middle with soil.
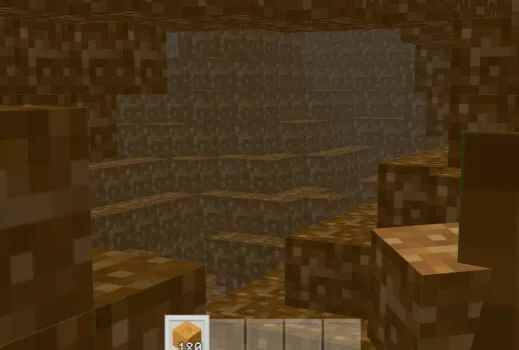
Random caves
Cave randomization uses 3D Perlin noise.
Input the x, y, and z coordinates. If it exceeds the set threshold and it is below the ground surface, and above the bottom layer, it is judged as an air block. If it is an air block, there is no need to fill it with dirt blocks. Naturally, there are caves with foundations (caves without mines…)
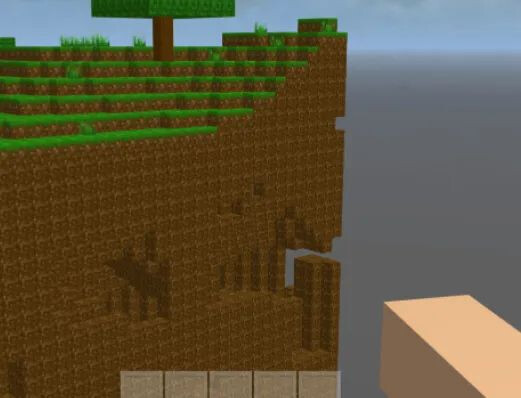
Random weeds and trees
Pure randomness is used for random weeds and trees. When 2D Perlin noise is processed for each coordinate, just make random judgments about weeds and trees. It is still a set threshold, and random weeds or trees will appear if it exceeds it. A tree is a fixed shape made of many blocks.
Terrain mesh generation
The above contents are generated virtual objects. I used two methods back and forth for the blocks rendered in the scene.
Default block + instancing
Use the setInstancedAttribute function to distinguish different blocks.
The effect is quite good. The disadvantage is that there are many block types and faces.
The second is to use dynamic grids, which is also the current practice.
This should be a new feature in 3.6. Just in time to try.
Create a dynamic mesh for each block.
This update has not been processed yet, and every time a block is added or deleted, the grid data of the entire block is rebuilt. So every time the nearby blocks are refreshed, it will freeze.
Surface optimization is possible using a dynamic mesh. Only faces that are not adjacent are created. However, all blocks must be traversed for surface optimization.
UV values for each face of each type of block are also configured to display different textures.
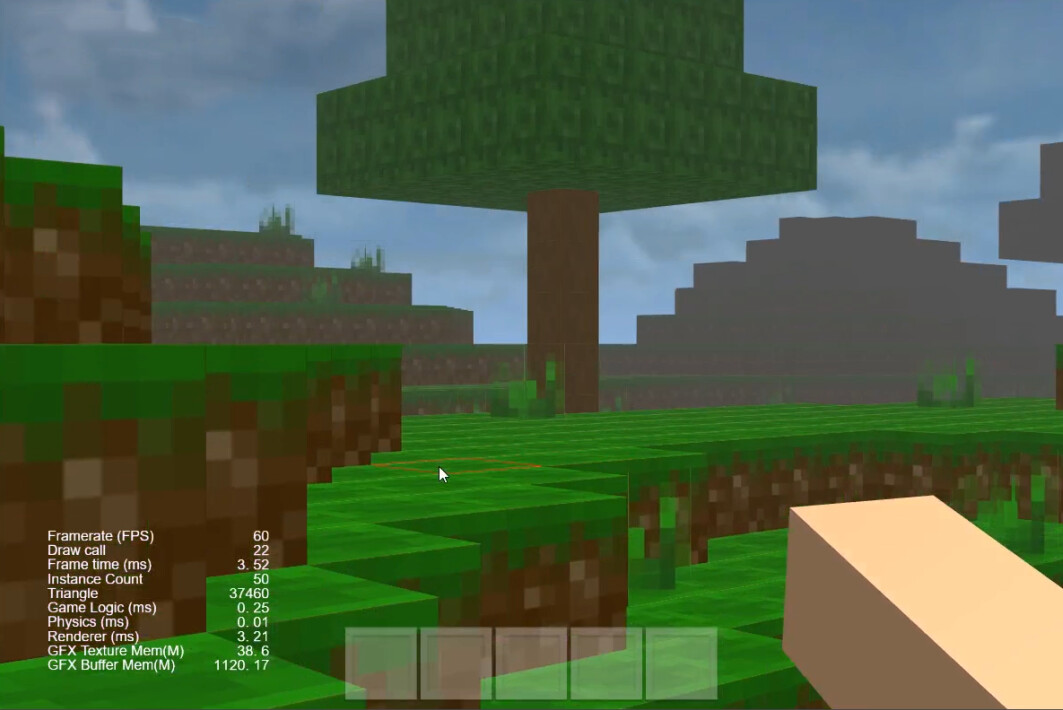
Performance optimization
There are many squares, and each square is a class. In the class, the vec3 class is not used to represent the exact coordinates, but numbers are used. This will take up much less memory.
Block creation and destruction
If the default block is used, the creation and destruction are very simple. This one started out fairly quickly.
But after switching to a dynamic grid, data reconstruction is required every time. The data of the entire dynamic grid is reconstructed based on virtual data.
Selection of squares
Here we simply use an octree to manage nearby blocks. Use ray AABB intersection detection to determine which block the mouse is focusing on.
Then you need to know which face is focused. At the beginning, I used 6 AABBs to judge. Later, I found out that the distance to the candidate surface has been calculated in the built-in detection function. After copying it, the one with the smallest distance is the current one.
Check box
4 methods are used before and after checking the box.
1. Geometry rendering using the camera.
The disadvantage of this is that it cannot be fully occluded. Occluded edges are shown semi-transparently.
The official also said that it is used for testing and does not want to change the source code, so forget it.
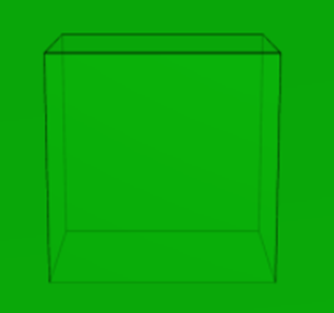
2. Use the shader
Determine whether the UV is in the edge range, and if so, display the border color.
The disadvantage of this is that it is thicker when it is close, and thinner when it is far away. The effect is not very beautiful. Haven’t found a better way.
Then give up. You can see that it is very thin in the distance and is about to disappear.

3. Use cube’s primitive line stroke**
Because the default cube vertex order is lower left, lower right, upper left, and upper right, a complete box cannot be formed if line_list or loop is used.
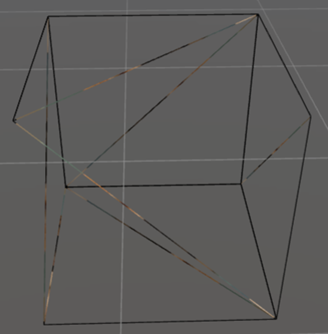
4. Use the static grid, which is also the current practice
This allows you to set the vertex order according to your own ideas. Change to lower left, lower right, upper right, upper left. Then I think it is better to frame a block every time in my world than to only frame the focused surface. So in the end only a border with 4 vertices is created. Using the line rendering mode can also meet the requirement that the distance will not become thinner.
Block texture
Originally, I wanted to find the texture map of my world directly. However, due to lack of ability, it is still impossible to find a suitable one. So I was so cruel, I just started doing it with PS. Using ps pixelation, it is very convenient to generate similar textures.

Put all the textures in a 512 picture, which can be used together.
Destroying particles
When breaking a block, play a particle animation at its position. Mesh particles are used, and the cube that comes with the engine is used.
Set to the gravity mode, use the curve to control the gravity to be small and then large, so that the generated particles stay for a while before falling.
Then there is the custom particle material, which sets the offset of the material based on the properties of the currently destroyed block. The texture uses the same one as the other blocks.

Character movement, collision, gravity, and simple animation
This part took the longest time, but the effect has never been good. T_T
Character movement
Press the direction key to record the direction of movement, and release it to reset the direction. Move based on the direction of movement in update.
The translate method of node, the second parameter passes 0 to the local coordinate system, and passes 1 to the world coordinate system. The world coordinate system I use needs to rotate the displacement vector according to the y-axis.
Character collision
Use octree to detect nearby blocks, and then use circle and polygon intersection to detect collision. If it collides, move in the opposite direction of the movement vector. Create a blocking effect.
Character gravity
Use the physical formula vt+0.5vtt to perform the vertical displacement of the character. Then use the collision principle to detect whether there is a collision. If it collides, set the acceleration of gravity to 0 and the velocity to 0. Resume acceleration until there is no collision.
Because the horizontal collision is corrected first, after the gravity displacement is performed, if there is a collision, it must be embedded in the soil. Can be corrected.
When jumping, set the speed to a positive value to achieve jumping.
The current effect only satisfies the basic displacement, collision and gravity, such as the feeling of jumping in front of the block, even the feeling of jumping is not in place. The collision was so hard that I often couldn’t move. Both require subsequent optimization.
Simple animation
When the character is not moving, he will breathe, that is, his hands will move up and down. When running, there will be camera shake. When removing blocks and adding blocks, there will be hand movements. These are relatively simple.
Terrain extension
Because Perlin noise is used, as long as you have the coordinates of the block, you can randomly generate natural and continuous terrain.
This part is where the performance is most tight. As long as other blocks are judged, 25 nearby blocks will be searched. Then create a new block and replace the old block with the new block’s grid. This part now takes 500ms, which is very laggy. Temporarily use asynchronous method to alleviate part of it. Then I added fog and it felt a little better.
And when a new block arrives, a new octree needs to be created. There will also be some consumption.
Terrain extension is currently the most unsatisfactory part, and it should be focused on and optimized in the near future.
Update record
Caton is mainly consumed in the creation of the octree. Previously, the octree construction was performed on the 25 nearby blocks based on the central block, so every time a new block is reached, there will be a lot of repeated construction waste, and now the octree construction is limited to each block , before querying, the block is first screened, and then the octree of the block is queried, which greatly improves the performance.
Quick Items Bar
This is part of the UI, not too difficult.
Listen for keyboard events and then toggle the state of the cell. When needed, call the interface of pushing items and using items to update the state. There is also linkage with the state of the hand, because when switching cells, if there are items in the cell, the hand needs to be replaced with the item model.
The difficulty lies in drawing the item ICON. So now only 3 squares have ICON.
Epilogue
Core skills include octree queries for scene management, ray detection for collision and interaction, Perlin functions for terrain randomization, and dynamic meshes for terrain display. Follow-up needs to optimize scene performance, add resources, NPC, archive, redstone, etc. For long-term study, it is still a very good project.
Main reference link
Originial topic
我用cocos做了个《我的世界》|征稿活动V5 - Creator 3.x - Cocos中文社区
Kylin’s discussion on graphics
https://www.mdnice.com/writing/c1c4ec1255164bc2997872745b63579e