Inner Stroke Effect for 2D Sprites
Original: https://forum.cocos.org/t/topic/156861
Author: BitByBit
Preface
When it comes to outlining, there are various implementation methods, especially for 3D outlining, which can be easily found online. However, 2D outlining topics are relatively scarce.
Outlining can be categorized into inner outlining and outer outlining. Inner outlining involves applying desired colors to pixels near the edges of the original image, while outer outlining extends beyond the edges of the image and applies colors.
Although the difference may seem insignificant, the implementation methods vary significantly. This article mainly focuses on inner outlining.
Principle
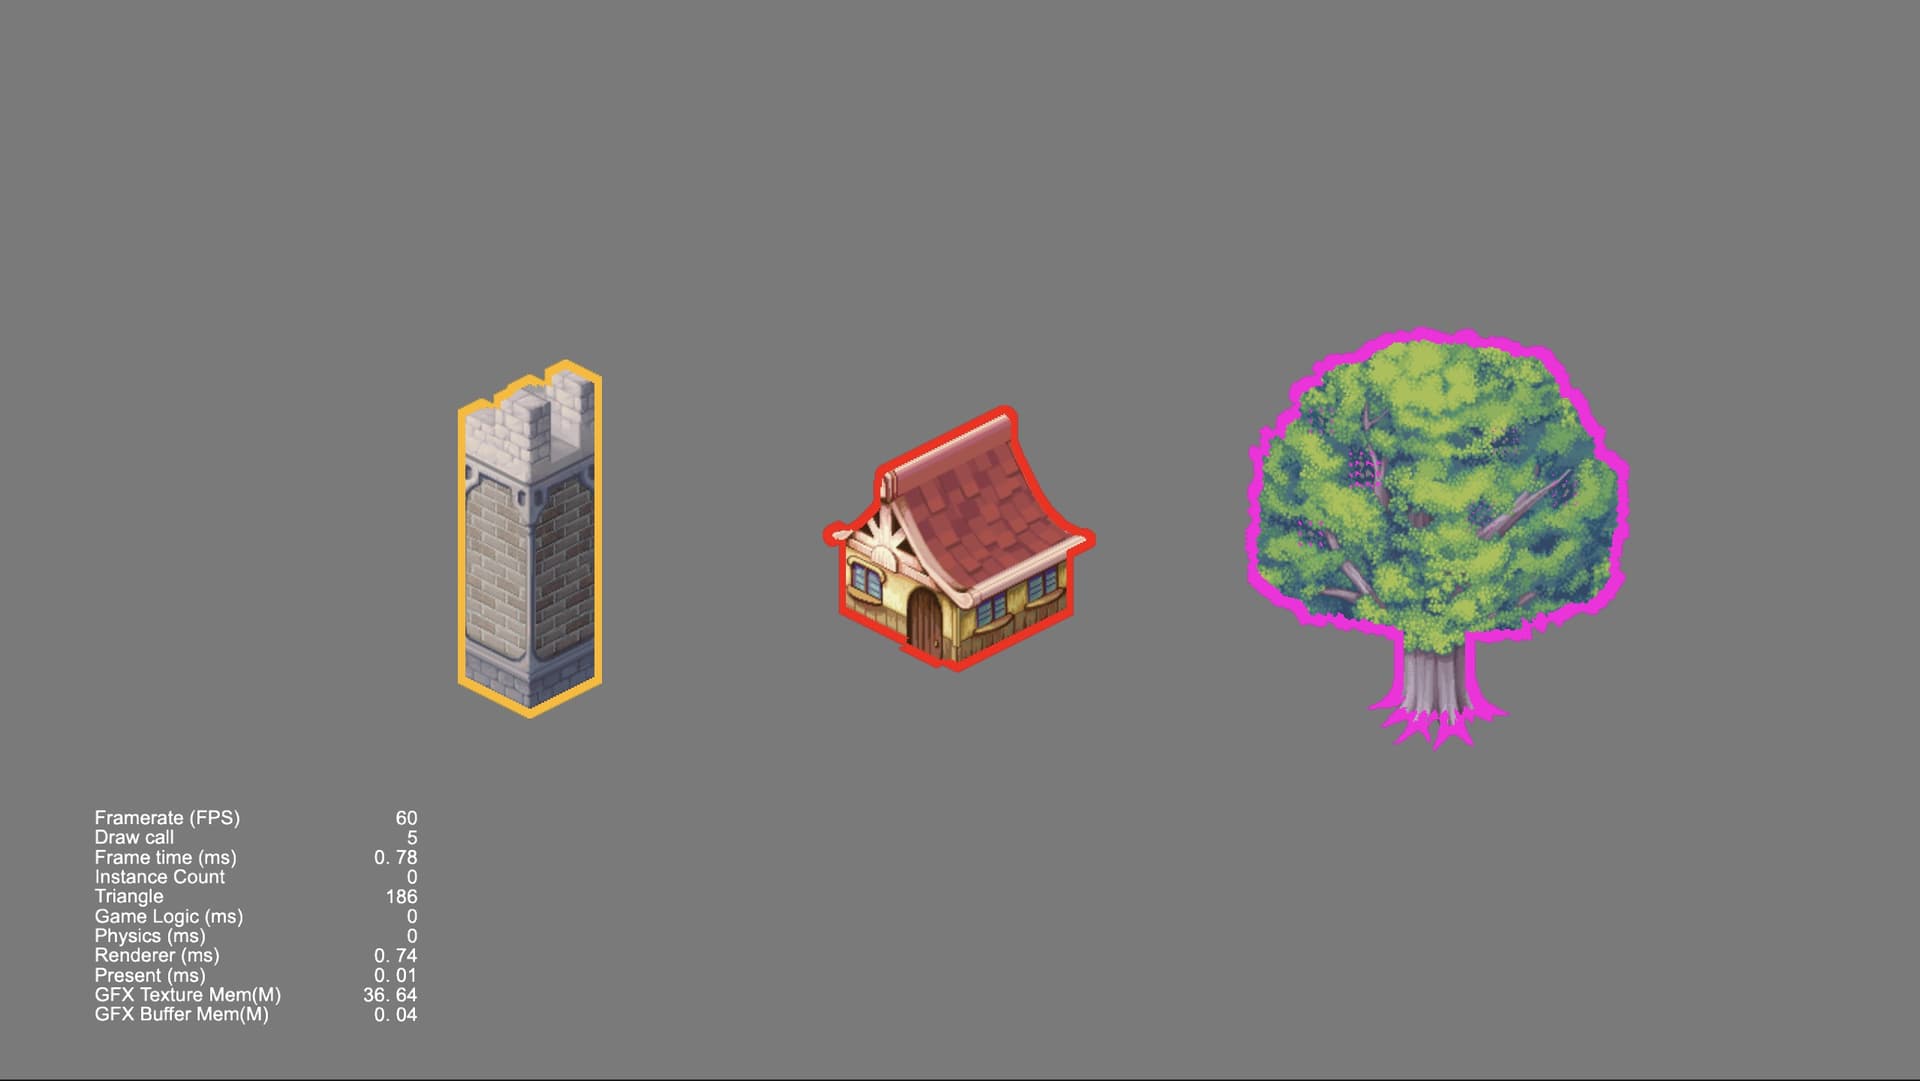
As mentioned above, inner outlining entails applying desired colors to pixels near the edges of the image. Therefore, the original image size remains unchanged, utilizing only the edge pixels. Thus, the implementation is relatively simple. It involves modifying the material itself and determining, within the shader, whether each pixel in the image is near the edge (with the degree of proximity being customizable). If it is, the outlining color is applied; otherwise, the original image color is retained.
Step 1: Finding The Edges
So, how can we determine whether a pixel in the shader is an edge pixel? Let’s take a look at the following image:
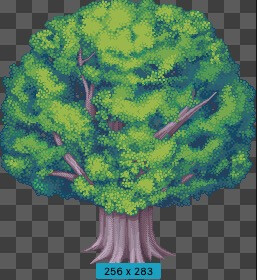
In this image of a tree, it’s obvious that aside from the main body of the tree, the rest of the pixels are hollow, meaning the alpha value of these pixels is 0, while the tree’s pixels have an alpha value greater than 0.
We can leverage this characteristic to identify the edges based on alpha values. The question arises: what distinguishes the alpha values of the tree’s edge pixels?
They are also greater than 0, but there are always some neighboring pixels with an alpha value of 0.
Therefore, within the shader, we can examine the surrounding pixels of each pixel to determine whether any of them have an alpha value of 0. If they do, then it’s an edge pixel. Here’s the code snippet:
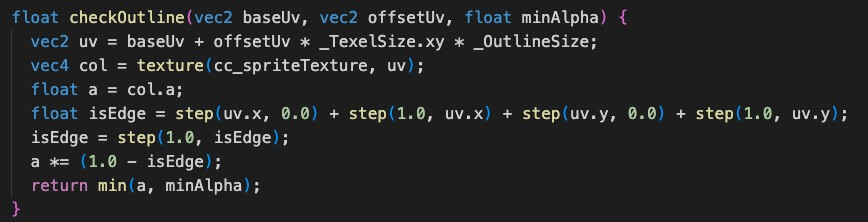
This concise code snippet constitutes the core algorithm. baseUv represents the current pixel’s UV coordinates, offsetUv denotes the UV offset, and minAlpha signifies the minimum alpha value. Let’s briefly explain this code.
Step 2: Calculating the UV of the Neighboring Pixel
Here, _TexelSize represents the texel size, which can be directly obtained in Unity but needs to be passed manually in Cocos. Observing the screenshot of the tree image above, with dimensions of 256 * 283, the texel size would be (1 / 256, 1 / 283).
_OutlineSize is a custom parameter representing the width of the outlining, as mentioned earlier. Then, we retrieve the alpha value of this UV pixel and compare it with the provided minAlpha. If the alpha value is smaller, we return 0, indicating that if we encounter a pixel with an alpha of 0, our return value will be 0. One line of code requires attention:
float isEdge = step(uv.x, 0.0) + step(1.0, uv.x) + step(uv.y, 0.0) + step(1.0, uv.y);
This line checks whether the UV coordinates have exceeded the boundaries of the image.
As we know, the UV coordinates of an image range from 0 to 1 (excluding repeats). If the coordinates surpass this boundary, we forcefully return 0.
Step 3: Obtain the Minimum Alpha
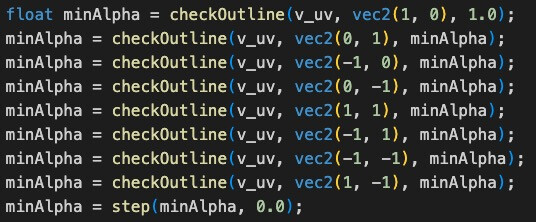
This step utilizes the edge-finding algorithm from Step 1. It iterates through the surrounding 8 pixels of the current pixel, obtaining the minimum alpha value.
If it’s 0, then it’s an edge pixel, and we assign the outlining color; if it’s greater than 0, we use the original image color. It’s quite straightforward.
Advantages:
The advantages of inner outlining are evident: it’s lightweight, requiring simple shader code for implementation.
Additionally, it allows for customization of outlining width and color for each image, offering great flexibility.
Disadvantages:
However, this flexibility comes with drawbacks. Since images may vary in size, different texel values need to be used, leading to the requirement for different materials for different objects.
Consequently, batching becomes impossible when dealing with numerous objects requiring outlining.
Additionally, a subtle issue arises: it’s not suitable for images with many small, scattered holes. The algorithm might mistakenly identify edge pixels around these holes, leading to incorrect rendering.
Another concern lies in image configuration; specifically, the Packable option must be disabled:
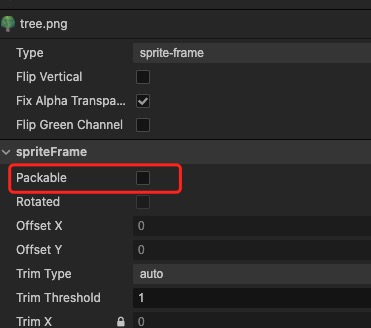
Enabling this option the engine will automatically merge fragmented images into an atlas.
Consequently, when the shader tries to identify edges, two images may be too close in the atlas, causing the algorithm to fail to recognize the edges, similar to the issue with small holes.
Conclusion
Therefore, if your outlining requirements are limited, or if the objects are uniform without intricate holes, and if there’s sufficient spacing between images within a single image or image atlas, then inner outlining is the best choice.
Otherwise, considering the issues mentioned, you may want to explore outer outlining, which I will discuss in the subsequent section.
I Hope this sharing can be helpful to you all, thank you.