
In the previous article, I shared with you how to integrate the existing CRP solution from Cocos Cyberpunk into your own projects.
In this article, I will demonstrate how to add your own post-processing effect to the CRP solution.
Cocos Cyberpunk is a complete open-source TPS 3D game developed by the Cocos Engine official team to showcase the engine’s capabilities in creating heavy 3D games and to boost the community’s learning motivation. It can be released to multi-platforms, such as Web, iOS, and Android.
This series of articles will analyze the source code from various perspectives to improve your learning efficiency. I hope to help you advance further in 3D game development.
Download the project source code for free at:
https://store.cocos.com/app/detail/4543
Today’s content is relatively simple, suitable for both juniors to explore and seniors for entertainment.
After integrating the CRP from Cocos Cyberpunk into their own projects, many friends got stuck on how to do the next. So they came and asked:
- How do I add a new Shader for the CRP?
- How is the CRP graph connected?
- I want to add my own effect, how do I do it?
Don’t worry, I’ve got you covered!
As you can see, I always maintain a clear structure in my articles - an introduction, main content, and conclusion.
This structure is very suitable for sharing learning content.
If you have any better suggestions, please feel free to let me know, and I will adjust accordingly.
Without further ado, let’s get started.
Content Outline
To add a new post-processing effect to the CRP in Cocos Cyberpunk, you only need to address the following questions.
- What post-processing effect to add
- How to write a Pass
- How to add a Pass to the pipeline
Let’s tackle them one by one.
Choose an Effect
Cocos Cyberpunk has already built-in two post-processing effects with more than 90% popularity: Bloom and TAA. If you want to add more, you could consider it.
- Lut
- Vignette
- DoF
- Motion Blur
- SSR
- SSAO
Except for LUT and Vignette, which are quite simple, the rest are challenging.
The list is just for your reference.
Let’s back on track, The purpose of this article is to demonstrate the workflow of adding a post-processing effect, so there is no need to make it too complicated. We will implement a simple effect.
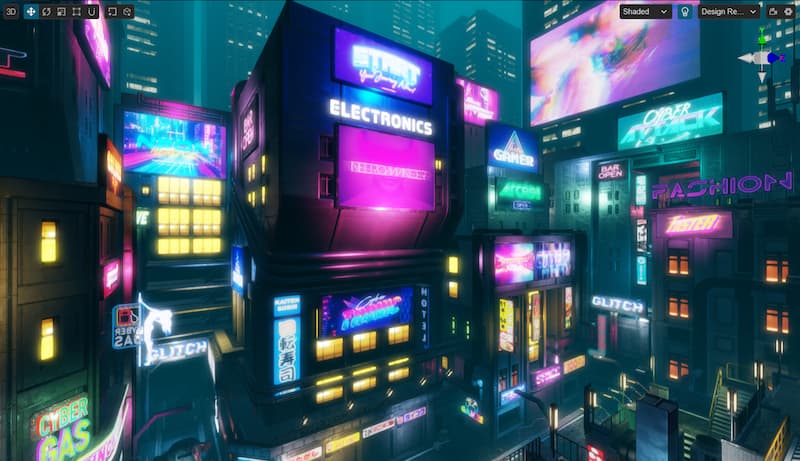
To make things easier, we can create an effect that turns the screen grayscale.
Although this effect is simple, it can be used as a screen grayscale effect when the player dies to enhance the game atmosphere.
Let’s start with a preview image to keep the audience engaged!
Write a Pass
Folder Contents
First, let’s look at the contents involved in a pass.
- pipeline/passes:Related scripts
- pipeline/resources/effects:Related shaders
- pipeline/resources/materials:Related materials
Pass Code
Next, we’ll ignore all principles and details for now, quickly implement a grayscale effect, and grasp the workflow.
1. Build from fxaa
Create a new TypeScript file named grayscale-pass.ts, and copy the contents from fxaa.ts.
2. Modify the content
Modify the code related to the class name as follows(check line by line):
@ccclass('GrayscalePass')
export class GrayscalePass extends BasePass {
    _materialName = 'grayscale';
    ...
    @property({ override: true })
    name = 'GrayscalePass';

    @property({ override: true })
    outputNames = ['GrayscalePassColor'];
    ...
    render(camera: renderer.scene.Camera, ppl: rendering.Pipeline){
      ...
      passUtils.addRasterPass(width, height, 'post-process', `Camera_Grayscale_Pass${cameraID}`);
      ...
    }
}
Remove the following code:
...
checkEnable () {
    return super.checkEnable() && !!HrefSetting.fxaa;
}
...
_offset = new Vec2
texSize = new Vec4
...
material.setProperty('texSize', this.texSize.set(width, height, 0, 0))
Alright, we have completed our grayscale-pass.ts.
Cocos Shader
Next, let’s create a Shader to turn the screen grayscale.
For quick implementation, we will first copy pipeline/resources/fxaa.effect and rename it to grayscale.effect.
Change to ‘main’ function content to the following:
void main () {
  vec4 color = texture(inputTex,v_uv);
  float Y = 0.2126 * color.r + 0.7152 * color.g + 0.0722 * color.b;
  fragColor = vec4(Y,Y,Y ,1.0);
}
To keep the shader code clean, let’s remove the unused parts and only keep the following.
#include <unpack>
#include <./chunks/fxaa>
...
uniform Params {
  vec4 texSize;
};
Be careful not to delete in vec2 v_uv; by mistake, make sure to keep it.
Now, our shader is ready to use.
Material
Creating the material is the easiest part. You just need to copy the pipeline/resources/fxaa.mtl file in Cocos Creator and rename it to grayscale.
Then, set its effect to grayscale.effect.
Now, We are successfully created a GrayscalePass.
Add The New Pass to CRP Graph
Material Loading
-
Double-click pipeline/resources/pipeline.prefab.
-
In the Inspector panel, find out the PipelineAssets component.
-
Increase the number next to the Materials property( If you haven’t changed it, it should be 8, we’ll change it to 9), and you will see an empty element appear at the bottom.
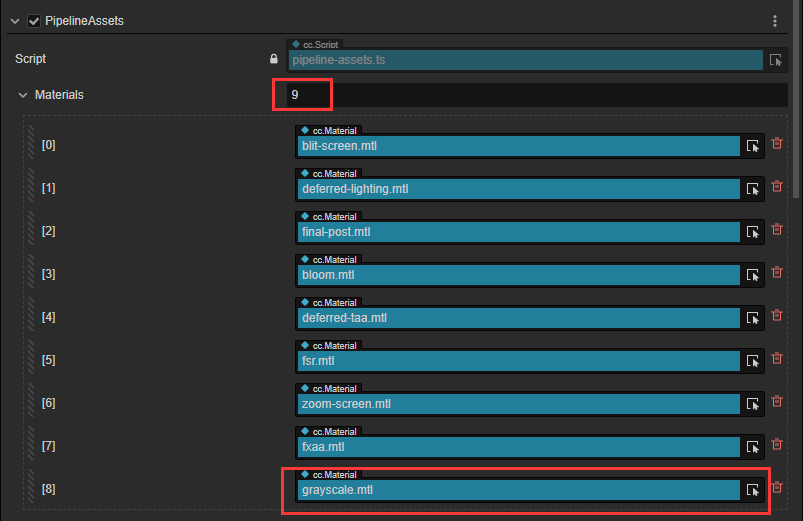
4、Drag pipeline/resources/materials/grayscale.mtl into the empty element, then save pipeline.prefab.
The material will be loaded when the pipeline starts.
Adding GrayscalePass to Graph Data
To be able to add nodes in the CRP Graph, we first need to register the GrayscalePass in the graph data.
Open pipeline/graph/nodes/pass.ts, and add the following line of code at the end:
createPassGraph(BasePass);
createPassGraph(BloomPass);
...
//GrayscalePass
createPassGraph(GrayscalePass);
Adding the Node
Follow the steps I have mentioned previously.
Well, never mind, let’s go through it from scratch.
Open CRP Graph
- Create a new empty node
- Drag the pipeline/graph/pipeline-graph.ts component onto this node
- Check the Edit checkbox, it will pop up the RenderPipeline Graph window
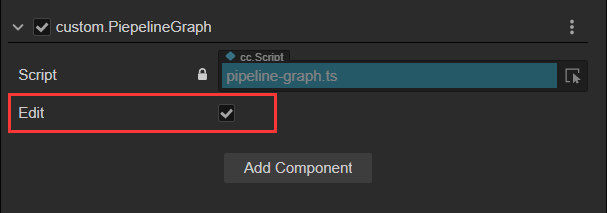
You should see a window like this:

If the CRP Graph window displays nothing, it’s possible that the content of graph-data.ts has been lost. You can fix this issue by copying it from a backup of the Cocos Cyberpunk project.
Adding GrayscalePass
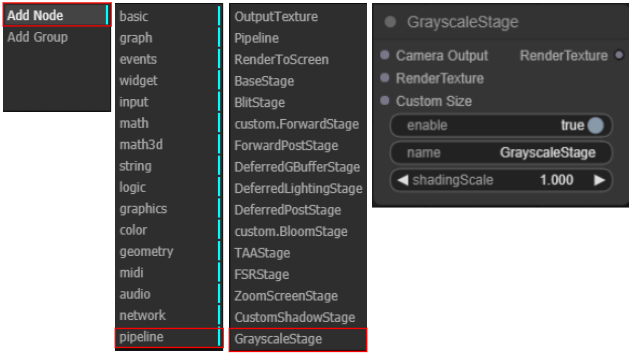
Right-click in the window to bring up the first-level menu, then choose the AddNode item.
In the new menu that pops up, select pipeline ( at the very bottom)
Next, in the new menu that appears, choose GrayscalePass ( at the bottom)
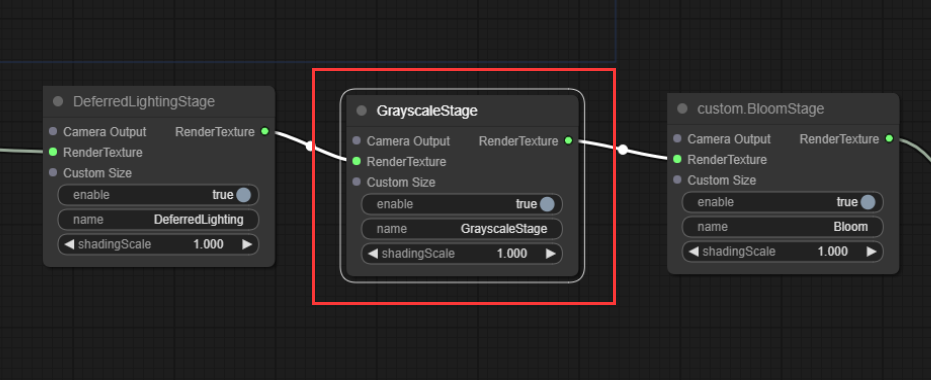
You’ll now have a GrayscalePass node.
Place it in an appropriate position within the main pipeline, In this example, I placed it before the BloomPass.
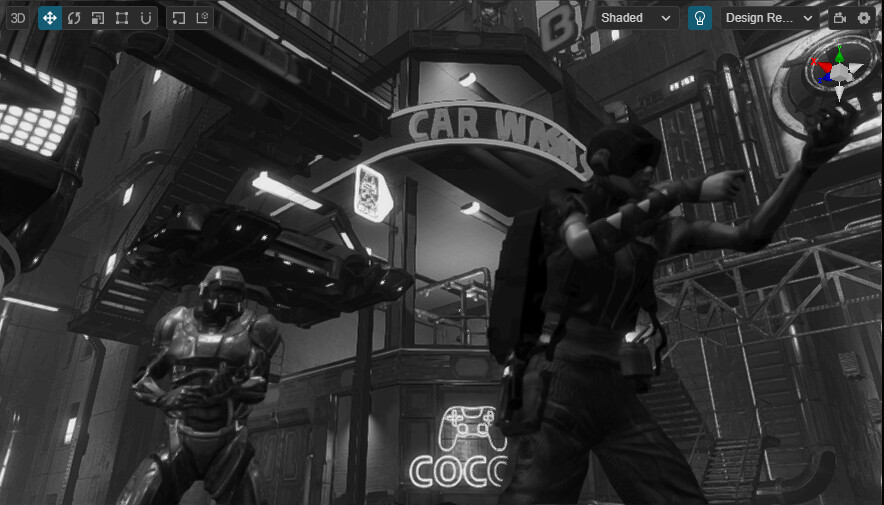
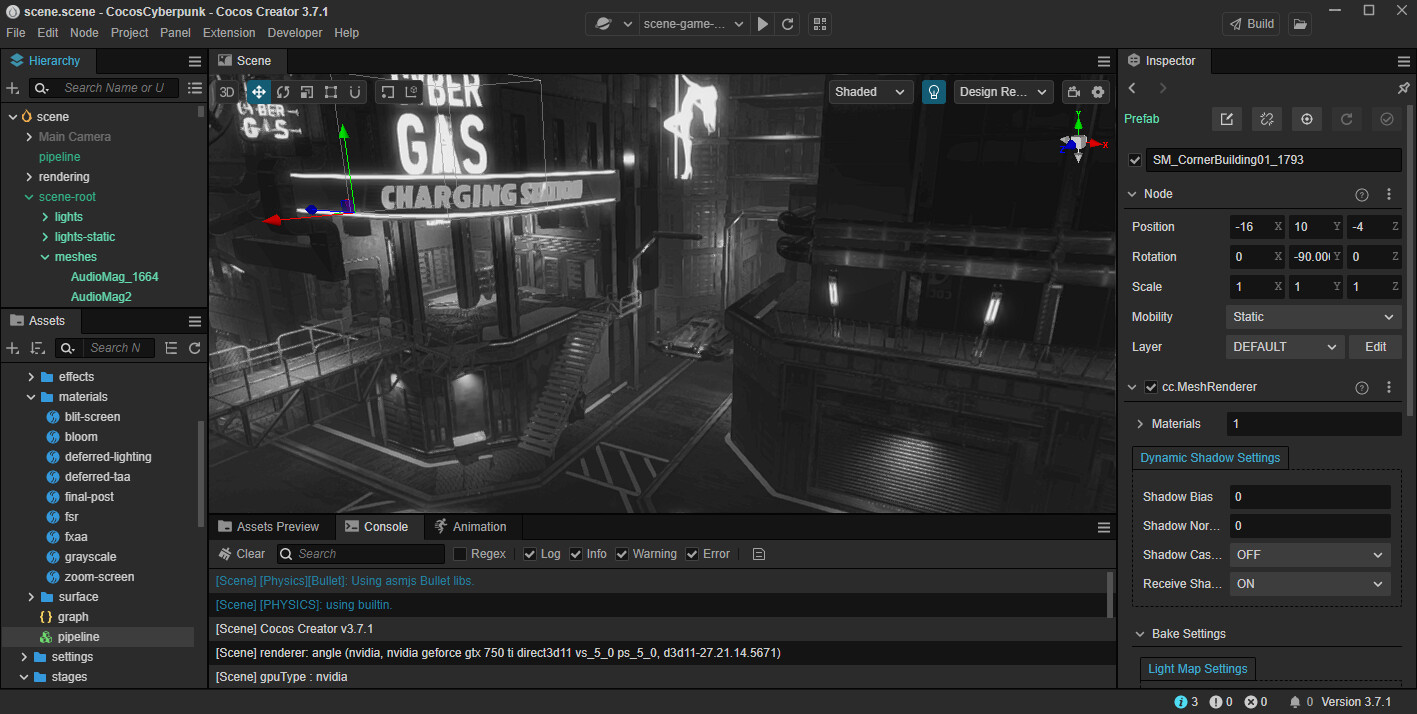
Close this window and return to Cocos Creator editor, and you’ll see the screen turning grayscale.
Wrapping Up
That’s all for today.
Although we didn’t analyze the details and implementation principles of the pipeline, by learning from FXAA, we’ve implemented a post-processing effect that turns the screen grayscale.
This is called: standing on the shoulder of giants.
In the next article, we will explain the design of custom pipelines from a theoretical perspective.
The subsequent articles will cover explanations of forward pipelines, deferred pipelines, BLOOM, TAA, FSR, and more.
In the later articles, more advanced features will be added based on this pipeline, including but not limited to SSR, SSAO, SunShaft, etc.
Of course, many people are asking about native development-related features, and Cocos Cyberpunk has done a lot of optimizations and compatibility processing for the native platform. This content will be shared in future articles, so stay tuned.