
Cocos Creator: Getting started with WeChat games (Part VII)
Note: This is a multi-part tutorial: Part 1 | Part 2 | Part 3 | Part 4 | Part 5 | Part 6
Introduction and getting help
You are welcome to post to the Cocos Creator category on the Cocos forums to talk about any issues you encounter during the development process. This tutorial does not teach how to code.
Please prepare your development environment before starting this tutorial. If you are having trouble with our tutorial, please take a look at the following documentation:
Preparing the development environment:
Let’s begin!
Perhaps you didn’t notice that the original name of this tutorial was: Kitten Fishing? It seems that we have not seen our kitten yet!

OK, don’t worry, the kittens will appear soon.
Starting with Animations
In this tutorial, mainly covering the animation of kittens, we also make the art resources of the entire game better through animation events.
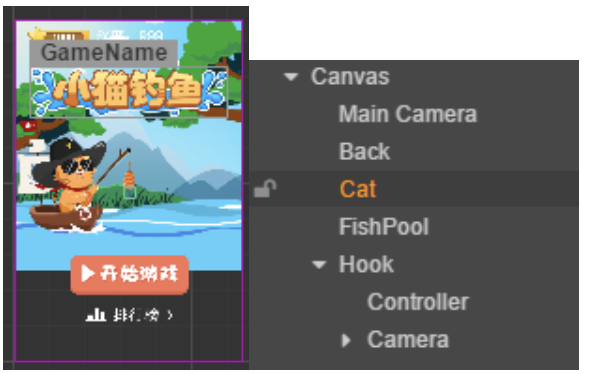
First, let’s create two Sprite nodes in the scene, one is the kitten Cat node, and we will use animations to move it later. The second node will hold a background image. Let’s replace the original blue background we have been using.
Let’s start to animate the kitten. To do this, please have an understanding of Animation systems.
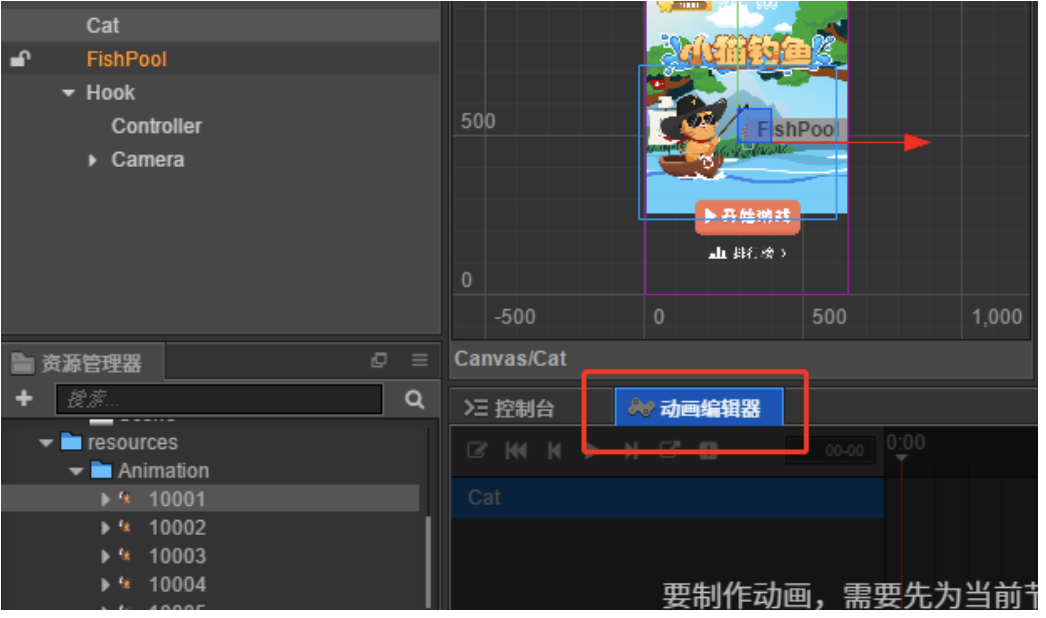
Next, select the Cat node and switch to the animation editor interface at the same time. If you have not adjusted the editor’s interface layout, then the animation editor is in this position:
Third, click the Add Animation Component button to add an animation component to the Cat node.
Fourth, click the New Animation Clip button in the animation editor to create a new animation clip file according to the pop-up window.
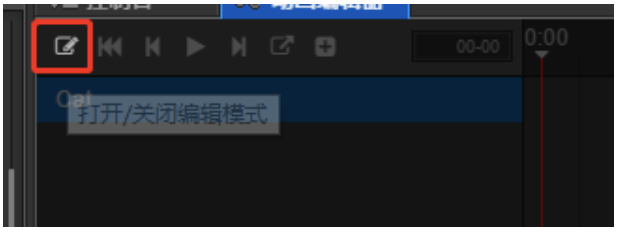
Fifth, after creating the new animation clip, click the edit button in the upper left corner of the animation editor to start editing.
We use frame animation to complete the kitten’s action sequence. Remember to turn off the Trim property of the Cat node, which prevents automatic cropping.

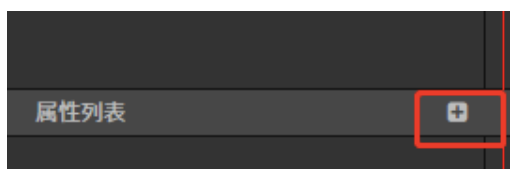
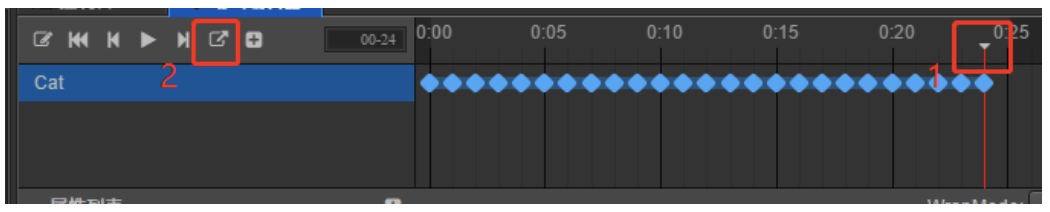
Sixth, click the plus button next to the property list in the animation editor. Select cc.Sprite.spriteFrame to add a track. We use the word track to describe the node animation data.
Seventh, drag the frame animation image resource from the Explorer to the track you just created.

Previewing
Let’s click on the Preview button to see how this game is playing and preview the new animations that were created.
OK, there is no problem with the animation frame sequence, but it seems that the whole animation plays a bit too fast. Let’s keep fine-tuning this game!
Fine-tuning
Adjusting the frame rate.
There are two ways to adjust the playback time of the animation frame sequence.
First method:
The default animation frame rate is 60 frames. This means that the spriteframe is being replaced every frame. Increasing the interval between each keyframe bu moving the keyframes with the mouse.
Second method:
Change the sample frame rate and speed of the animation. Changing the speed parameter from 1 to 0.5 will help! Click the edit button at the top left of the animation editor to exit editing and save.
Take a look at the Animation component in the Cat node’s Property inspector. Notice that the Cat node’s animation list already has our edited CatAnim animation.

The following code can be set in the script:
var anim = this.getComponent(cc.Animation);
anim.play();
or:
anim.play('CatAnim'); // play the specified animation
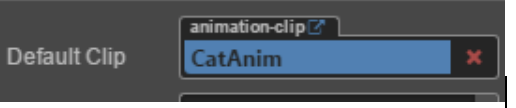
Note: when
anim.play()has no animation name as a parameter, it will play the DefaultClip animation. This means the DefaultClip needs to be set:
At this point, you should feel comfortable adding a script to the Cat node and create a startAnim() method in the script to control the animation playback. It should be called by clicking the start game button and the one more game button.
startAnim () {
  var anim = this.getComponent(cc.Animation);
  anim.play('CatAnim'); // play the specified animation
}
Final adjustments
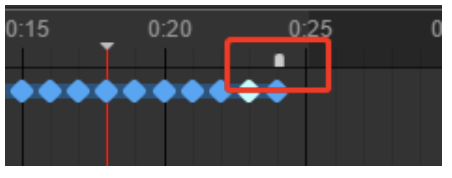
First, we need the fish hook to start to sink after the kitten’s fishing rod is played. To achieve this effect, we need to add a frame event. When the animation plays to the last frame, the hook sink code is executed through the event callback. Adding frame events is simple. If you have questions, please refer to the documentation at the start of this tutorial.
Second, open the animation, select the last keyframe, and click the AddEvent button next to the plus button in the upper left.
At this time we can see a small white mark on the timeline, this is the frame event we added
Double-click the small marker of the frame event, enter the callback method name and click the +,- buttons to increase or decrease the parameters.
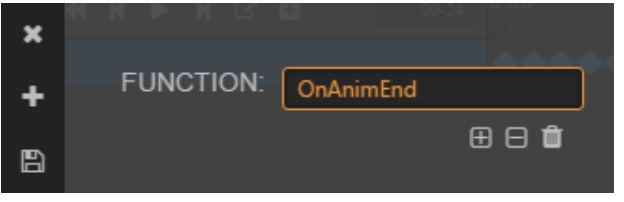
After editing, click Save on the left and implement a callback method in the script of the node. Example:
var Hook = require("Hook");

cc.Class({
  extends: cc.Component,

  properties: {
    mHook : cc.Node
  },

  start () {

  },

  startAnim () {
    var anim = this.getComponent(cc.Animation);
    anim.play('CatAnim'); // play specified animation
  },

  OnAnimEnd () {
    var pHook = this.mHook.getComponent("Hook");
    pHook.StartLine();
  }
});
Last, re-adjust the click event of the start game button and one more game button.
Conclusion
You have completed all 7 parts of this tutorial. Congratulations!!.
