
Cocos Creator: Getting started with WeChat games (Part III)
Introduction and getting help
You are welcome to post to the Cocos Creator category on the Cocos forums to talk about any issues you encounter during the development process. This tutorial does not teach how to code.
Please prepare your development environment before starting this tutorial. If you are having trouble with our tutorial, please take a look at the following documentation:
Preparing the development environment:
Let’s begin!
In the previous tutorials, we completed initial work on moving the fish around. In this tutorial, we need to put the fish into the scene through a PreFab.
It may seem that putting fish into the scene is a simple task. However, you don’t know how long the player can stay alive. This means you should consider using an unlimited number of fish versus placing fish one by one.
What is a Prefab?
When a game needs a lot of objects and resources to be used repeatedly, using a Prefab can help to quickly generate the same or similar game resources. In this case, the fish need to be generated quickly. Prefab has the following features:
- Can be placed in multiple scenes, or it can be placed multiple times in the same scene.
- When Prefab is added to the scene, a new instance is created, which is essentially a clone of Prefab.
- When Prefab selects automatic synchronization, no matter how many Prefab instances are placed in the scene, all instances will be synchronized as long as the Prefab is modified.
If you have questions, please refer to the Prefab documentation
Taking a closer look at Prefab
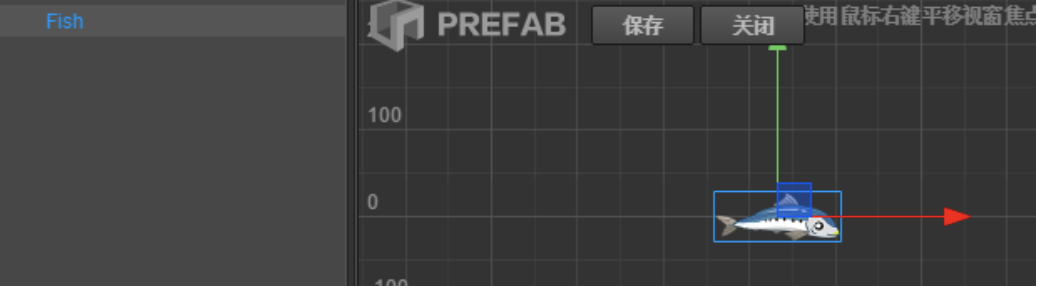
Creating a Prefab is very simple. After editing the Node in the Scene, use the mouse to drag the node from the Hierarchy Manager to the Resource Manager to create a Prefab.

First, double-click on the Prefab in Assets to start editing the Prefab. After editing the Prefab, click Save.
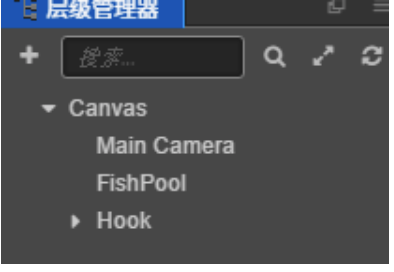
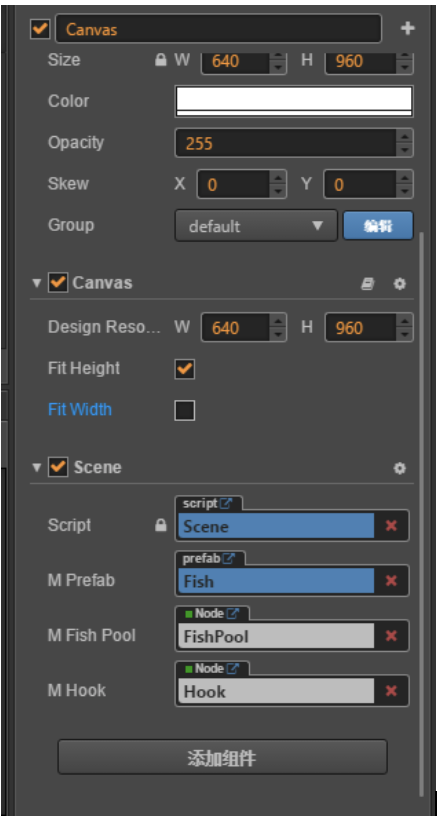
Next, we create a script for the Scene and add it under Canvas. In the update scene script, we need to create an instance of fish.
Third, at the same time, in the Scene, create an empty node named FishPool, which is used as the parent node of all fish and convenient for node management.
Example code:
cc.Class({
    extends: cc.Component,

    properties: {
        mPrefab : {
            default : null,
            type : cc.Prefab
        },
        mFishPool : {
            default : null,
            type : cc.Node
        },
        mHook : {
            default : null,
            type : cc.Node
        },
        mDepth : {
            default : 0,
            type : cc.Float,
            visible : false
        },

    },

    // LIFE-CYCLE CALLBACKS:

    // onLoad () {},

    start () {

    },

    update (dt) {
        var depth = Math.floor(Math.abs(this.mHook.y) / 100);// 100pixel = 1 m
        if (depth - this.mDepth > 0)//One fish per 1m
        {
            var fish = cc.instantiate(this.mPrefab);
            fish.x = Math.random() * 640 - 320;// Random X-axis coordinates
            fish.y = this.mHook.y - 480 - 100;// Generated in advance under the visible range of the screen
            this.mFishPool.addChild(fish);
        }
        this.mDepth = depth;
    },
});
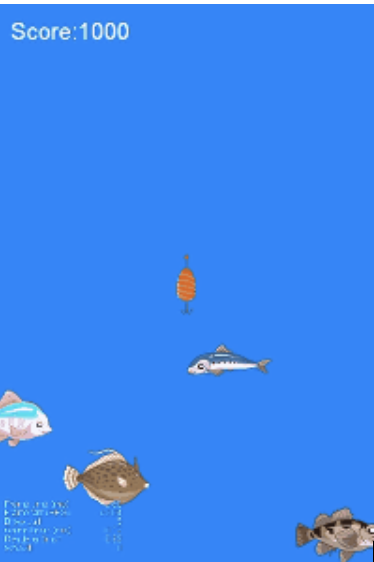
Our first preview
Let’s click on the Preview button to see how everything is working:

So far, the game is running as expected. We still have some details to add.
Continuing to add functionality
One interesting issue. The current fish has only one appearance, which looks very monotonous, and the mechanism of generating a fish per 1m does not make a fun level.
We need to enhance the gameplay.
Before we do this, let’s create some level data that defines the following: depth (how much depth to refresh the fish), fish resource path, fish movement speed.
First, create a new JSON file, named Scene.json. Populate it with the following data:
[
    {"depth":1,"res":"Fish/fish01","speed":1},
    {"depth":2,"res":"Fish/fish02","speed":1},
    {"depth":3,"res":"Fish/fish03","speed":1},
    {"depth":4,"res":"Fish/fish04","speed":1},
    {"depth":5,"res":"Fish/fish05","speed":1},
    {"depth":6,"res":"Fish/fish06","speed":1},
    {"depth":7,"res":"Fish/fish07","speed":1},
    {"depth":8,"res":"Fish/fish08","speed":1},
    {"depth":9,"res":"Fish/fish09","speed":1},
    {"depth":10,"res":"Fish/fish10","speed":1}
]
Add the following code to the scene script we created previously. Example:
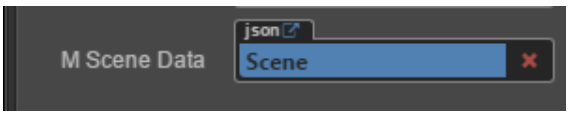
mSceneData : {
            default : null,
            type : cc.JsonAsset
        },
If you have questions, please refer to the JSON resources documentation
Next, modify the scene script:
cc.Class({
    extends: cc.Component,

    properties: {
        mPrefab : {
            default : null,
            type : cc.Prefab
        },
        mFishPool : {
            default : null,
            type : cc.Node
        },
        mHook : {
            default : null,
            type : cc.Node
        },
        mDepth : {
            default : 0,
            type : cc.Float,
            visible : false
        },
        mSceneData : {
            default : null,
            type : cc.JsonAsset
        },
        mIndex : {
            default : 0,
            visible : false
        }
    },

    // LIFE-CYCLE CALLBACKS:

    // onLoad () {},

    start () {

    },

    update (dt) {
        this.mDepth = Math.floor(Math.abs(this.mHook.y) / 100);// 100pixel = 1 m
        let data = this.mSceneData.json[this.mIndex];
        if (data != undefined && this.mDepth >= data.depth)//Generate a fish when it reaches the configured location
        {
            var fish = cc.instantiate(this.mPrefab);

            cc.loader.loadRes(data.res,cc.SpriteFrame,function(err,spriteFrame){
                if (!err)
                    fish.getComponent(cc.Sprite).spriteFrame = spriteFrame;
            });//change the sprite

            fish.x = Math.random() * 640 - 320;//Random X-axis coordinates
            fish.y = this.mHook.y - 480 - 100;//generate ahead of the screen visible range
            this.mFishPool.addChild(fish);
            this.mIndex++;
        }
    },
});
We use cc.loader.loadRes to load the resources and then replace the resource after the loading is finished.
If you have questions, please refer to the Dynamic Loading Resources documentation
Conclusion
This tutorial is starting to take shape!
Stay tuned for Part 4 of this tutorial!