
Super Mario in Cocos Creator
This tutorial demonstrates how to quickly and flexibly use Cocos Creator to design the Super Mario classic game. Do you remember it?

Prerequisites
Please review the following documentation:
This tutorial is based on the Cocos Creator v2.x version. If you don’t yet have Cocos Creator you can Download and install it.
Getting started
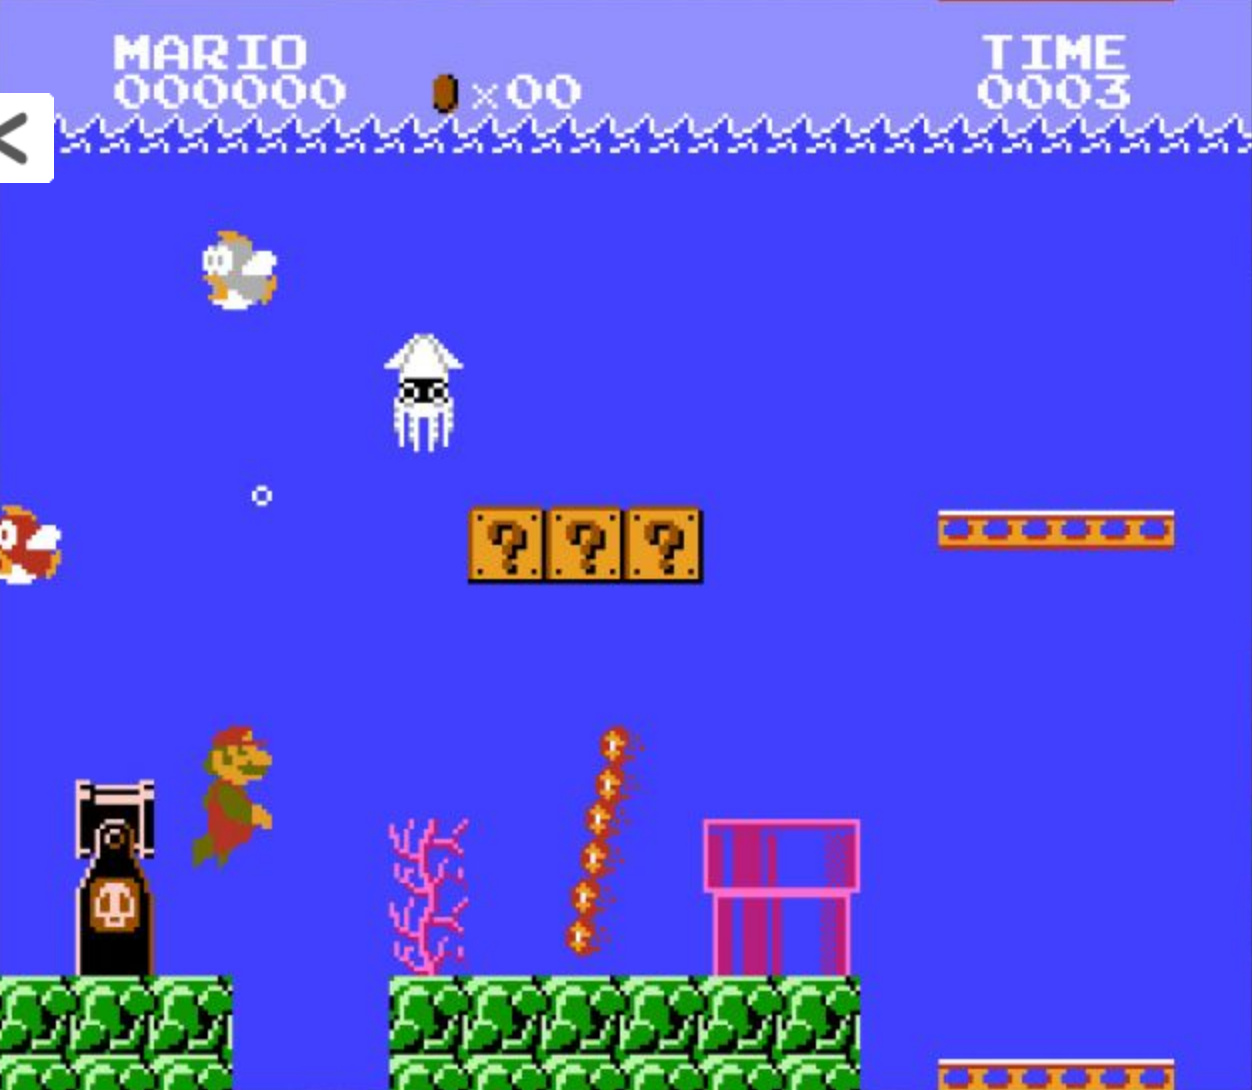
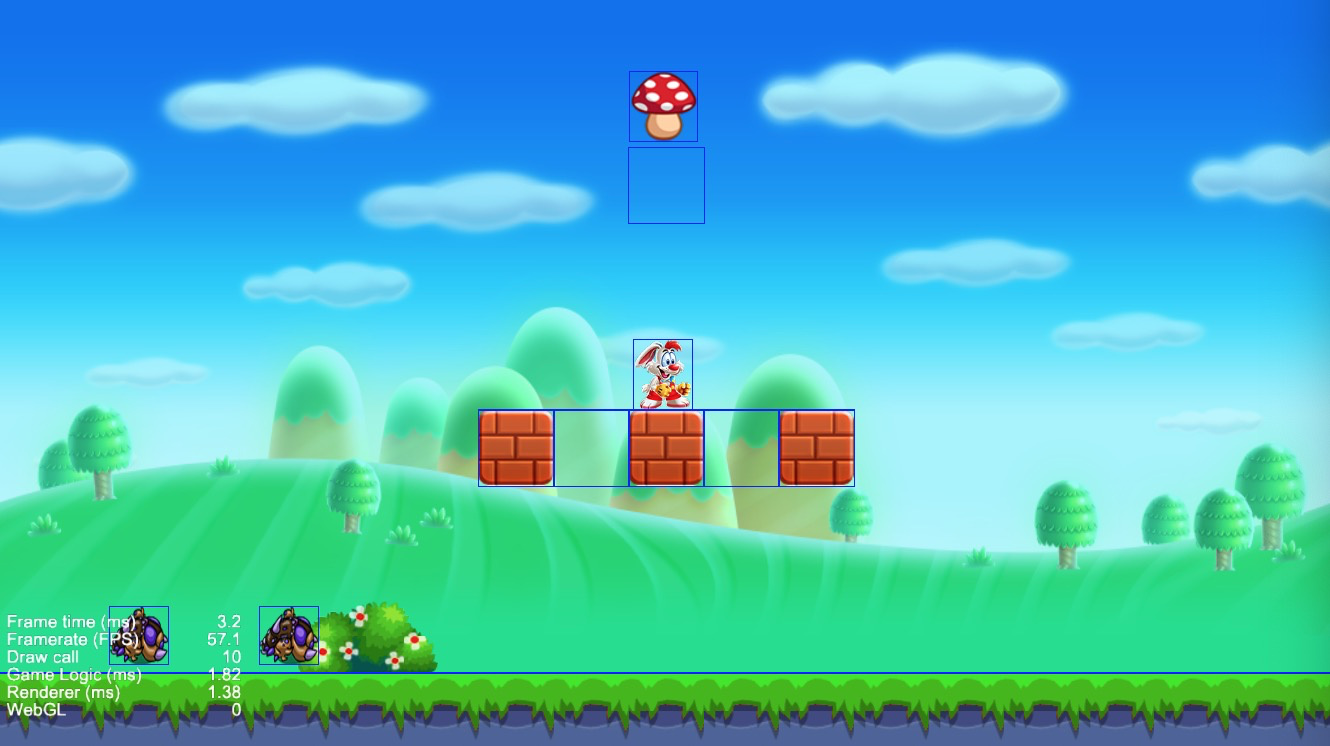
Let’s take a look at the effects we want to achieve (all art resources come from the Internet).
Game Scene Design
Referring to Super Mario’s worldview, we build our world node tree in Node Manager first, add a Camera object, background layer, world root, map, and a player (role) node.

Add the Main Camera
A Camera acts as a window for the player to observe the game world. By default, Cocos Creator automatically assigns a camera to the Scene, this means we don’t need to add one manually.
Add a Main Root Node
We need to setup a few items and scripts to get our game naded in the right direction. Let’s perform the following actions:
-
Add an empty
Nodeand rename it to World Root. World Root will act as our main container for adding object nodes in the game. -
Create the script,
world.tsand drag it into the Node Properties Panel. Next, configure the game world parameters, such as setting the value of the gravitational acceleration G. Here is some example code:// world.ts const {ccclass, property} = cc._decorator; @ccclass export default class CWorld extends cc.Component { @property() WorldFallG: number = 0; @property() WorldWalkA: number = 0; static G: number = 0; static WalkA: number = 0; // LIFE-CYCLE CALLBACKS: onLoad () { CWorld.G = this.WorldFallG; CWorld.WalkA = this.WorldWalkA; } start () { // enable Collision System cc.director.getCollisionManager().enabled = true; cc.director.getCollisionManager().enabledDebugDraw = true; cc.director.getCollisionManager().enabledDrawBoundingBox = true; } // update (dt) {} } -
Create the script
lookat.tsand drag it into the Node Properties Panel to synchronize the world perspective based on the location of the Player Node. Here is some example code:// lookat.ts const { ccclass, property } = cc._decorator; @ccclass export default class NewClass extends cc.Component { @property(cc.Node) target: cc.Node = null; @property(cc.Node) map: cc.Node = null; boundingBox: cc.Rect = null; screenMiddle: cc.Vec2 = null; minX: number = 0; maxX: number = 0; minY: number = 0; maxY: number = 0; isRun: boolean = true; // LIFE-CYCLE CALLBACKS: onLoad() { this.boundingBox = new cc.Rect(0, 0, this.map.width, this.map.height); let winsize = cc.winSize; this.screenMiddle = new cc.Vec2(winsize.width / 2, winsize.height / 2); this.minX = -(this.boundingBox.xMax - winsize.width); this.maxX = this.boundingBox.xMin; this.minY = -(this.boundingBox.yMax - winsize.height); this.maxY = this.boundingBox.yMin; } update() { if (!this.isRun) return; let pos = this.node.convertToWorldSpaceAR(cc.Vec2.ZERO); let targertPos = this.target.convertToWorldSpaceAR(cc.Vec2.ZERO); let dis = pos.sub(targertPos); let dest = this.screenMiddle.add(dis); dest.x = cc.misc.clampf(dest.x, this.minX, this.maxX); dest.y = this.minY; this.node.position = this.node.parent.convertToNodeSpaceAR(dest); } }

Adding a role (Player)
The Player node, is the focus of the game world perspective and we will control it to do what we want.
Adding a map (Tiled Map)
The map resource, _level01 is created by Tiled. Cocos Creator supports TiledMap v1.0. Drag level01 into the World Root node. The map node will be generated automatically. You can view map levels by expanding the TiledMap.

We need to instantiate the TiledMap. We can create worldmap.ts script to do the work. The following figure shows the Prefab resources binding for the map level objects we have configured in Tiled.

The instantiation of a map object is divided into several steps:
- Prefab resources corresponding to the instantiation type
- Set up a collision group
- Set the object size
- Add collision components
- Set the type tag of the object
In worldmap.ts, the instantiation of a water object is as follows:
// worldmap.ts
// get waters layer and traverse all water objects.
var waters = this.worldMap.getObjectGroup(this.waterLayerName);
for (var i = 1; i < 8; i++) {
  var waterName = 'water' + i;
  var waterBlock = waters.getObject(waterName);
  var waterNode = cc.instantiate(this.ColliderPreName);

  // set group name for Collider System.
  waterNode.group = 'water';

  // set size
  waterNode.width = waterBlock.width;
  waterNode.height = waterBlock.height;
  waterNode.x = waterBlock.x;
  waterNode.y = waterBlock.y - waterBlock.height;

  // add collider component.
  waterNode.addComponent(cc.BoxCollider);
  waterNode.getComponent(cc.BoxCollider).size = cc.size(waterNode.width, waterNode.height);
  waterNode.getComponent(cc.BoxCollider).offset =
    new cc.Vec2(waterNode.width / 2, -waterNode.height / 2);

  // set tag for check when collision.
  waterNode.getComponent(cc.BoxCollider).tag = 6;
  this.node.addChild(waterNode);
}
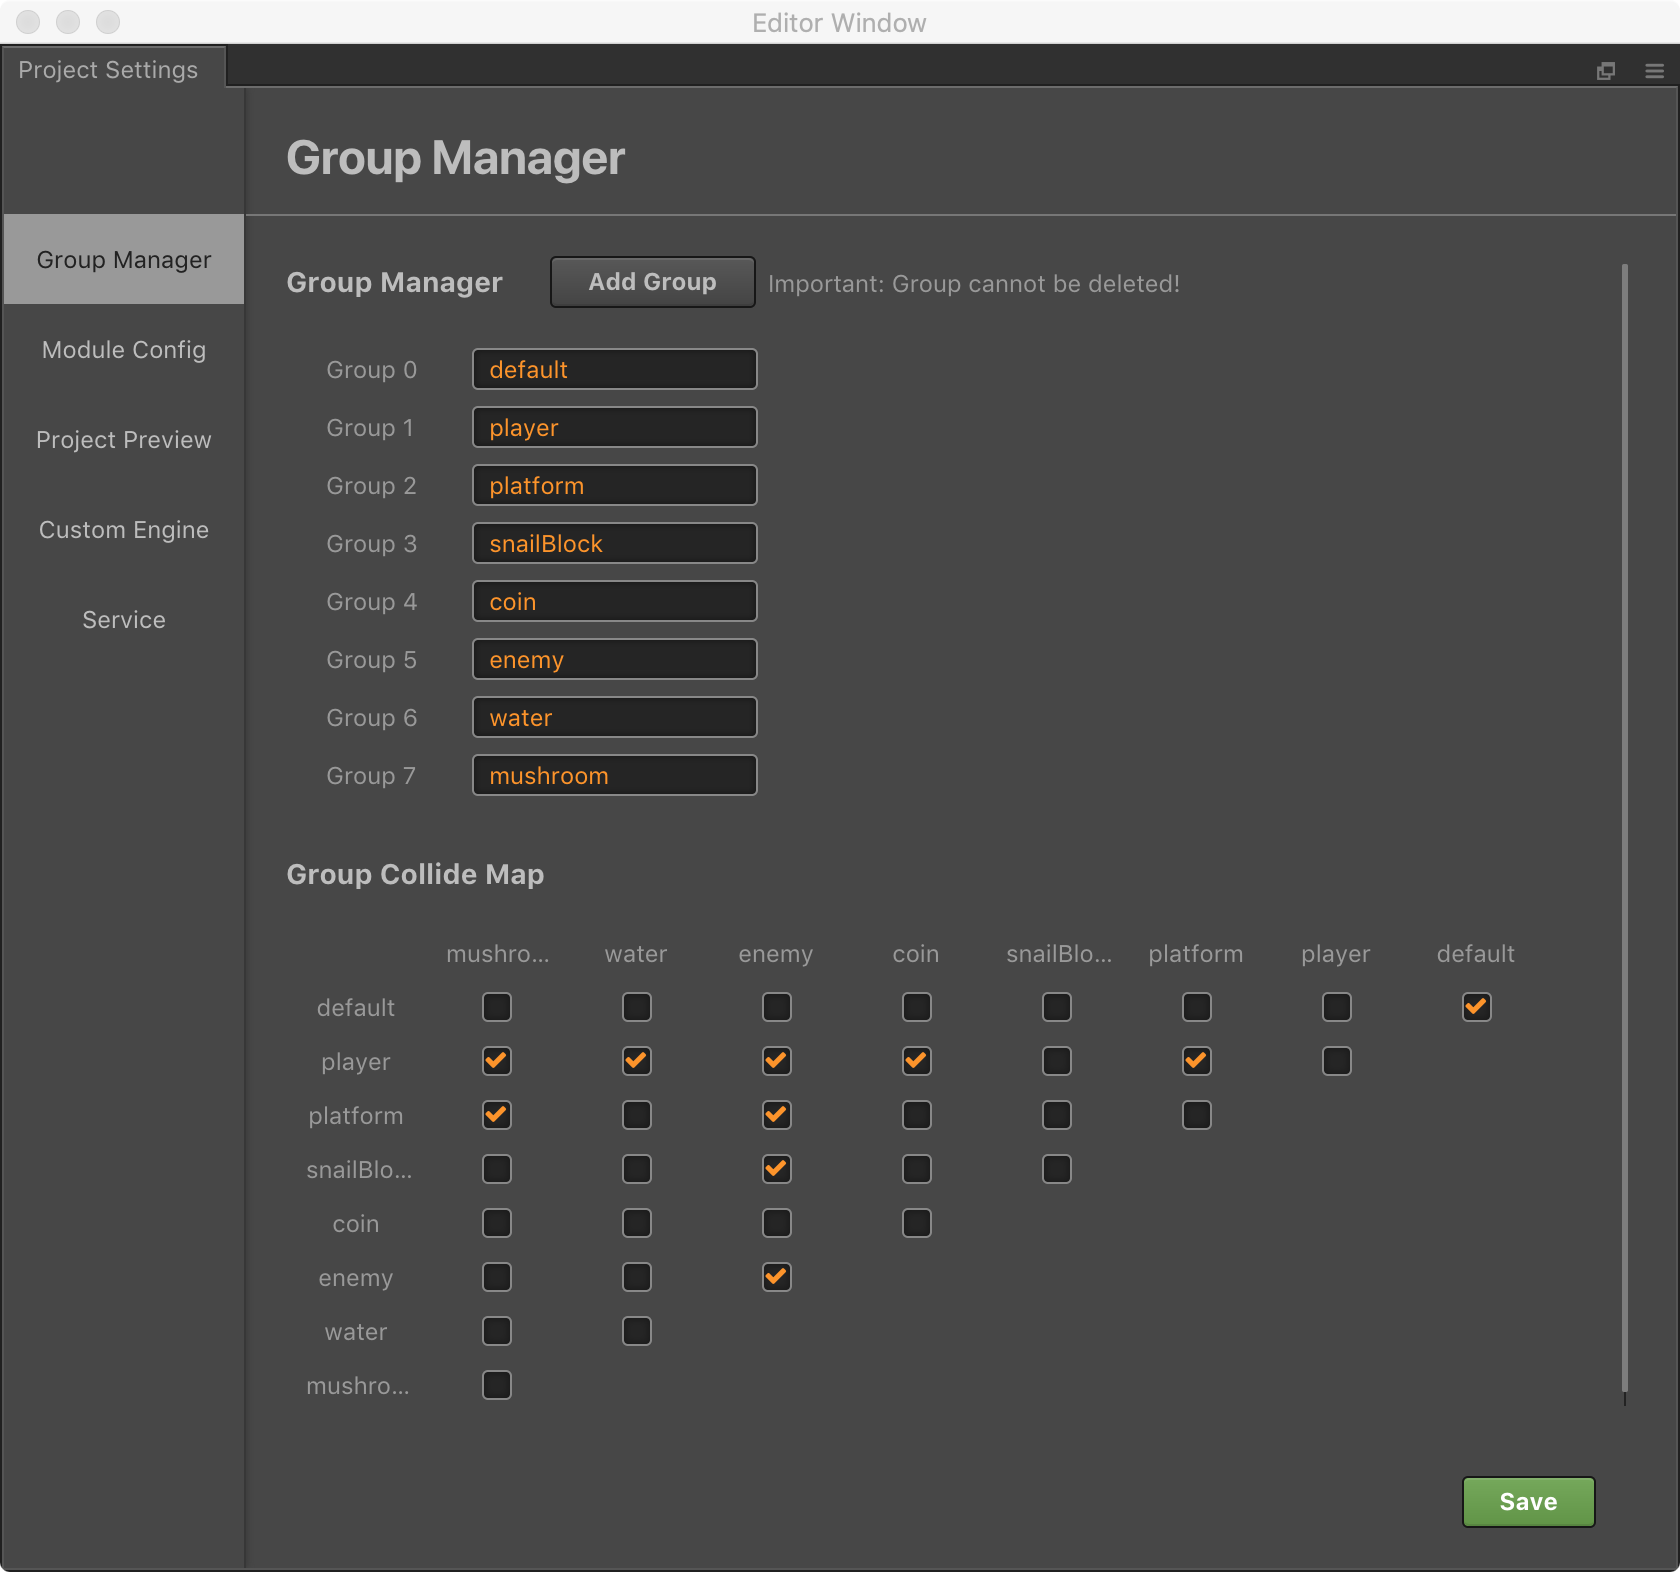
Adding collision rules
World objects contain characters, ground, squares, gold coins, beetles, water, mushrooms and more. But how do we respond to interactions between these objects? It’s easy, we need to create collision groups to help constrain the collision rules between all the types of objects we have in our game.
Game Object Design
The game objects are categorized into Prefab objects, according to their own characteristics. Our Prefab object will add the following characteristics to our objects:
- Collision
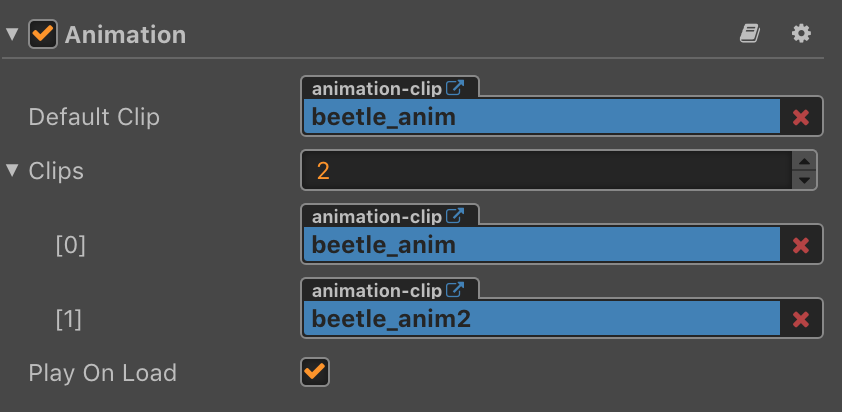
- Animation
- Sound
- Behavior
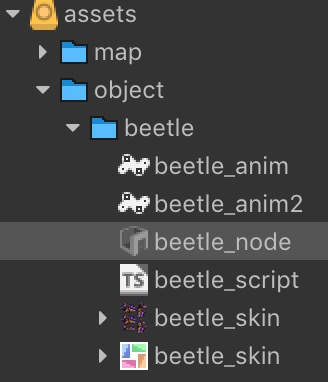
Object Prefab production
For example, here is the Beetle’s resource directory, which contains the Beetle animation file beetle_anim, the Prefab resource beetle_node, the skin file beetle_skin, the behavior control script beetle_script.
Add an Action Components to the beetle Prefab:
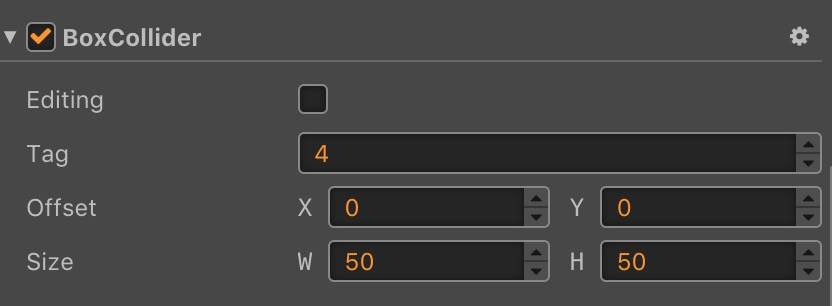
Add a Collision Component to the beetle Prefab:
Add a Script Component to the Beetle Prefab to set the speed, zoom factor, sound effects, etc.
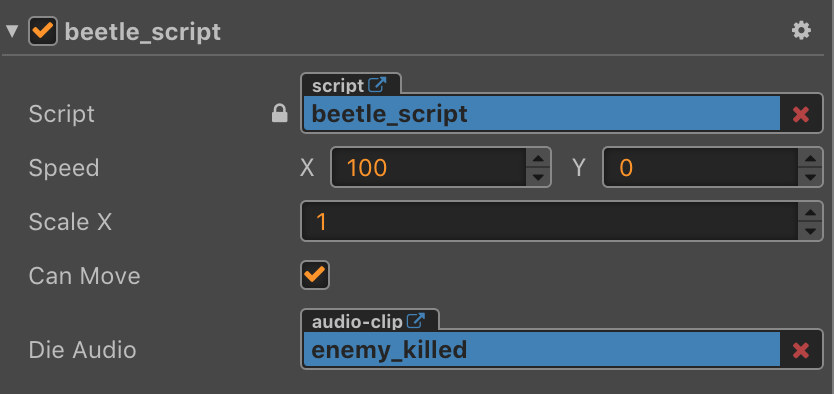
Here is what the beetle Script Component, mentioned above, might look like to achieve collision detection and behavior control. Example:
const { ccclass, property } = cc._decorator;

@ccclass
export default class enemy extends cc.Component {
    @property()
    speed: cc.Vec2 = new cc.Vec2(0, 0);

    @property
    scaleX: number = 1;

    @property
    canMove: boolean = true;

    @property({type: cc.AudioClip})
    dieAudio: cc.AudioClip = null;

    anim: cc.Animation = null;

    // LIFE-CYCLE CALLBACKS:

    onLoad() {
        this.node.scaleX = 1;
        this.anim = this.getComponent(cc.Animation);
    }

    start() {

    }

    // onCollisionEnter overrated
    onCollisionEnter(other, self) {
        if (other.tag == 5) {
            this.turn();
            this.speed.x = -this.speed.x;
        }

        var otherAabb = other.world.aabb;
        var otherPreAabb = other.world.preAabb.clone();

        var selfAabb = self.world.aabb;
        var selfPreAabb = self.world.preAabb.clone();
        selfPreAabb.y = selfAabb.y;
        otherPreAabb.y = otherAabb.y;

        if (cc.Intersection.rectRect(selfPreAabb, otherPreAabb)) {
            if (selfPreAabb.yMax < otherPreAabb.yMax && other.node.group == 'player') {
                this.todie();
            }
        }
    }

    todie() {
        cc.audioEngine.play(this.dieAudio, false, 1);
        this.anim.play('beetled');
        this.canMove = false;
        this.node.height = this.node.height * 0.3;

        this.node.runAction(cc.fadeOut(.5));
        this.scheduleOnce(function () {
            this.node.removeFromParent();
        }, 0.5);
    }

    update(dt) {
        if (this.canMove) {
            this.node.x -= this.speed.x * dt;
        }
    }

    turn() {
        this.node.scaleX = -this.node.scaleX;
    }
}
Player (Role) Logic Design
As the core of the game, the Player’s (role) design is more complicated, mainly divided into two parts: control events and collision events. We need both of these items in-order to achieve our goals. Let’s add each one to our beetle Script Component that we have been using from above:
Control event handling
Here is an example of how we might want to control event handling:
onLoad() {
  cc.systemEvent.on(cc.SystemEvent.EventType.KEY_DOWN, this.onKeyDown, this);
  cc.systemEvent.on(cc.SystemEvent.EventType.KEY_UP, this.onKeyUp, this);
}

onDestroy() {
  cc.systemEvent.off(cc.SystemEvent.EventType.KEY_DOWN, this.onKeyDown, this);
  cc.systemEvent.off(cc.SystemEvent.EventType.KEY_UP, this.onKeyUp, this);
}

onKeyDown(event) {
  switch (event.keyCode) {
    case cc.macro.KEY.a:
    case cc.macro.KEY.left:
      this.playerLeft();
      break;
    case cc.macro.KEY.d:
    case cc.macro.KEY.right:
      this.playerRight();
      break;
    case cc.macro.KEY.w:
    case cc.macro.KEY.up:
      this.playerUp();
      break;
    case cc.macro.KEY.down:
    case cc.macro.KEY.s:
      this.playerDown();
      break;
  }
}

onKeyUp(event) {
  switch (event.keyCode) {

    case cc.macro.KEY.a:
    case cc.macro.KEY.left:
    case cc.macro.KEY.d:
    case cc.macro.KEY.right:
      this.noLRControlPlayer();
      break;
    case cc.macro.KEY.up:
    case cc.macro.KEY.w:
      this.noUpControlPlayer();
      break;
    case cc.macro.KEY.s:
    case cc.macro.KEY.down:
      this.noDownControlPlayer();
      break;
  }
}
Collision event processing
The object is assigned an object type tag when instantiated, and the following code assigns different collision logic based on the tag.
onCollisionEnter(other, self) {
   if (this.touchingNumber == 0) {
     if (this.buttonIsPressed)
       this.player_walk();
     else
       this.player_idle();
   }
   switch (other.tag) {
     case 1://coin.tag = 1
       this.collisionCoinEnter(other, self);
       break;
     case 2://bonusblock6.tag = 2
     case 3://breakableWall = 3
     case 7: //bonusblock6withMushroom.tag = 7
       this.collisionBonusWallEnter(other, self);
       break;
     case 4://enemy.tag = 4
       this.collisionEnemyEnter(other, self);
       break;
     case 5://platform.tag = 5
       this.collisionPlatformEnter(other, self);
       break;
     case 6://water.tag = 6
       this.collisionWaterEnter(other, self);
       break;
     case 8://mushroom.tag = 8
       this.collisionMushroomEnter(other, self);
       break;
   }
 }
We also need to handle collision events between the character and the ground. This might look like the following:
collisionPlatformEnter(other, self) {
  this.touchingNumber++;
  this.jumpCount = 0;
  var otherAabb = other.world.aabb;
  var otherPreAabb = other.world.preAabb.clone();
  var selfAabb = self.world.aabb;
  var selfPreAabb = self.world.preAabb.clone();
  selfPreAabb.x = selfAabb.x;
  otherPreAabb.x = otherAabb.x;

  if (cc.Intersection.rectRect(selfPreAabb, otherPreAabb)) {

    if (this._speed.x < 0 && (selfPreAabb.xMax > otherPreAabb.xMax)) {
      this.node.x += Math.floor(Math.abs(otherAabb.xMax - selfAabb.xMin));
      this.collisionX = -1;
    }
    else if (this._speed.x > 0 && (selfPreAabb.xMin < otherPreAabb.xMin)) {
      this.node.x -= Math.floor(Math.abs(otherAabb.xMin - selfAabb.xMax));
      this.collisionX = 1;
    } else if (this._speed.x == 0 && (selfPreAabb.xMax == otherPreAabb.xMin)) {
      this.isFallDown = true;
    }

    this._speed.x = 0;
    other.touchingX = true;
    return;
  }
  selfPreAabb.y = selfAabb.y;
  otherPreAabb.y = otherAabb.y;

  if (cc.Intersection.rectRect(selfPreAabb, otherPreAabb)) {
    if (this._speed.y < 0 && (selfPreAabb.yMax > otherPreAabb.yMax)) {
      this.node.y = otherPreAabb.yMax - this.node.parent.y;
      this.isJumping = false;
      this.collisionY = -1;
    }
    else if (this._speed.y > 0 && (selfPreAabb.yMin < otherPreAabb.yMin)) {
      cc.audioEngine.play(this.hit_block_Audio, false, 1);
      this.node.y = otherPreAabb.yMin - selfPreAabb.height - this.node.parent.y;
      this.collisionY = 1;
    }

    this._speed.y = 0;
    other.touchingY = true;
  }
  this.isWallCollisionCount++;
}
Next, let’s handle collisions between characters and enemies:
collisionEnemyEnter(other, self) {
  // 1st step
  // get pre aabb, go back before collision
  var otherAabb = other.world.aabb;
  var otherPreAabb = other.world.preAabb.clone();

  var selfAabb = self.world.aabb;
  var selfPreAabb = self.world.preAabb.clone();

  // 2nd step
  // forward x-axis, check whether collision on x-axis
  selfPreAabb.x = selfAabb.x;
  otherPreAabb.x = otherAabb.x;
  if (cc.Intersection.rectRect(selfPreAabb, otherPreAabb)) {
    if (this._life == 2) {
      cc.audioEngine.play(this.player_decrease_Audio, false, 1);
      var actionBy = cc.scaleBy(1, 3 / 5);
      this.node.runAction(actionBy);
      this._life--;
    } else if (this._life == 1) {
      this.anim.play("player_die");
      this.rabbitDieJump();
      this.OverNodeLoad();
      return;
    }

    if (this._speed.x < 0 && (selfPreAabb.xMax > otherPreAabb.xMax)) {
      this.node.x += Math.floor(Math.abs(otherAabb.xMax - selfAabb.xMin));
      this.collisionX = -1;
    }
    else if (this._speed.x > 0 && (selfPreAabb.xMin < otherPreAabb.xMin)) {
      this.node.x -= Math.floor(Math.abs(otherAabb.xMin - selfAabb.xMax));
      this.collisionX = 1;
    }

    this._speed.x = 0;
    other.touchingX = true;
    return;
  }

  // 3rd step
  // forward y-axis, check whether collision on y-axis
  selfPreAabb.y = selfAabb.y;
  otherPreAabb.y = otherAabb.y;

  if (cc.Intersection.rectRect(selfPreAabb, otherPreAabb)) {
    if (this._speed.y < 0 && (selfPreAabb.yMax > otherPreAabb.yMax)) {
      this.rabbitJump();
      return;
    }

    if (this._speed.y > 0 && (selfPreAabb.yMax < otherPreAabb.yMax)) {
      if (this._life == 2) {
        var actionBy = cc.scaleBy(1, 3 / 5);
        this.node.runAction(actionBy);
        this._life--;
      } else if (this._life == 1) {
        this.anim.play("player_die");
        this.rabbitDieJump();
        this.OverNodeLoad();
        return;
      }
    }

    this._speed.y = 0;
    other.touchingY = true;
  }
  this.isWallCollisionCount++;
}
Conclusion
We hope that you have enjoyed this tutorial. Remember the goal is to help get you comfortable using Cocos Creator to create a landscape game, using componentization, reducing the amount of code needed and helping you become efficient when using Cocos Creator. The code for this tutorial can be found on GitHub. This code is intended for educational purposes and not deemed for commercial use.
 Can I make a video on this?