
Zelda’s 3D rendering style, can it run in mini games?
As a core module of any game engine, the rendering system is the ceiling for the expressiveness of the engine’s graphics, which directly determines the upper limit of the content that the game can output to the player. The rendering system of Cocos Creator 3.x aims at future-oriented, high-performance, and cross-platform from architecture to design, and supports developers to create more refined game screens.
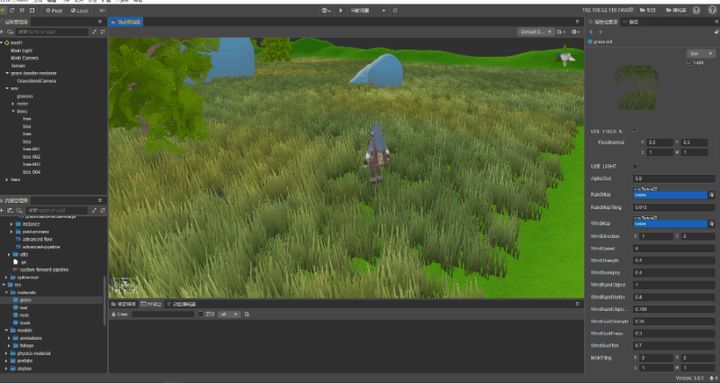
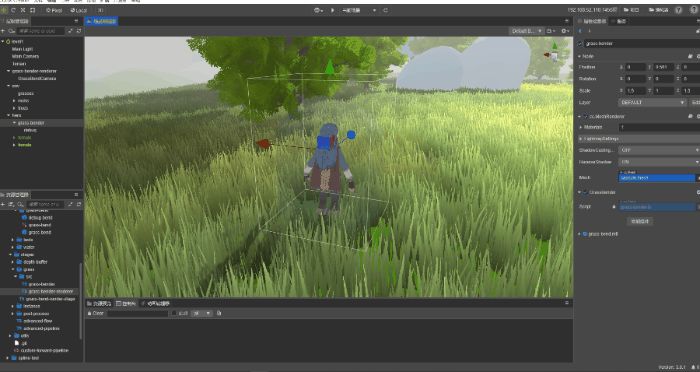
Recently, the engine rendering team used Cocos Creator 3.1, to recreate the Zelda/Ghibli’s cartoon rendering style as an interesting experiment. Let’s first look at a video of the operation in the editor:

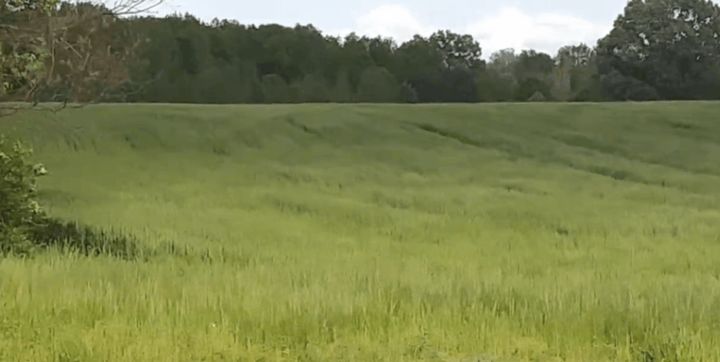
The Ghibli style created by Hayao Miyazaki does not pursue a highly realistic reproduction of the real world, but a unique artistic expression in terms of color, light and shade, and contrast. The painting sense is closer to watercolor, and the use of a lot of bright colors as the main color to show the world through artistic colors instead of pursuing realism, making the picture more cartoonish and fantasy.
Important
-
All the materials and source code of the demo in the above video have been open sourced in the Cartoon Vegetation repository.
-
Known issues in the mini game version:
- Under the default settings, the leaves flicker due to insufficient accuracy of the ShadowMap. On high-end Android phones, this problem can be solved through the in-game top left gear → turn on High Quality. However, because iPhone 12 does not have JIT, the frame will drop below 30 after High Quality is turned on.
- It is known that some Android phones do not support the float texture of WebGL, which causes the Bend Glass, that is, the effect of flattening the grass where the character is walking cannot be corrected. The problem does not exist on the iPhone.
The following will introduce in detail the part of the vegetation rendering and the interaction between the model and the characters.

Tools
Engine version: Cocos Creator 3.1
DCC tool: Blender
Art: The character in the demo is inspired by a Zelda fan. The author provides many character models for everyone to use for free. Check them out!.
Since the downloaded model has no actions, search for some simple actions on this website.

Vegetation Rendering
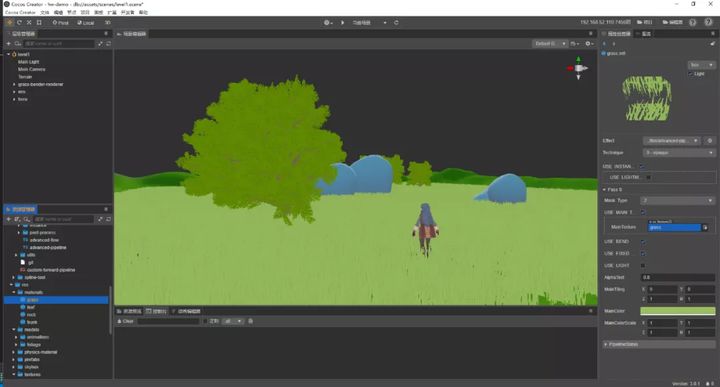
Initial state
The initial state of vegetation is equivalent to the default unlit material of the engine, and only the texture and base color can be set. The whole picture is green, it is relatively plain, without any atmosphere and recognition.
vec2 uv = mainTiling.xy + mainTiling.zw * v_uv;
vec4 col = texture(mainTexture, uv);
Add modified color
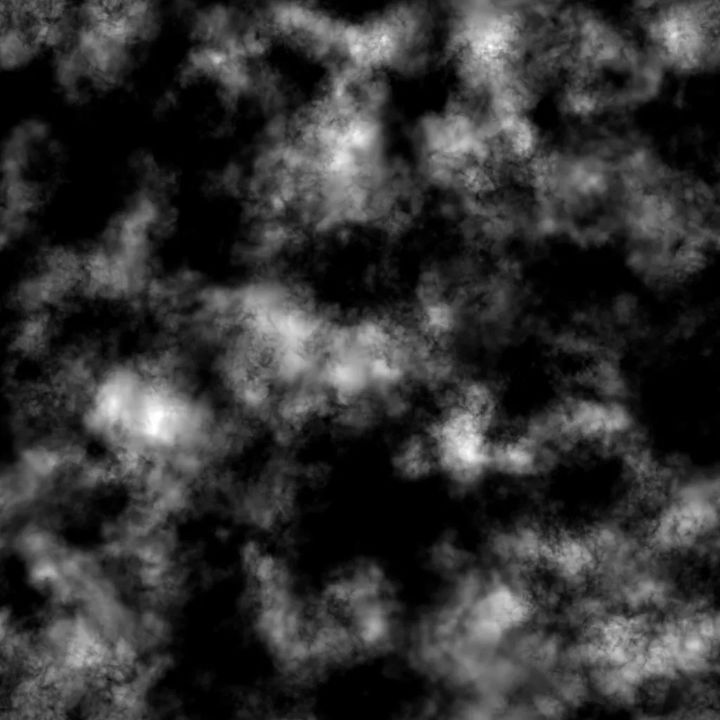
To add the modified color of the grass, and get a smooth random number 0-1 based on the noise map, and make a smooth transition to the original basic color, the grass color will become richer and brighter.
float rand = texture(randMap, worldPos.xz * randMapTiling).r;

col.rgb = mix(col.rgb, hue.rgb, rand * hue.a);
Analog AO
Generally, grass roots or leaf roots receive less light, so the color should be darker than the tip of the leaf. Simply use the uv value to get the difference in brightness from the root to the top of the grass, and simulate and calculate the AO value based on this data, or the shading information is pre-stored in the vertex color during modeling.
float getMask () {
    #if Mask_Type == Mask_Channel_Color
        return a_color.r;
    #elif Mask_Type == Mask_Channel_Uv
        return 1. - a_texCoord.y;
    #else
         return 0.;
    #endif
}
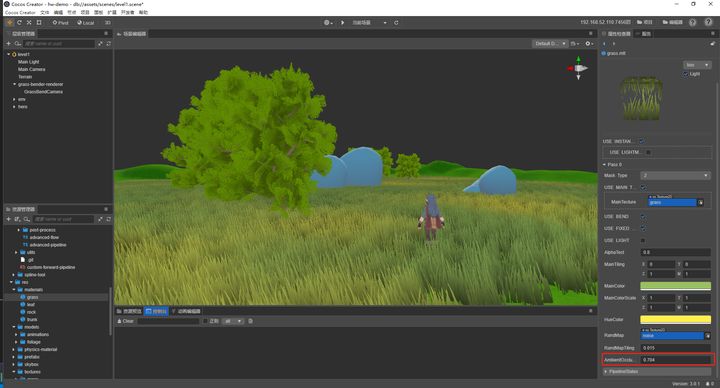
In the figure, the AO mask is used as the color output, and it can be clearly seen that the value of the AO mask gradually decreases from the top to the root.
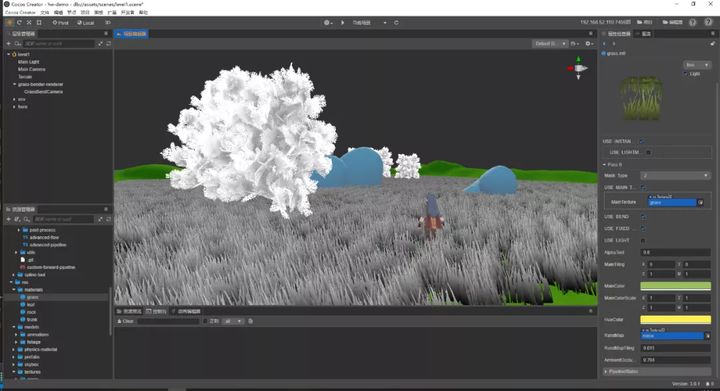
float mask = getMask();

float ao = mix(col.a, col.a * mask, ambientOcclusion);
col.rgb *= ao;
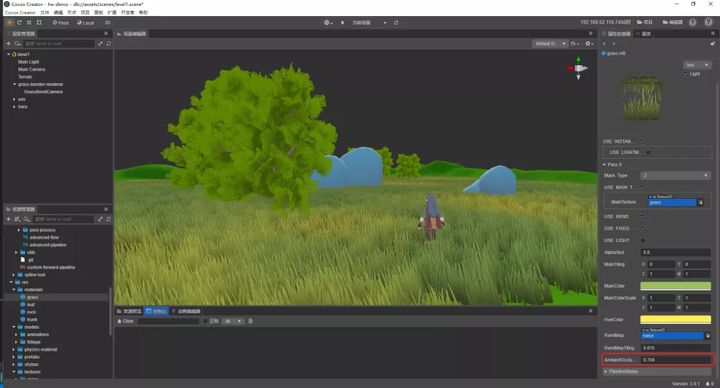
Expose ambientOcclusion as a material parameter, combined with the effect of the previous color output as shown below:
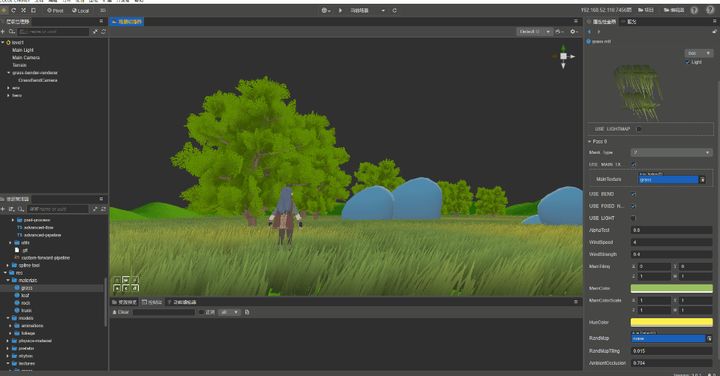
Swing Grass
The color of the grass is richer, and now it can give vitality to the grass and let it sway with the wind.
Simply let it oscillate with time according to the Sine curve, and then adjust the parameters through windStrength and windSpeed.
It should be noted that only the tip of the blade can be blown, and the root does not need to swing. This is the same as what we had before is the over-shading of AO Mask. Use the previously calculated Mask value multiplied by Sine to do a simple simulation.
vec4 offset = vec4(0.);

float strength = windStrength;float sine = sin(windSpeed * (cc_time.x ));

sine = sine * mask * strength;

// Calculate the xz plane offset offset.xz = vec2(sine);
// Calculate the curvature in the y direction float windWeight = length(offset.xz) + 0.0001;

windWeight = pow(windWeight, 1.5);

offset.y = windWeight * mask;
It may seem strange that the grass swings back and forth greatly. Under normal circumstances, the swing back and forth of the grass is small and natural.
Therefore, it is necessary to remap the range of Sine calculation results from (-1, 1) to (0, 1), and adjust the swing amplitude through the parameter windSwinging.
sine = mix(sine * 0.5 + 0.5, sine, windSwinging);
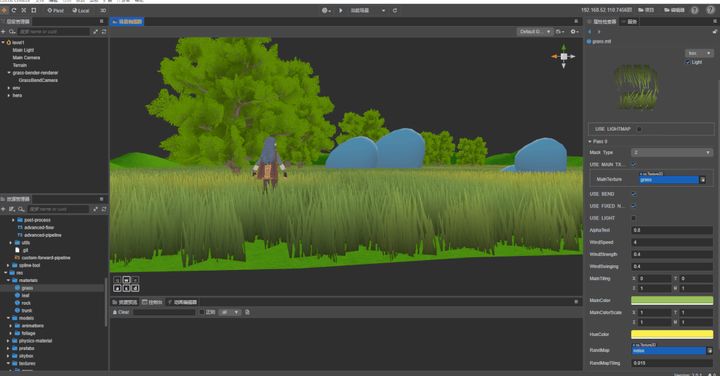
It looks better now, but the swing is too regular and there is no sense of hierarchy. To calculate a different swing value for each vertex, here simply use the coordinate value in the model coordinate system to calculate the vertex strength.
float f = length(positionOS.xz) * windRandVertex;
// Recalculate the sin value, rand is the noise value obtained with the noise map before, and the random range of rand is 0-1 float sine = sin(s.speed * (cc_time.x + rand + f));
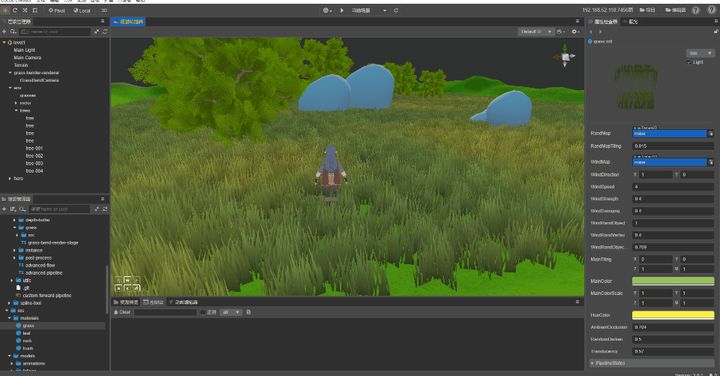

Gust effect
The wind doesn’t always blow in continuously, it usually blows in gusts of wind. The picture below is from the effect of gusts blowing across the grass in reality. Notice that the grass will change in light and shade in some parts.
Noise maps are used to simulate this effect:
vec2 gustUV = (worldPos.xz * windGustFrequency * windSpeed) + (cc_time.x * windSpeed * windGustFrequency) * -windDirection。xy;

float gust = texture(windMap, gustUV).r;

gust *= windGustStrength * mask;

// col is the result of the previous calculation
col.rgb += (gust * v_color.a * windGustTint);

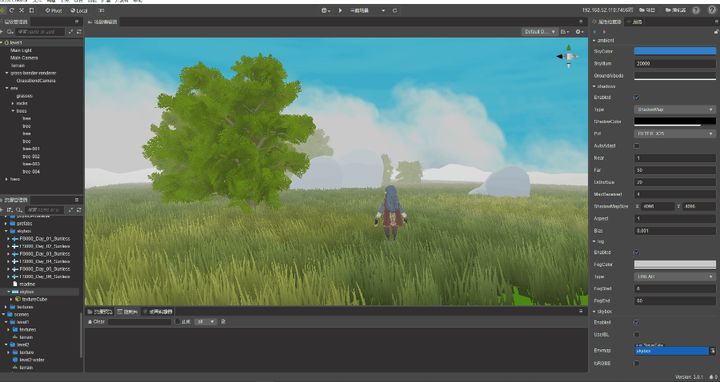
Fog effect and sky box
So far, the effect of the grass has been achieved, but the player still can’t feel the depth of the scene, and the background of the scene is still the default color. Use the built-in fog effect and sky box of the engine to increase the details of the picture.
The sky box is very important for enhancing the sense of the picture. When in the player’s perspective, about a quarter to half of the picture is filled by the sky box. It is very important to choose a suitable sky box.
For this scene,choose a lighter sky box, with a white fog effect to make the end of the scene closer to the sky box.

Shadows
This time, the stylized rendering did not use the lighting model to calculate the lighting effect, but used the results of the shadow calculation to increase the details of the picture.
// getShadowAttenuation refers to the logic of calculating the shadow inside the engine to get the shadow intensity

float getShadowAttenuation () {
    float shadowAttenuation = 0.0;

    #if CC_RECEIVE_SHADOW

        // The definition of cc_shadowInfo can be found in the cc-shadow.chunk file in the engine, where the data format is:
        // x -> width; y -> height; z -> pcf; w -> bais;
        // z -> pcf corresponds to the value of the pcf option set in the scene
        float pcf = cc_shadowInfo.z + 0.001;

        // CCGetShadowFactorXX is the PCF shadow calculation method inside the engine. The number behind indicates the number of times the shadowmap is sampled. The more the number of samples, the better the shadow blur effect, the softer the performance, and the higher the performance consumption.
        if (pcf > 3.0) {
            shadowAttenuation = CCGetShadowFactorX25();
        }
        else if (3.0 > pcf && pcf > 2.0) {
            shadowAttenuation = CCGetShadowFactorX9();
        }
        else if (2.0 > pcf && pcf > 1.0) {
            shadowAttenuation = CCGetShadowFactorX5();
        }
        else {
            shadowAttenuation = CCGetShadowFactorX1();
        }
    #endif

    return shadowAttenuation;
}

float shadowAttenuation = getShadowAttenuation();

// Obtain the shadow intensity, and expose the parameter shadowIntensity to freely adjust the shadow intensity
shadowAttenuation = 1. - min(shadowAttenuation, shadowIntensity);

col.rgb *= shadowAttenuation;
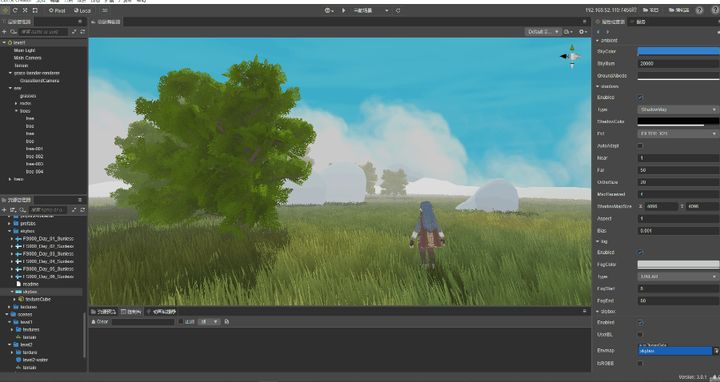

Translucent effect
The translucent effect mentioned here does not refer to the effect of glass that can see other objects through objects, but the effect that sunlight can continue to shine through the leaves. When looking at the leaves in the direction of the sun, notice that the leaves appear brighter.
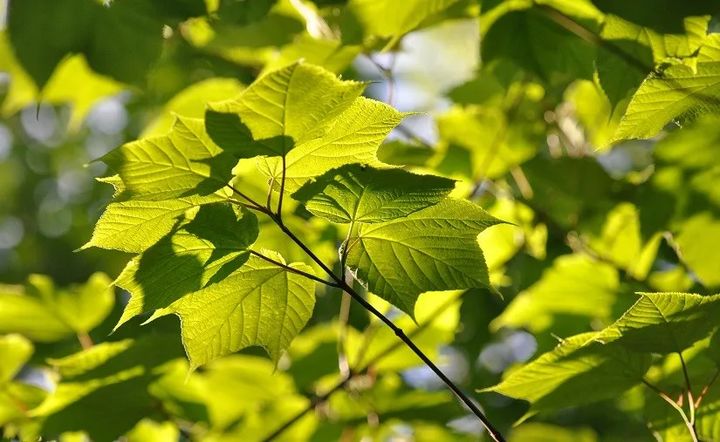
According to the above description, we can generalize that the leaves should appear brighter when the direction from the leaves to the camera is the same as the direction from the sun to the leaves. Using the overlay effect can simply simulate the bright effect.
// The main light source is the direction of sunlight
vec3 ld = normalize(cc_mainLitDir.xyz);

// viewDirectionWS is the direction from the leaves to the camera
vec3 viewDirectionWS = normalize(cc_cameraPos.xyz - worldPos.xyz);

// Translucency is exposed as a material parameter to facilitate adjustment of the effect
float VdotL = max(0., dot(viewDirectionWS, ld)) * translucency;

VdotL = pow(VdotL, 4.) * 8.;

float tMask = VdotL * shadowAttenuation;

vec3 tColor = col.rgb + BlendOverlay(cc_mainLitColor.rgb * cc_mainLitColor.w, color);

col.rgb = mix(col.rgb, tColor, tMask);


Interaction with vegetation
When the player moves on the grass, the grass is collided and squeezed by the player, and it should be obviously bent around.
To do this, draw the object to interact with on a height map. The information in the map includes the height of the object, the direction in which the object is squeezed on the XZ axis, and the strength of the squeeze.
Information rendered into the height map:
float mask = -v_normal.y * heightStrength;// * v_color.r;

float height = (v_position.y + heightOffset);

// Remap the value from (-1, 1) to (0, 1) vec2 dir = (v_normal.xz * extendStrength) * 0.5 + 0.5;
vec4 heightMapInfo = vec4(dir.x, height, dir.y, mask);
The method to generate the height map is to use a vertically downward camera to shoot all objects that need to be interacted. In the demo, the camera will always follow the protagonist and the camera can be modified at any time.

When rendering the object to the height map, we don’t need to render the original protagonist completely, because the protagonist generally has more faces. In order to save some performance, use an object of similar size but fewer faces. To do approximate rendering.
Refer to the figure below, use a cylinder instead of the protagonist to render on the height map, and we can freely change the size of the cylinder to control the rendering range.
Please review how to get the information in the height map in the grass material:
// cc_grass_bend_uv is the result of calculation in the custom pipeline
// cc_grass_bend_uv.xy is the world coordinates of the height map camera
// cc_grass_bend_uv.z is the range taken by the height map camera

// Use the world coordinates of the pixel to subtract the world coordinates of the height map camera and divide by the range to get the uv coordinates in the height map

vec2 getBendMapUV(in vec3 wPos) {

    vec2 uv = (wPos.xz - cc_grass_bend_uv.xy) / cc_grass_bend_uv.z + 0.5;

    return uv;
}

// cc_grass_bend_map is the height map
vec4 getBendVector(vec3 wPos) {

    vec2 uv = getBendMapUV(wPos);
    vec4 v = texture(cc_grass_bend_map, uv);

    //Remap from 0.1 to -1.1
    v.x = v.x * 2.0 - 1.0;
    v.z = v.z * 2.0 - 1.0;

    return v;
}

Conclusion
The above is the full sharing of the Ghibli cartoon style rendering presented by the Cocos engine rendering team. The video, source code, mini game experience, and implementation steps are all provided.