
Cocos Creator - Using Shaders + Mesh Components together
In this tutorial a shader + mesh can be used to achieve a flying flag!
What might this look like?

Instructions
In Cocos Creator:
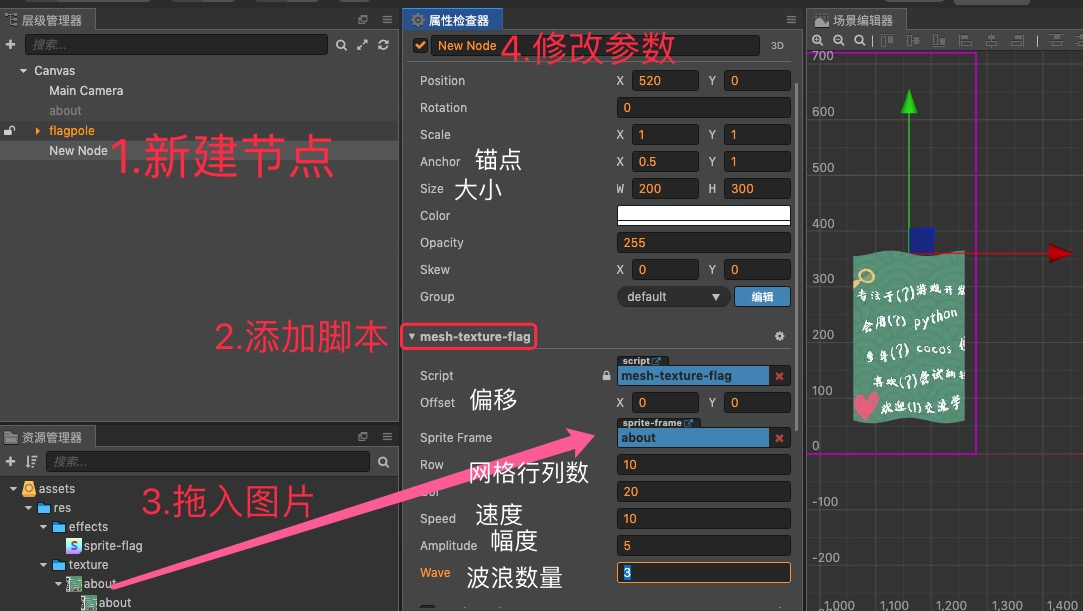
- Create an empty node
- Add user script component
mesh-texture-flag - Add pictures
- Modify the corresponding attributes
How to implement?
In a nutshell, the workflow is to create a mesh model, and use vertex shaders to continuously modify the coordinates of the vertices to achieve a floating effect. For the introduction of mesh, you can refer to Mesh documentation.

Determining the vertex coordinates
In order to allow multiple vertices in the vertex shader to change position, you need to divide a shape into multiple squares (triangles). The larger the number of divisions, the finer the effect, but it requires more performance consumption. The following figure is an example of division into two rows and three columns.
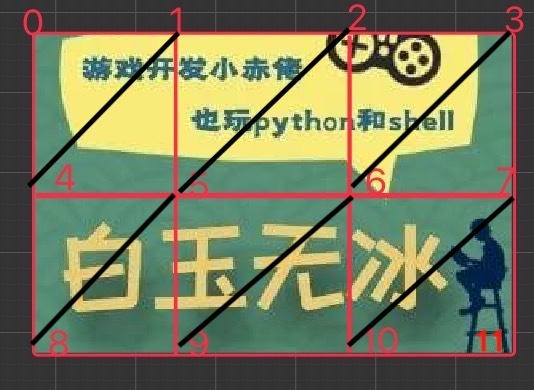
According to the number of divided rows and columns and the size of the node, the node anchor point, from left to right and top to bottom, calculate the position information of each vertex. The position relative to the upper left corner can be calculated first, and then offset according to the anchor point. Example:
const x = (_col-this._col * this.node.anchorX) * _width / this._col;
const y = (_row-this._row * this.node.anchorY) * _height / this._row;
Determining the texture uv coordinates
The texture uv coordinate system is in the upper left corner, the u axis is to the right, the v axis is down, and the range is 0-1. And, the coordinate system is determined according to the anchor point, x axis is right, y axis is up.
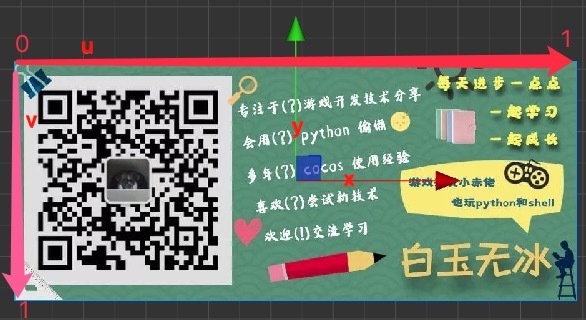
According to the anchor point, find the proportion of the position coordinates in the lower left corner, and then flip v again to find the corresponding uv coordinates. Example:
const u = (pt.x + this.texture.width * this.node.anchorX + this.offset.x) / this.texture.width;
const v = 1.0-(pt.y + this.texture.height * this.node.anchorY + this.offset.y) / this.texture.height;
Determine vertex index
Starting from the grid in the upper left corner of the grid, determine the triangle vertex drawing in sequence. The figure below is an index divided into two rows and two columns.
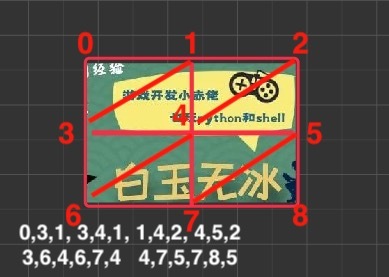
Each grid has two triangles, the reference code is as follows.
// Calculate vertex index
let ids = [];
let getIndexByRowCol = (_row, _col) => {
    return _row * (this._col + 1) + _col;
}
for (let _row = 0; _row <this._row; _row ++) {
    for (let _col = 0; _col <this._col; _col ++) {
        ids.push (getIndexByRowCol (_row, _col), getIndexByRowCol (_row, _col + 1), getIndexByRowCol (_row + 1, _col));
        ids.push (getIndexByRowCol (_row + 1, _col), getIndexByRowCol (_row + 1, _col + 1), getIndexByRowCol (_row, _col + 1));
    }
};
Vertex shader writing
The sin function is used to modify the vertices.
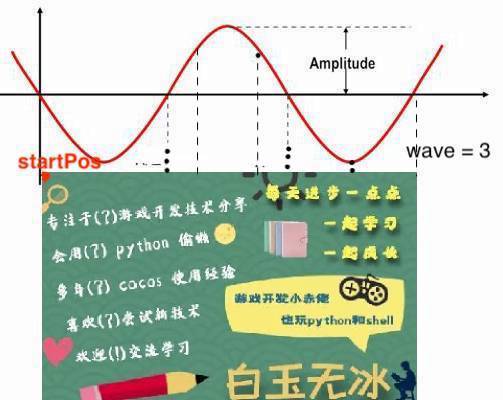
A wave is a PI, so it is necessary to map the amplitude of position coordinate changes to wave * PI. The angle of the sin function can be obtained by finding the width ratio.
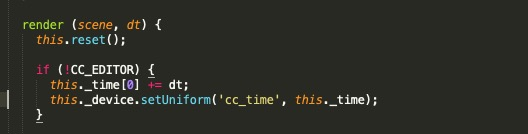
The built-in variable cc_time can make the coordinates change with time. However, it can only be previewed in a non-editor, because it is not assigned by default.
Example:
float angleSpanH = wave * 3.14159265;
float pz = amplitude * sin (cc_time.x * speed-(a_position.x-startPos.x + a_position.y-startPos.y) / textureWidth * angleSpanH);
vec4 position = vec4 (a_position.x, a_position.y + pz, a_position.z, 1);
Summary
The above shared by Baiyu Wubing’ using of Cocos Creator v2.2.2 to develop this Flying Banner!.