
Cocos Creator: learning “FlappyBird”
Part (8): module reference
Note: This is a multi-part tutorial: Part 1 | Part 2 | Part 3 | Part 4 | Part 5 | Part 6 | Part 7
Note: Parts 9-11 coming soon.
Introduction and getting help
You are welcome to post to the Cocos Creator category on the Cocos forums to talk about any issues you encounter during the development process. This tutorial does not teach how to code.
Please prepare your development environment before starting this tutorial. If you are having trouble with our tutorial, please take a look at the following documentation:
Preparing the development environment:
Let’s get started
This tutorial focuses on using Cocos Creator to build a Flappy Bird clone. Remember Flappy Bird?

So far, from Part 1, Part 2, Part 3, Part 4, Part 5, Part 6 and Part 7, we have our Bird, we can make it appear to fly in a colorful world, we have written code to start to make our game playable and even added collision detection to our Bird and Pipes.
In the previous tutorial, we added code to output on the console when the game is over. This tutorial builds on this to improve the logic for ending the game.
Better logic
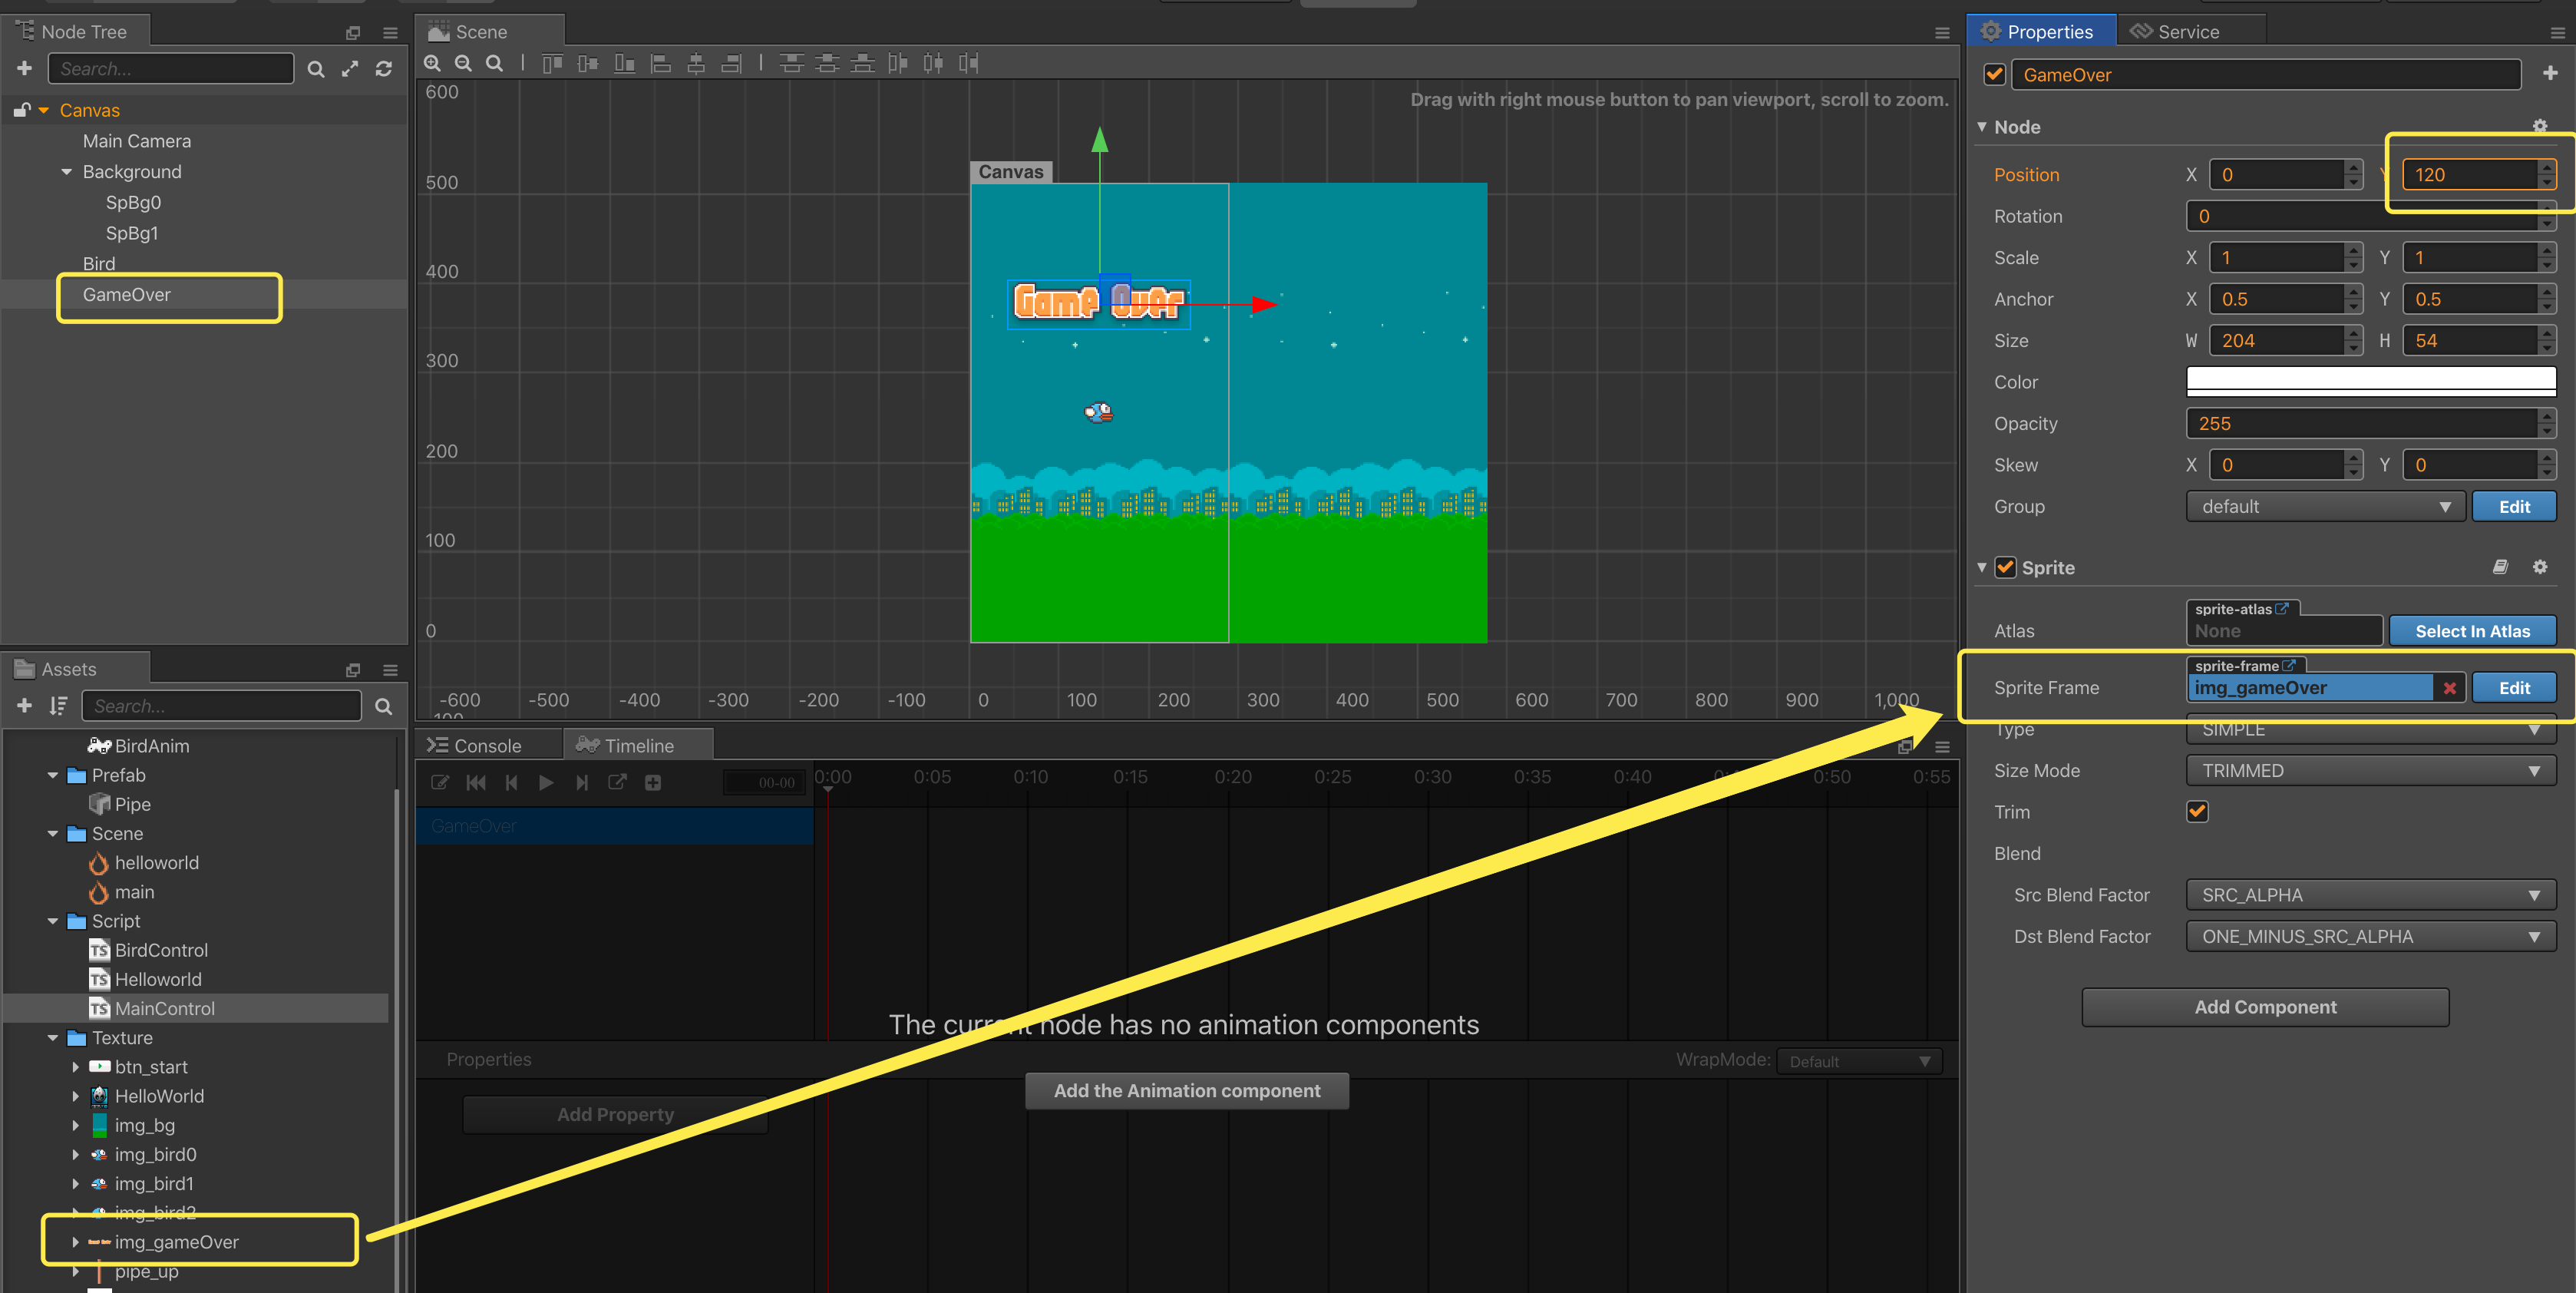
First, add a Sprite node to the Scene. This Node will be used to display the gamemOver sprite.
Modify the MainControl.ts script file to add the following code:
onLoad() {
    // open Collision System
    var collisionManager = cc.director.getCollisionManager();
    collisionManager.enabled = true;
    // open debug draw when you debug the game
    // do not forget to close when you ship the game
    collisionManager.enabledDebugDraw = true;
    // find the GameOver node, and set active property to false
    this.spGameOver = this.node.getChildByName("GameOver").getComponent(cc.Sprite);
    this.spGameOver.node.active = false;
}
The above code accompished the following:
- Declare a
spGameOversprite. Note that@property (cc.Sprite)is not used at this time. This is mainly to access the component in other ways. - Initializes
spGameOversprite. This happens by first getting the node namedGameOver, and then getting thecc.Spritecomponent through thegetComponentAPI interface. You only need to get the node here, because the active attribute is the node. Assigning the active attribute to false would hide the node.
When the game ends, it is OK to display the spGameOver sprite.
Modularity and referencing modules
However, the collision event is triggered in the BirdControl.ts script. How can the MainControl.ts script know about this event being triggered? The concept of modularity and how to reference modules.
First, add a gameOver function to the MainControl.ts script. Add the following code to the MainControl.ts:
gameOver () {
    this.spGameOver.node.active = true;
}
Second, modify BirdControl.ts as follows:
import MainControl from "./MainControl";

const {ccclass, property} = cc._decorator;

@ccclass
export default class BirdControl extends cc.Component {

    // Speed of bird
    speed: number = 0;

    // assign of main Control component
    mainControl: MainControl = null;

    onLoad () {
        cc.Canvas.instance.node.on(cc.Node.EventType.TOUCH_START, this.onTouchStart, this);
        this.mainControl = cc.Canvas.instance.node.getComponent("MainControl");
    }

    onCollisionEnter (other: cc.Collider, self: cc.Collider) {
        // game over
        cc.log("game over");
        this.mainControl.gameOver();
    }
The above code accompished the following:
- Import the
MainControlmodule into the current module. - Declare a variable of type
MainControl(only the first block of code is written here, the type ofMainControlcan be recognized). - Get a reference to the
MainControlscript component in theonLoad()method. - When a collision occurs, use the
MainControlscript to reference the object to call in thegameOver()function. TheMainControlmodule receives the message that the game is over.
Save your progress
Save your changes in the text editor that you are using. Find the Save button in Cocos Creator and click Save once.
So where are we?
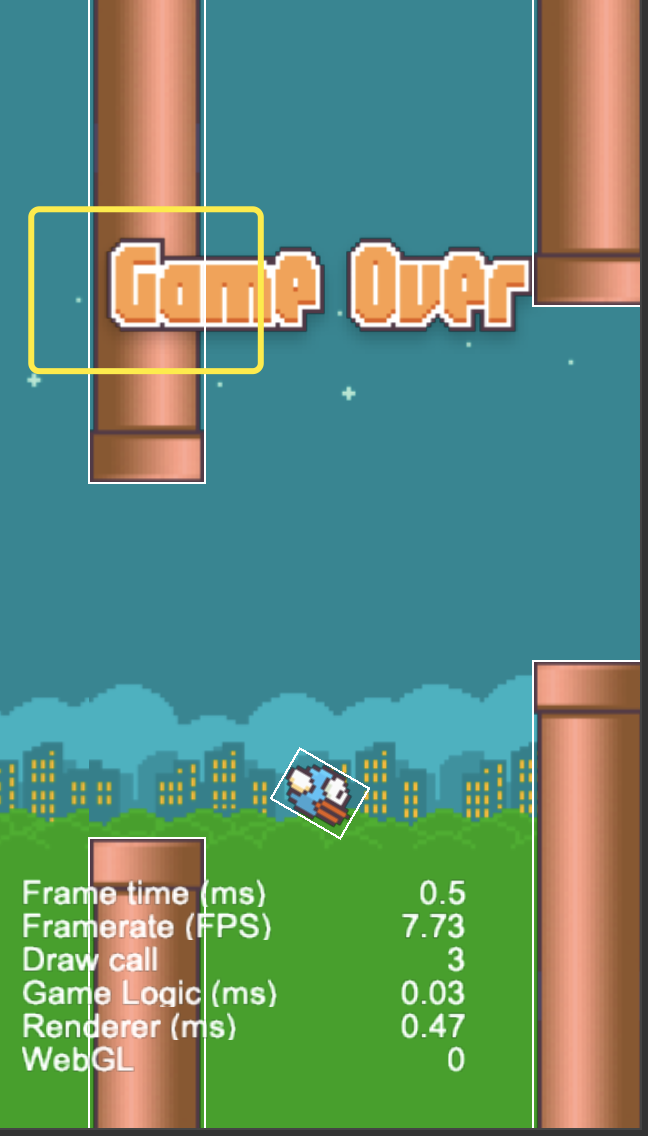
At this step, running our tutorial should look similar to this:
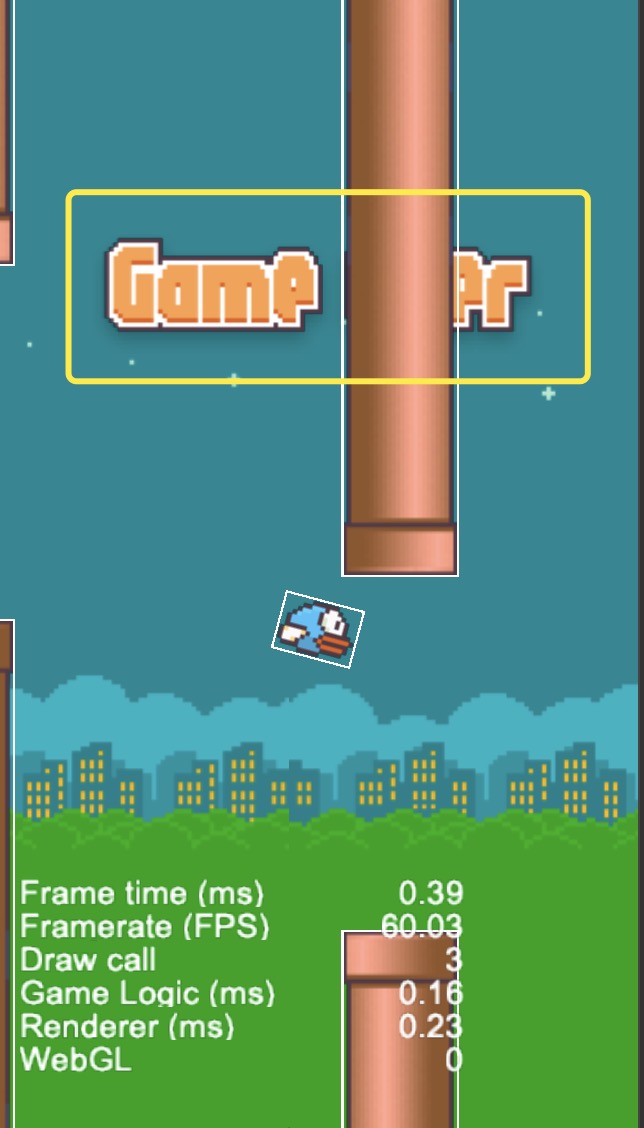
When the bird collides with the pillar, the GameOver sprite is displayed, but it was blocked by the pillar. This is because the pillar is added to the Canvas node after the game is started, therefore it is rendered after the GameOver sprite.
Final touches
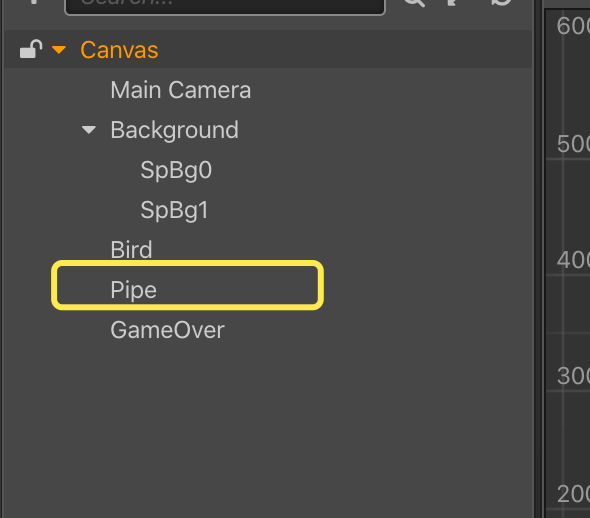
First, to fix the rendering order, create an empty Pipe node and drag this Pipe node to the top of GameOver.
Next, modify the following code in the MainControl.ts script. Get the node named Pipe, and add all the instantiated pipes to the Pipe node. This will cover the pipes by the GameOver sprite.
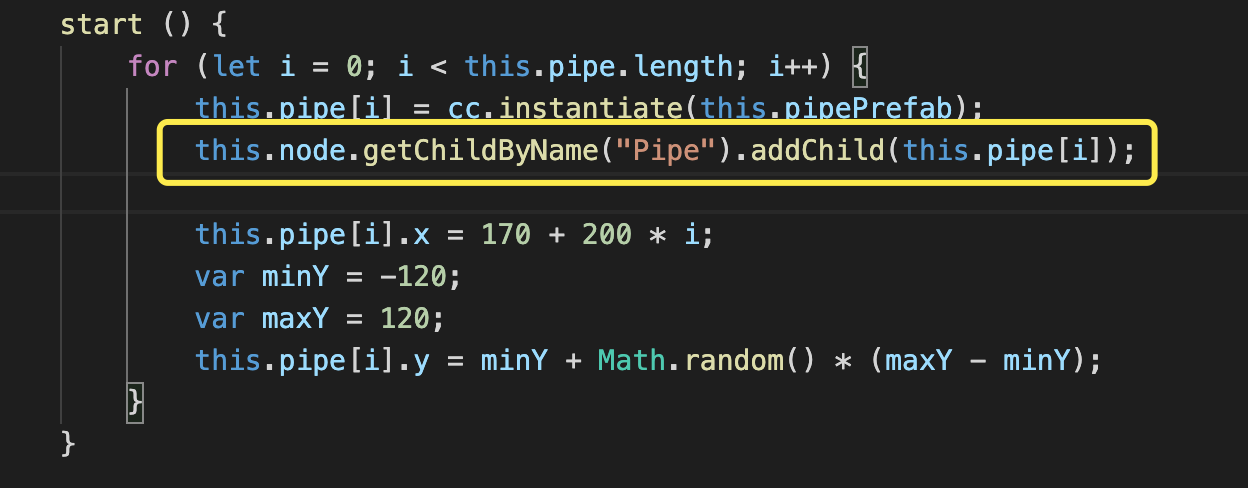
start () {
    for (let i = 0; i < this.pipe.length; i++) {
        this.pipe[i] = cc.instantiate(this.pipePrefab);
        this.node.getChildByName("Pipe").addChild(this.pipe[i]);

        this.pipe[i].x = 170 + 200 * i;
        var minY = -120;
        var maxY = 120;
        this.pipe[i].y = minY + Math.random() * (maxY - minY);
    }
}
So where are we?
At this step, our tutorial should look similar to this:
Conclusion
Stay tuned for Part 9 of this tutorial!
Special Thank you!
To HuJun for creating this tutorial.