
Cocos Creator: learning “FlappyBird”
Part (2): animations and moving the bird
Note: This is a multi-part tutorial: Part 1
Introduction and getting help
You are welcome to post to the Cocos Creator category on the Cocos forums to talk about any issues you encounter during the development process. This tutorial does not teach how to code.
Please prepare your development environment before starting this tutorial. If you are having trouble with our tutorial, please take a look at the following documentation:
Preparing the development environment:
Let’s get started
This tutorial focuses on using Cocos Creator to build a Flappy Bird clone. Remember Flappy Bird?

So far, from Part 1, we have our Bird. Not very interesting, yet. How about we make the wings move through frame animation? This will give the illusion that the bird is flying.
First, find the Bird node in the hierarchy manager and click on it. Either use the Add Component button at the bottom of the Property inspector or right click on the Bird node. Add an Animation component. Example:


Second, select the assets directory in the Explorer and right-click to create an Animation folder (used or storing animation files). Next, click the Animation Editor next to the console, so you can see the following interface, as shown in this figure:

Third, click the New Clip button. Choose the Animation folder created above and name the animation BirdAnim. Example:
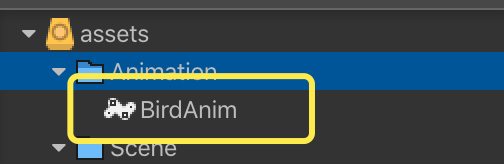
A BirdAnim file will be displayed under the assets\Animation folder.
Editing the animation
Click on the top-left button of the Animation editor to start editing the animation.
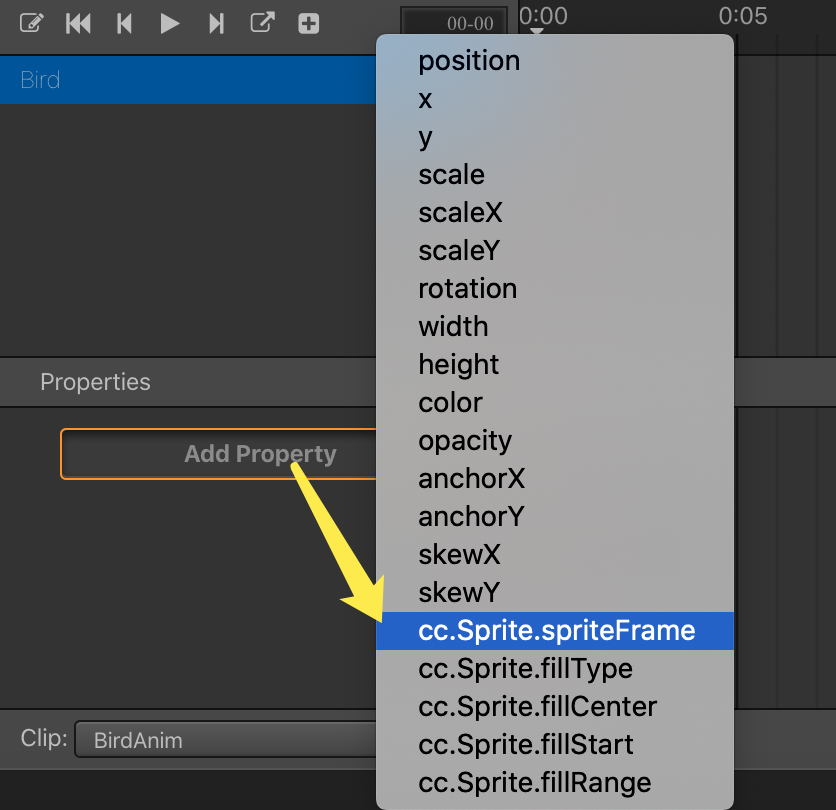
First, we click the Add Property button, select cc.Sprite.spriteFrame and a new option will appear in the property list. At the same time, a red line appears on the right side. This line is called a track.
Next, select the 3 bird pictures in the Texture folder and drag them to the red track line together.

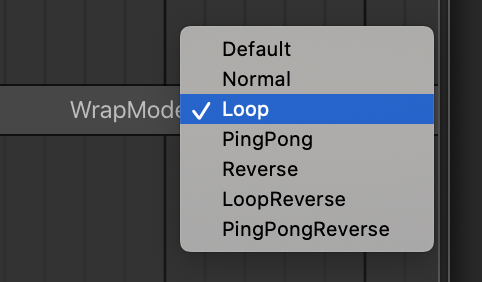
Next, select WrapMode as Loop (the default is Default)
After the operation above, the interface shown in the figure above will appear. At this time, the three pictures are overlapped and it is not easy to observe. We can adjust the distance between the pictures by using the small diamond icon above. The switching interval between pictures changes, so this is also a way to adjust the frame animation interval. Example adjustments:
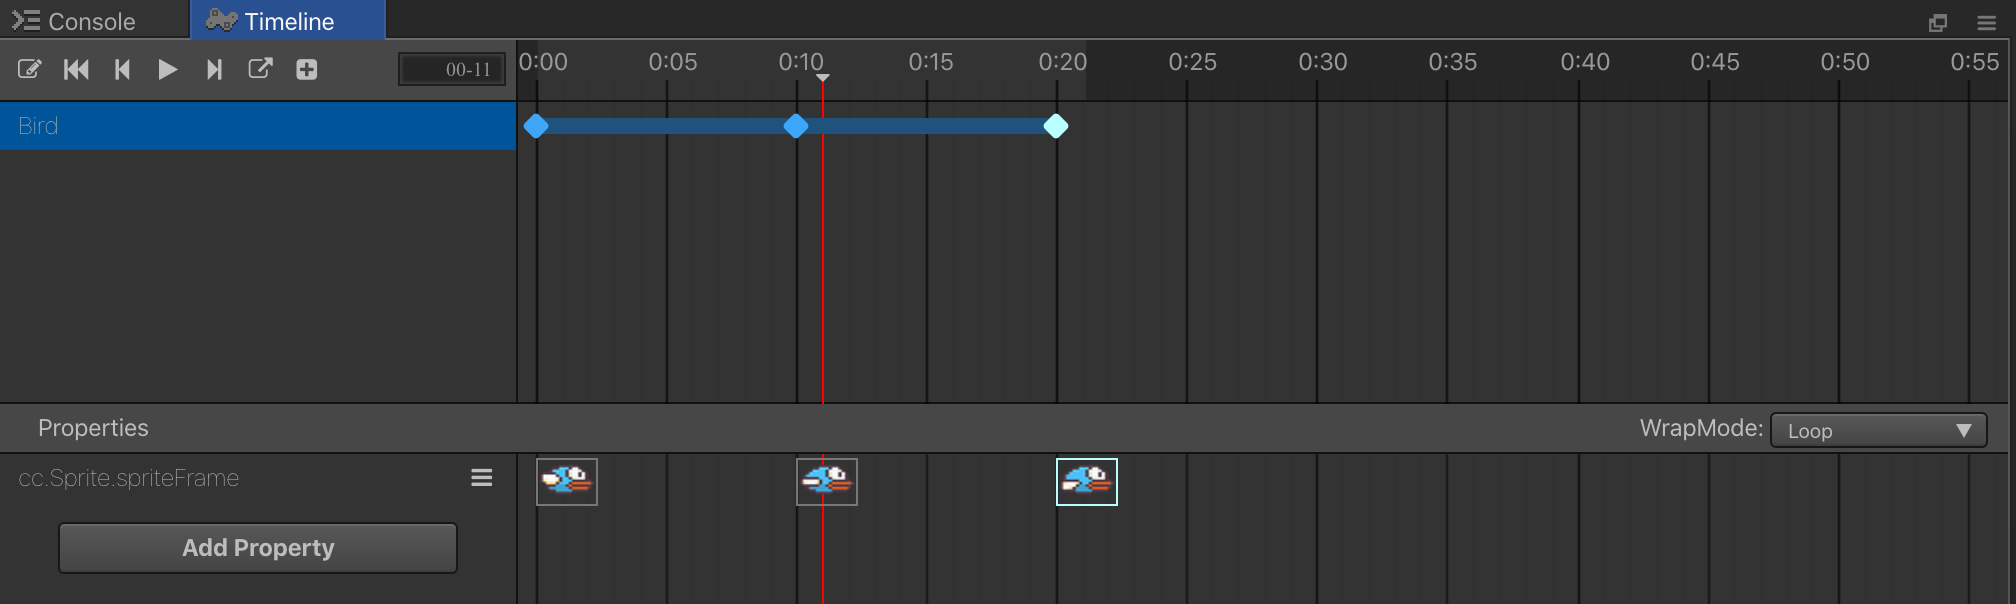
The Duration in the lower right corner changed from 0.07s to 0.35s, indicating that the switching interval between the three pictures has become longer. Click the Play button and you can see that the bird’s wings are constantly fanning up and down in the scene editor.
However, this animation looks a bit awkward. Notice, after the animation is played to the third frame, it is immediately replayed from the first frame, and there is a missing wing movement in the middle, which is a bit weird.
To fix, we add another frame to the animation. Example:

If you play it again, you can see these adjustments make the animation smoother and more realistic.
Save your progress
Find the Save button in the scene editor. Click Save once, and then click the Close button located next to the Save button.
So where are we?
At this step, the Animation display in Bird’s property inspector should look something like this:

Final progress for this tutorial
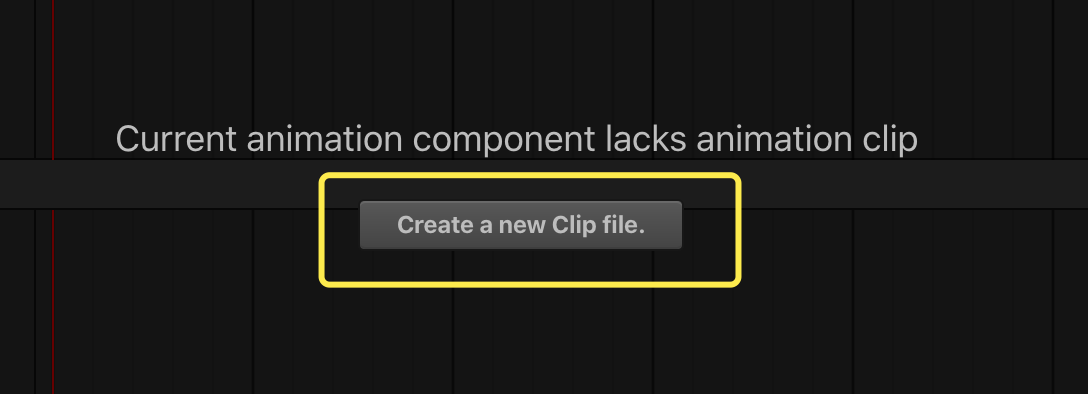
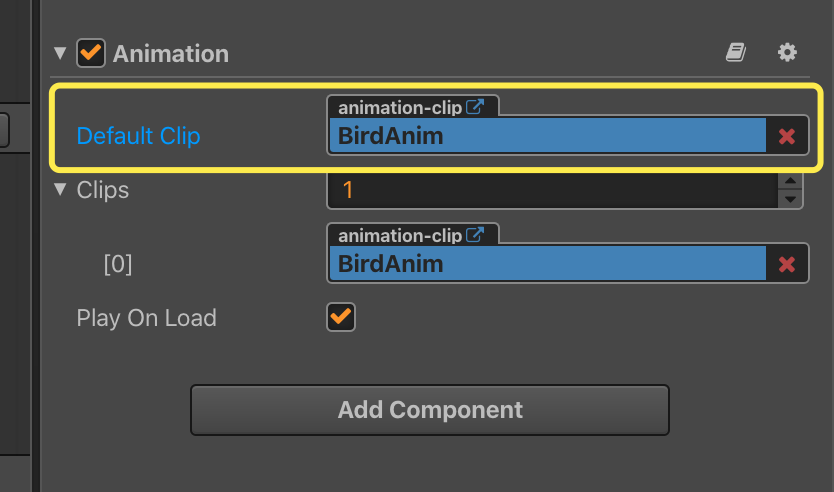
First, check the Play On Load option and click Run. You will find that the bird is not moving at all. After reading the documentation you would realize that the default clip played is Default Clip. From the figure above, we can see that this item is None.
Second, manually drag the BirdAnim animation file in \assets\Animation directory to the Default Clip, as shown below:
Lastly, save your work first and then run to check the results.
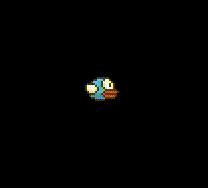
We finally see that the bird is flying happily!!
Conclusion
Stay tuned for Part 3 of this tutorial!
Special Thank you!
To HuJun for creating this tutorial.