
Cocos Creator: learning “FlappyBird”
Part (10): add scoring and fly-out screen processing
Note: This is a multi-part tutorial: Part 1 | Part 2 | Part 3 | Part 4 | Part 5 | Part 6 | Part 7 | Part 8 | Part 9
Note: Part 11 coming soon.
Introduction and getting help
You are welcome to post to the Cocos Creator category on the Cocos forums to talk about any issues you encounter during the development process. This tutorial does not teach how to code.
Please prepare your development environment before starting this tutorial. If you are having trouble with our tutorial, please take a look at the following documentation:
Preparing the development environment:
Let’s get started
This tutorial focuses on using Cocos Creator to build a Flappy Bird clone. Remember Flappy Bird?

So far, from Part 1, Part 2, Part 3, Part 4, Part 5, Part 6, Part 7, Part 8 and Part 9, we have our Bird, we can make it appear to fly in a colorful world, we have written code to start to make our game playable, added collision detection to our Bird and Pipes, added displaying a Game Over sprite when the game comes to an end and gave the game state.
Tallying a score
This part of the our Flappy Bird tutorial series will add scoring. Why keep a score? Bragging rights, of course!
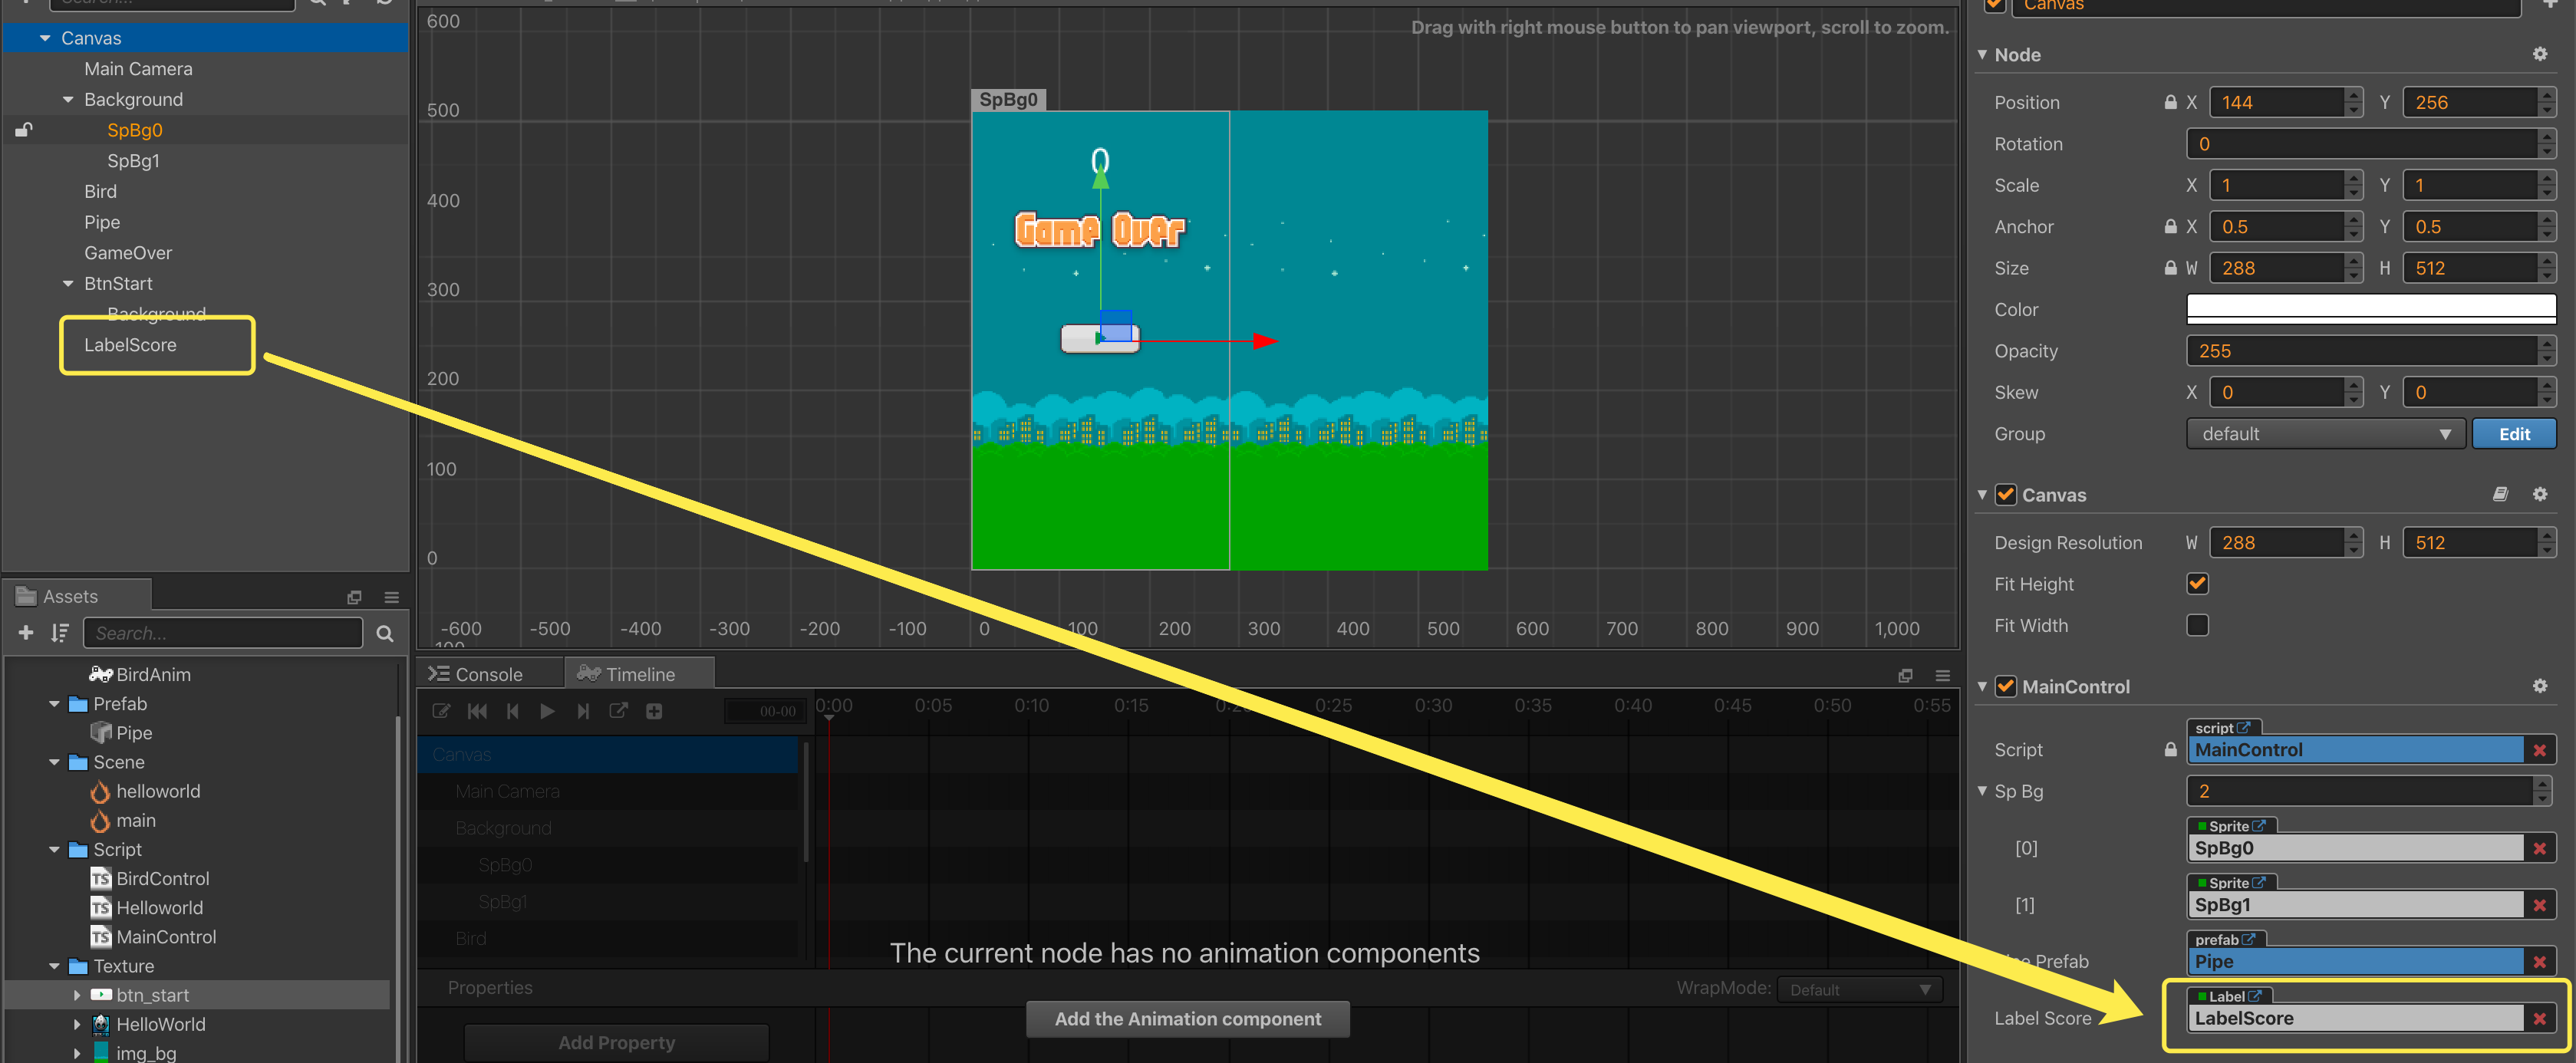
First, add a scoring Label node:
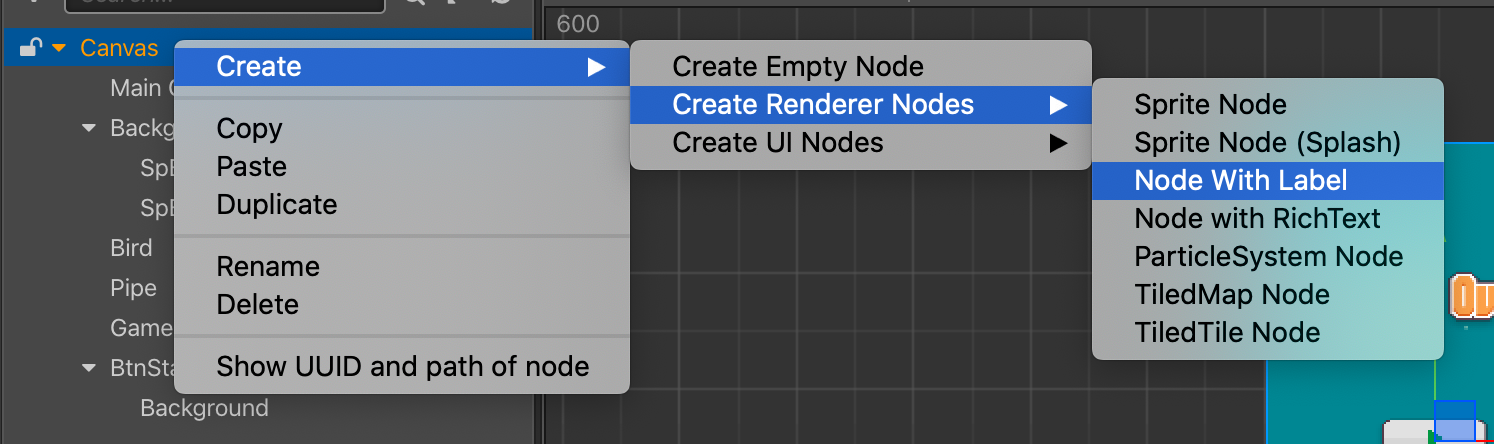

Second, create a Label text node called LableScore, set the Y coordinate, and bind it to the MainControl.ts script.
Third double-click the Pipe prefab to add a Collider component to the root node of the prefab.
Fourth, adjust the size of the Collider component so that the size of the collider is full of gaps. Set the tag property to 1 to distinguish it from the collider of the obstacle.
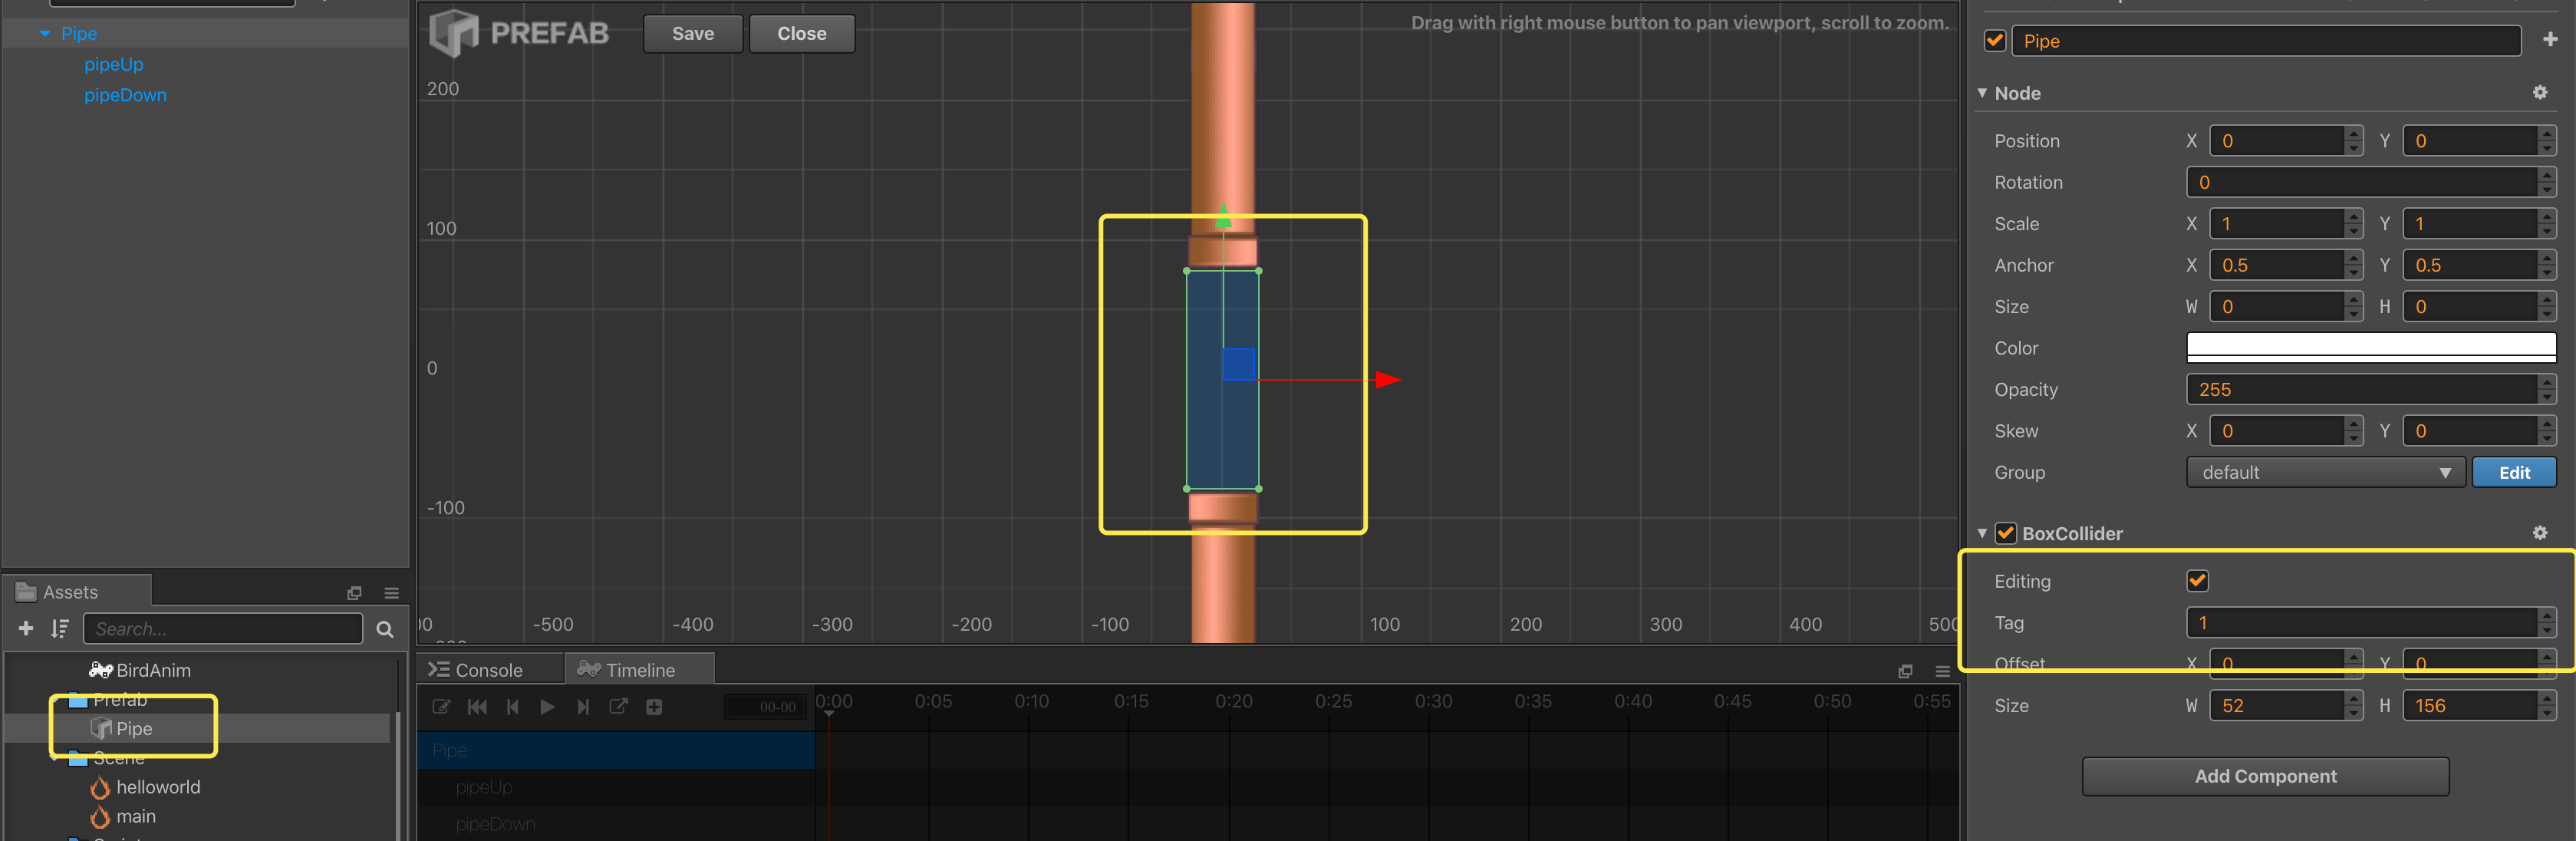
The width of the Collider component is recommended to be smaller than the width of the pipe, which will perform better.

Fifth, add the following code to the MainControl.ts script:
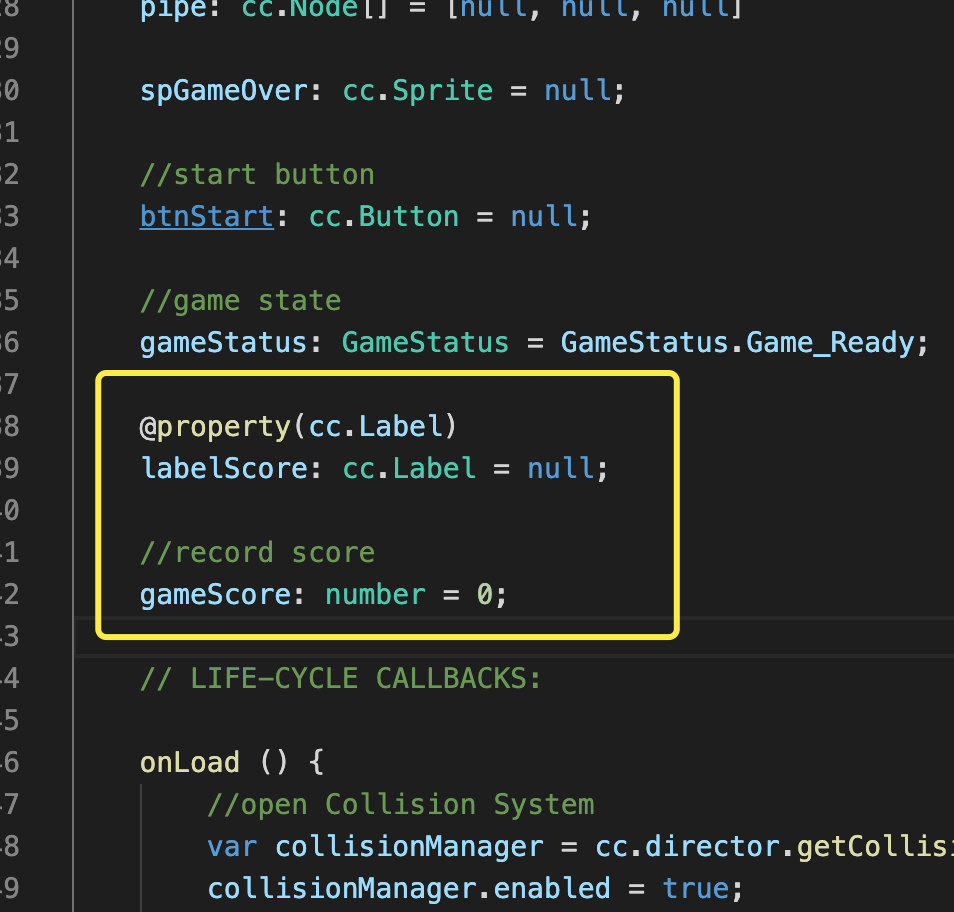
    @property(cc.Label)
    labelScore: cc.Label = null;

    // record score
    gameScore: number = 0;
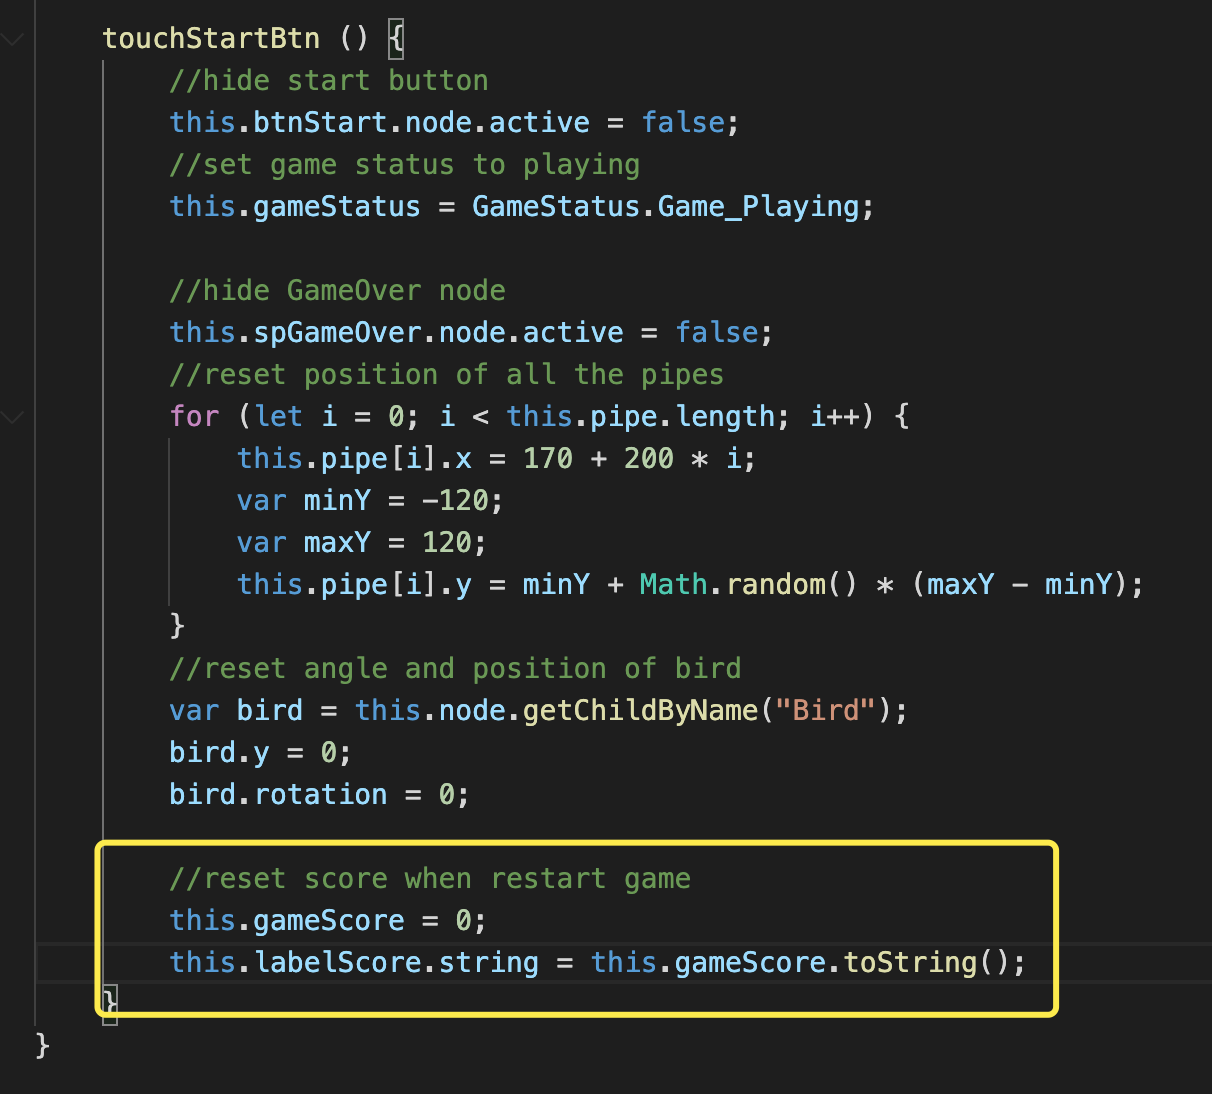
    // reset score when restart game
    this.gameScore = 0;
    this.labelScore.string = this.gameScore.toString();
Sixth, add the following code to the BirdControl.ts script:
onCollisionEnter (other: cc.Collider, self: cc.Collider) {
    // collider tag is 0, that means the bird have a collision with pipe, then game over
    if (other.tag === 0) {
        cc.log("game over");
        this.mainControl.gameOver();
        this.speed = 0;
    }
    // collider tag is 1, that means the bird cross a pipe, then add score
    else if (other.tag === 1) {
        this.mainControl.gameScore++;
        this.mainControl.labelScore.string = this.mainControl.gameScore.toString();
    }
}
Seventh, back in the Cocos Creator editor, set the labelScore property:
Save your progress
Save your changes in the text editor that you are using. Find the Save button in Cocos Creator and click Save once.
So where are we?
At this step, running our tutorial should look similar to this:
In the game, we can find that the Bird can fly out of the screen in the vertical direction or fall below the screen, in the horizontal direction. Let’s set limits so this doesn’t happen. If the Bird leaves the bounds of the physical screen, the game ends.
Last steps
Add the following code to the BirdControl.ts script:
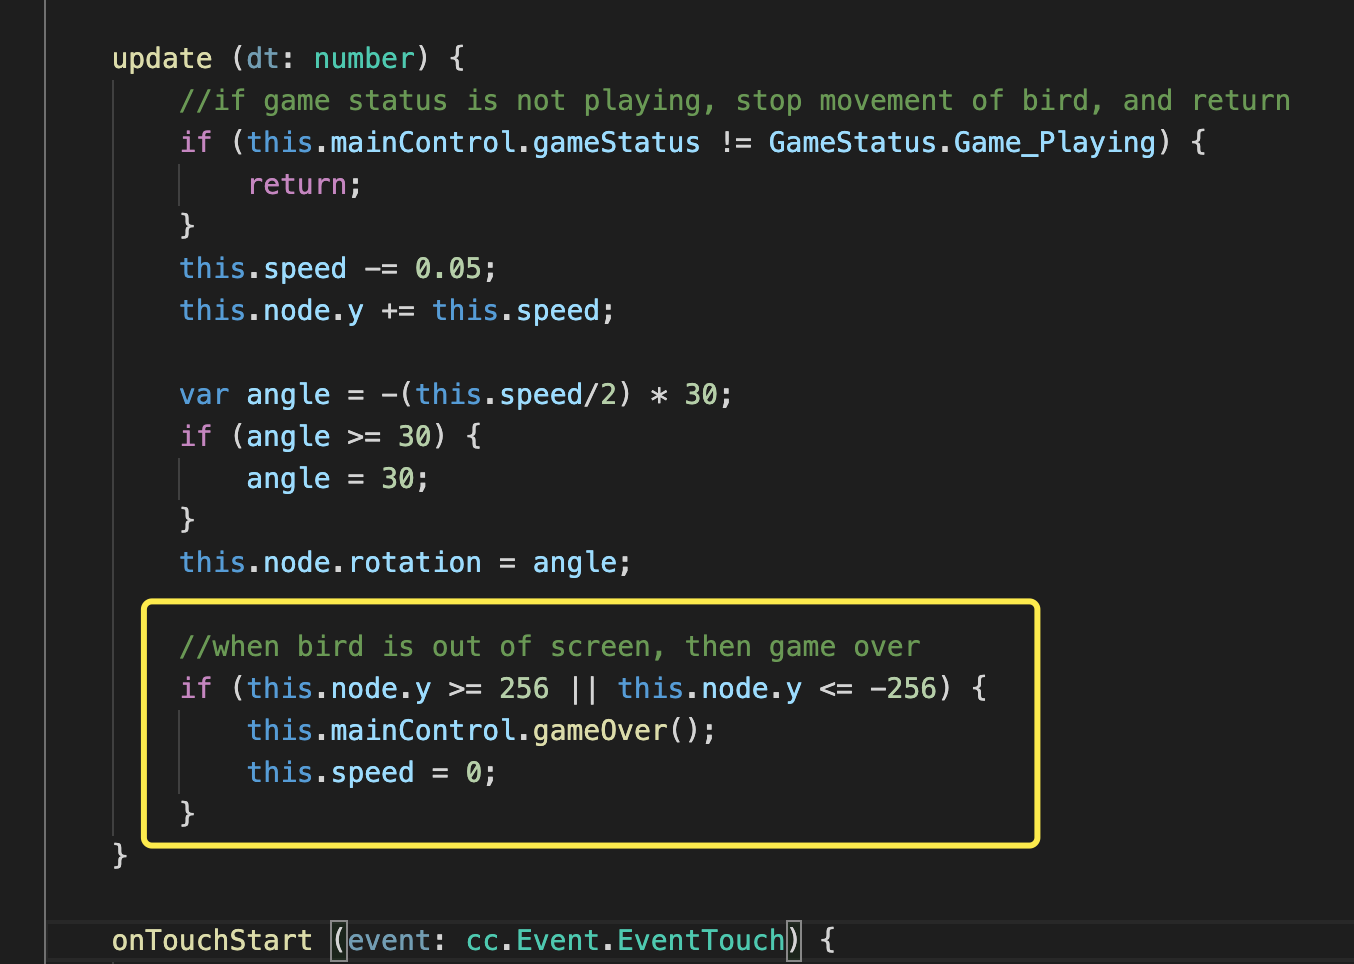
    // when bird is out of screen, then game over
    if (this.node.y >= 256 || this.node.y <= -256) {
        this.mainControl.gameOver();
        this.speed = 0;
    }
Because the height of our screen is 512, the top Y coordinate is 256 and the bottom coordinate is -256.
Save your progress
Save your changes in the text editor that you are using. Find the Save button in Cocos Creator and click Save once.
So where are we?
At this step, running our tutorial should look similar to this:
Conclusion
Stay tuned for Part 11 of this tutorial!
Special Thank you!
To HuJun for creating this tutorial.