
Cocos Creator | Android Environment Configuration for Creator 2.x
macOS
Installation
-
Install the Oracle JDK
-
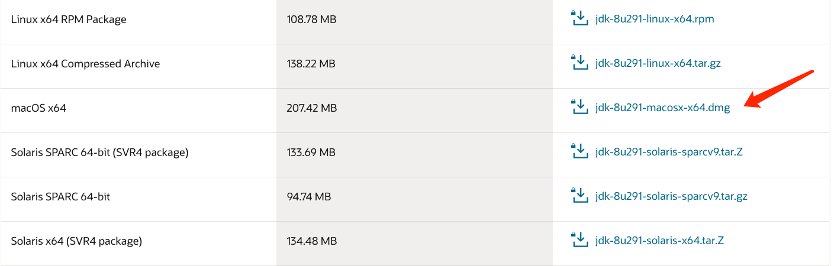
Visit Oracle’s Download site.
-
Select macOS x64 and download.
-
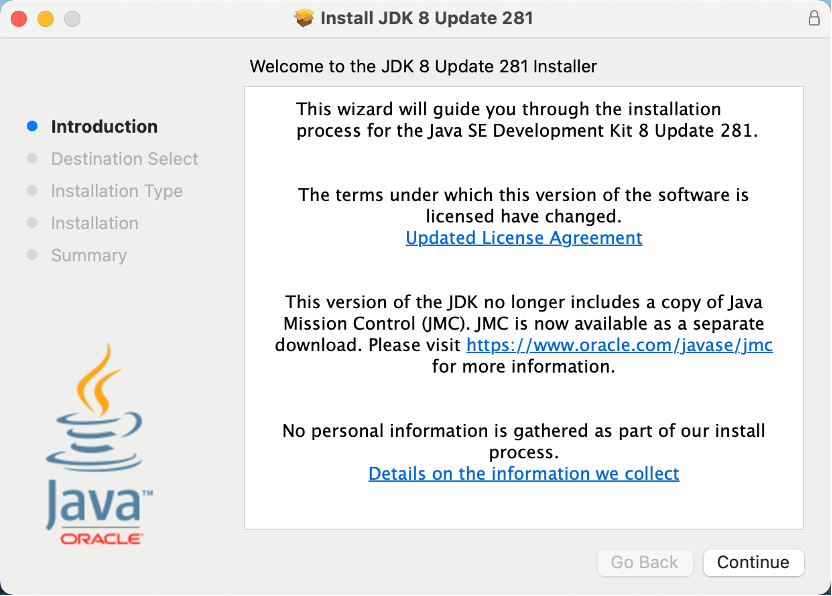
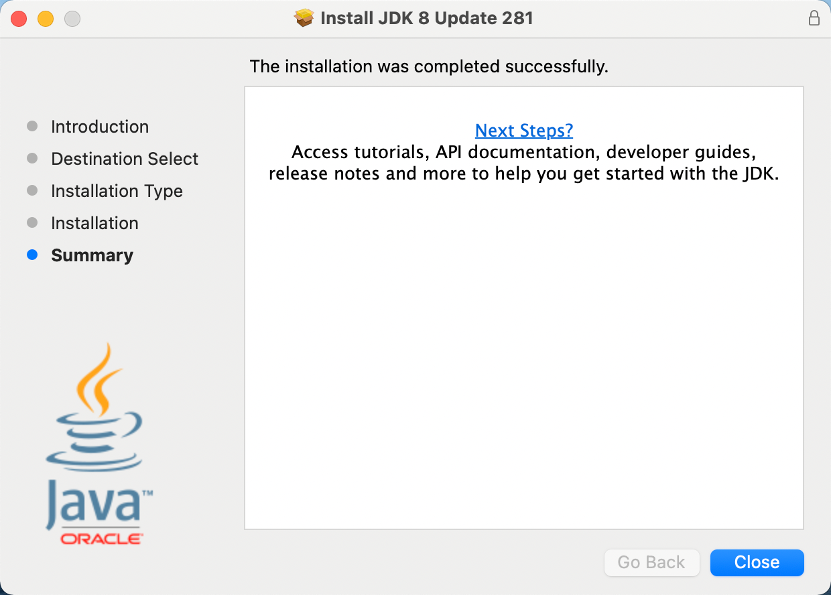
Install
-
Testing
Test for successful installation by entering the following command in the terminal:java -versionIf the following message shows, the installation is successful:

-
-
Installing Android Studio
-
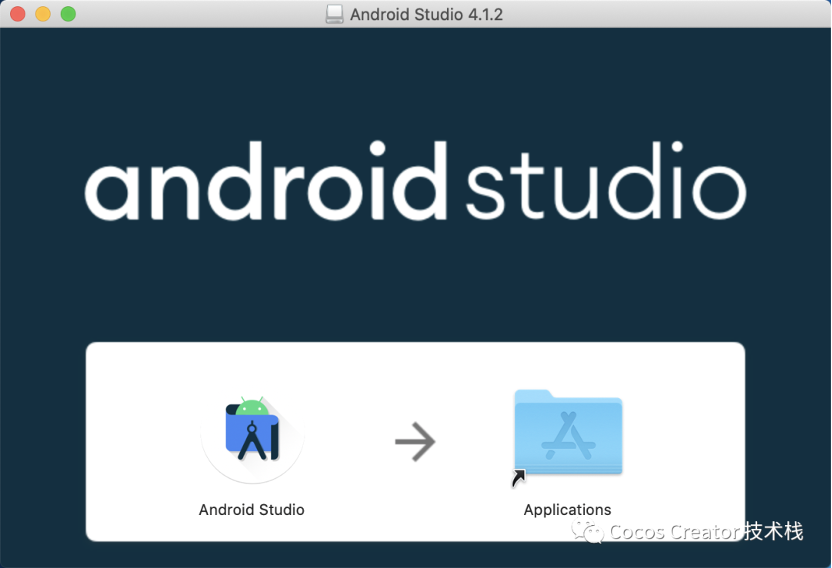
Install Android Studio
-
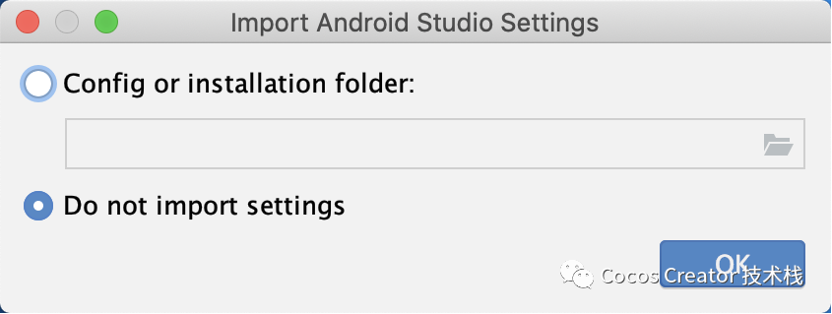
Run Android Studio - Select whether to import the configuration as needed:
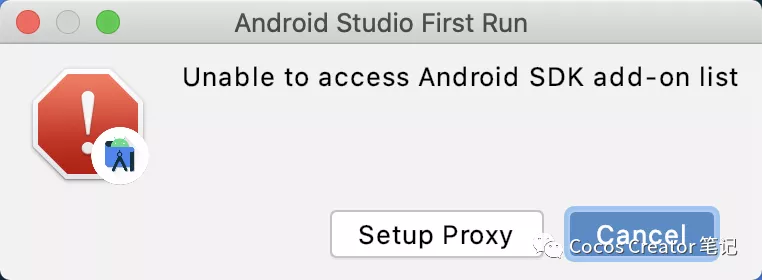
If the following prompt appears, click Cancel:
-
Install SDK and NDK
-
Open the SDK Manager in the welcome panel:
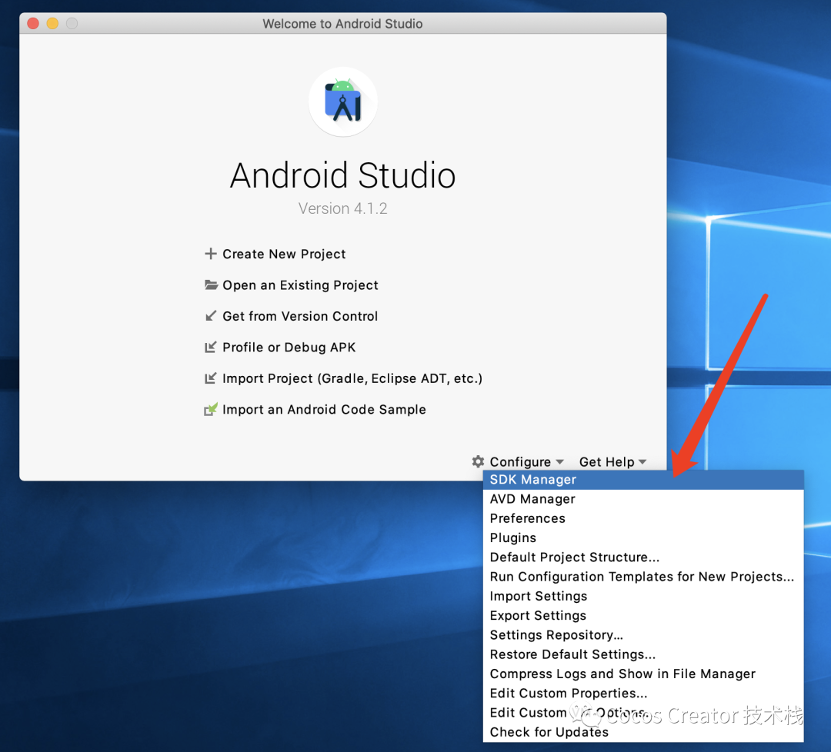
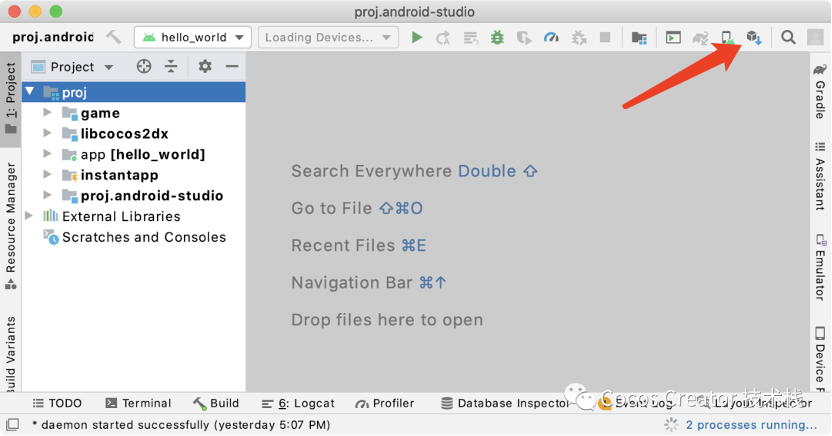
Later on, it is also open the SDK Manager from the menu bar or toolbar and download the required version of the SDK or NDK.Menu bar option:
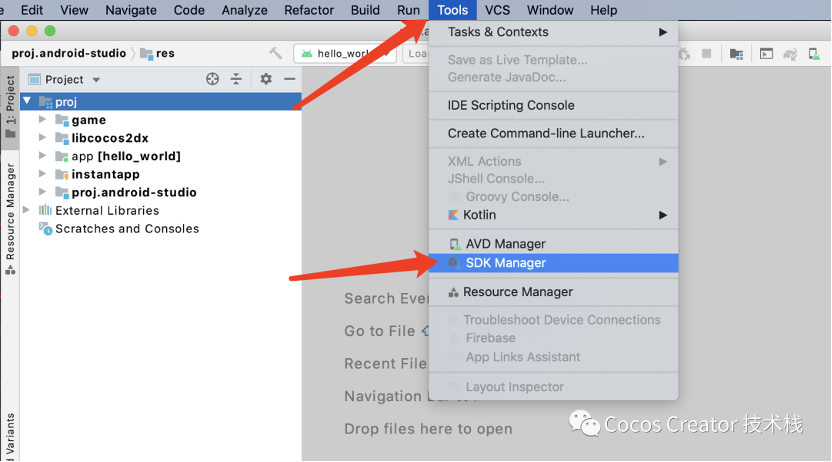
Toolbar option:
-
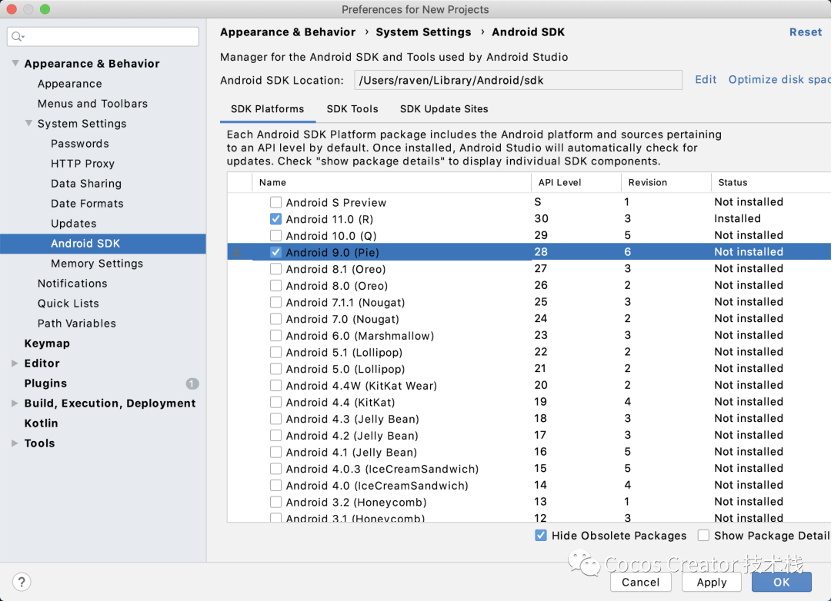
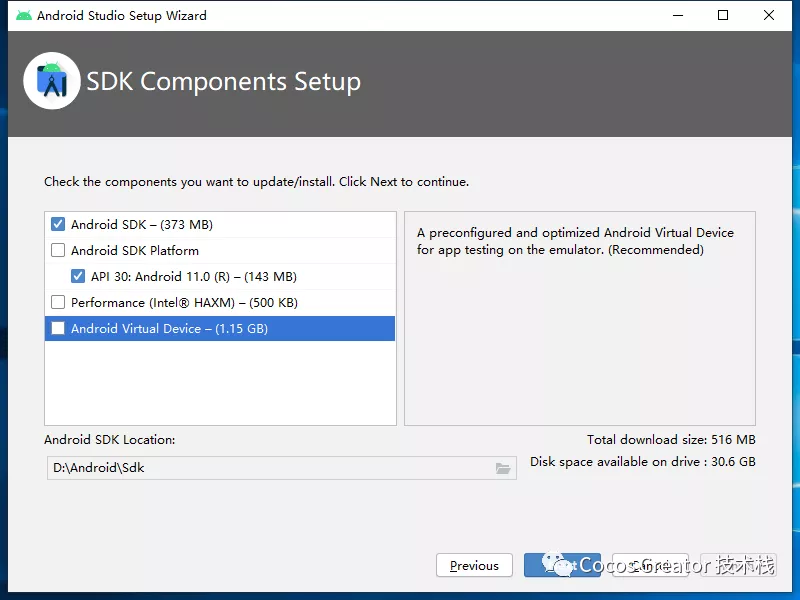
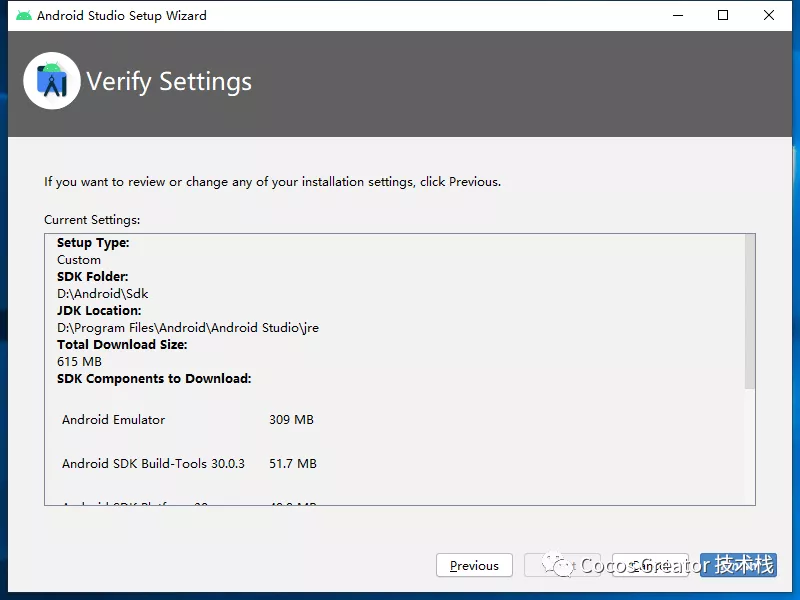
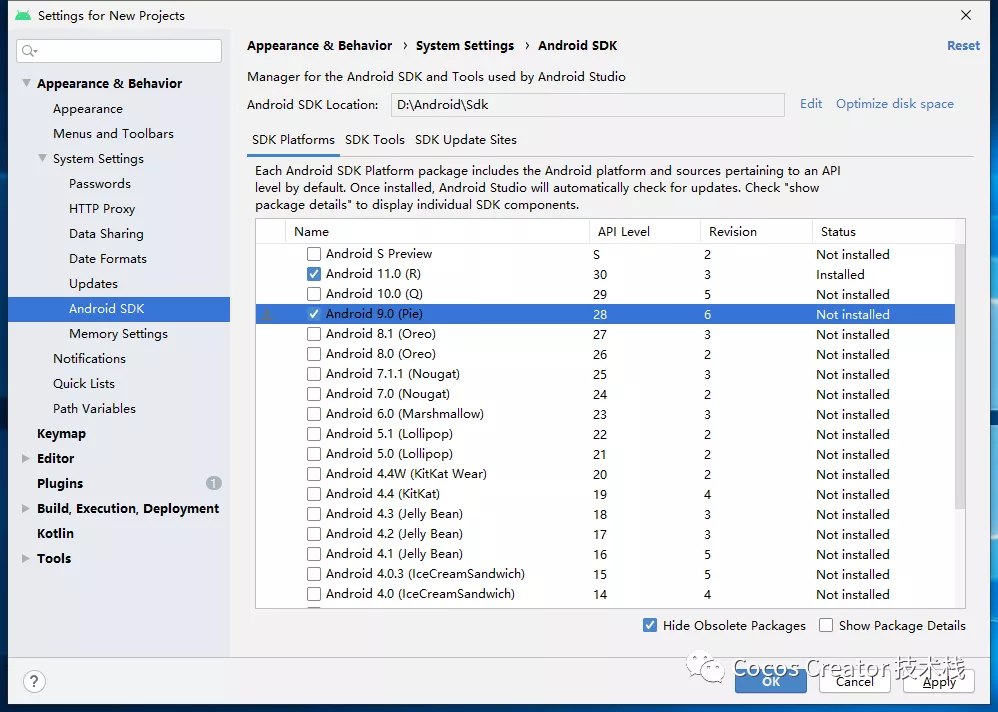
Install the SDK
-
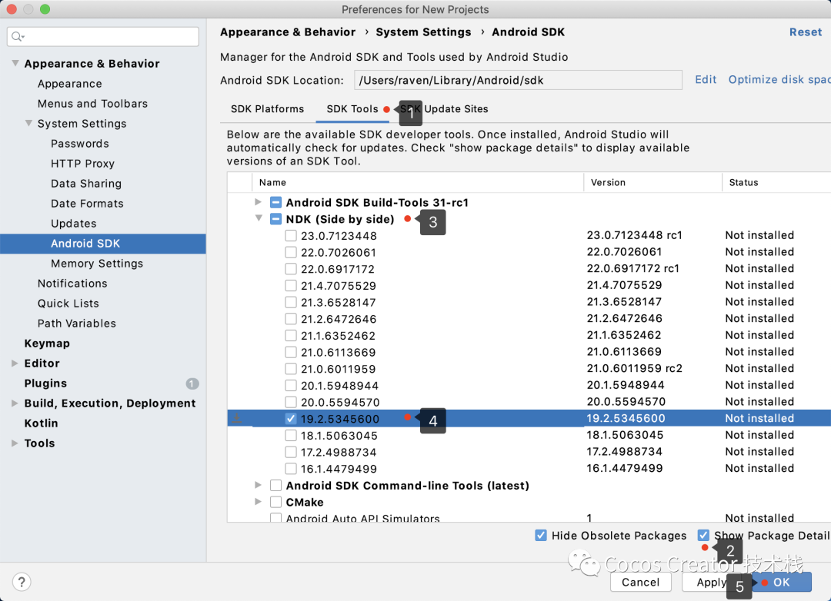
Install the NDK
The NDK needs to be selected according to the Cocos Creator version, the official recommended version is r17 - r19.If the NDK version is too high and the Cocos Creator version does not support it, compilation errors will occur.
-
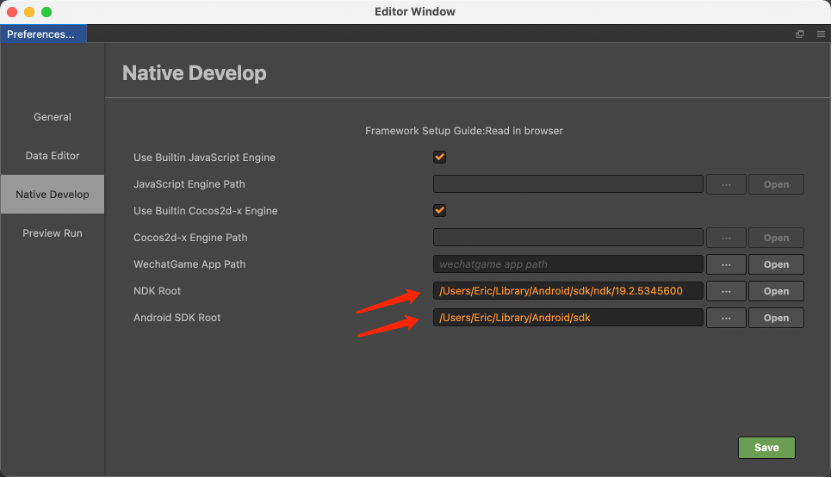
Configuring Cocos Creator
Once the SDK and NDK are downloaded, configure the native development environment of Cocos Creator.
Pay special attention to the <NDK path> and select the root directory of the NDK:
Building from Cocos Creator
Open the build panel from within Cocos Creator and set the relevant parameters:
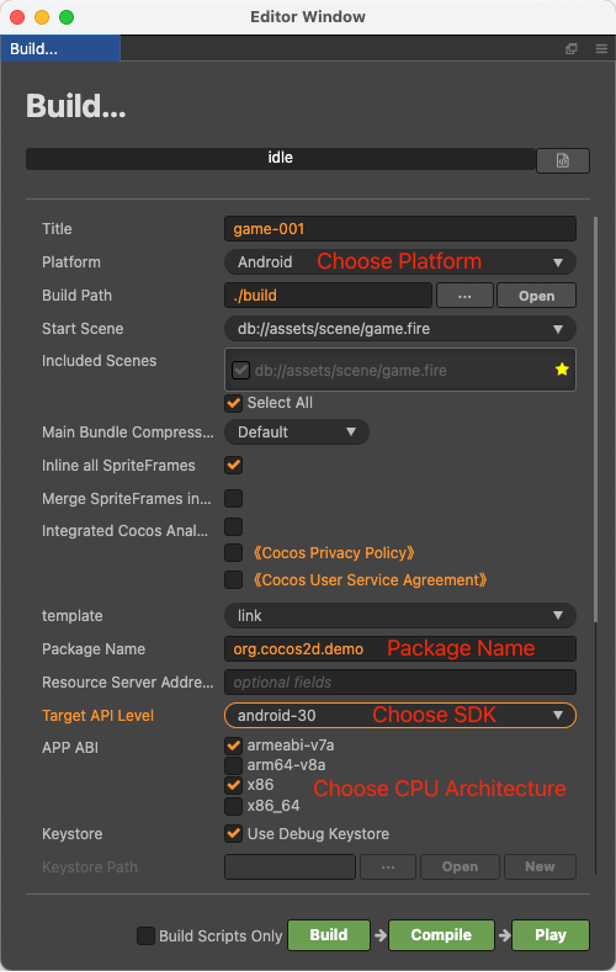
For more information about the parameters, please refer to the Publish Native documentation.
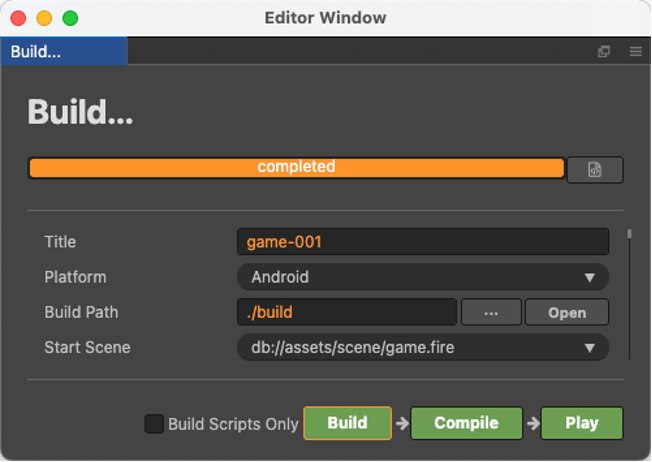
Start the build:
Running the project
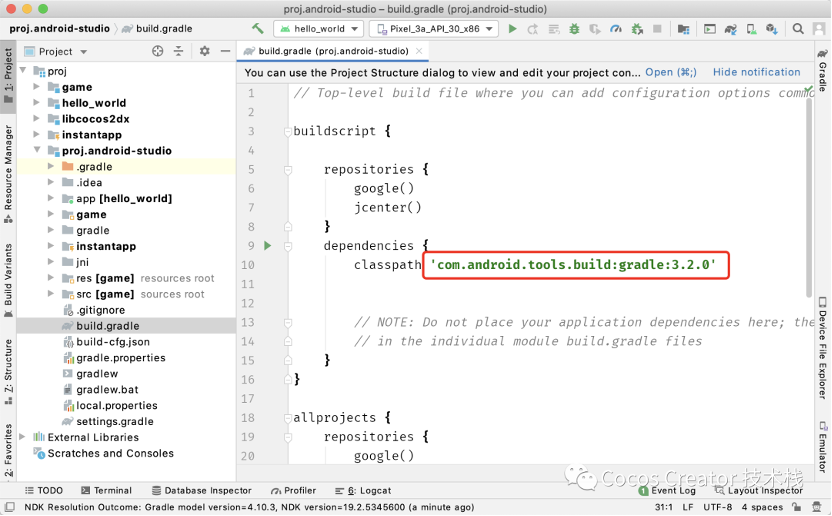
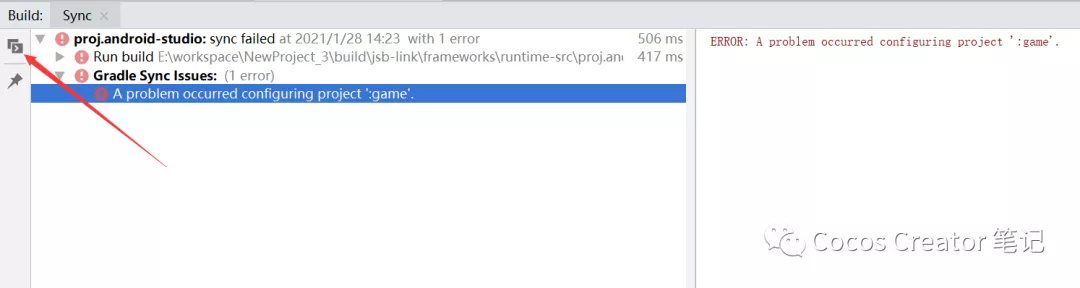
After the build is finished, open the project’s Android project (i.e. the proj.android-studio directory) with Android Studio. Android Studio will automatically download the required Gradle and other dependent libraries:

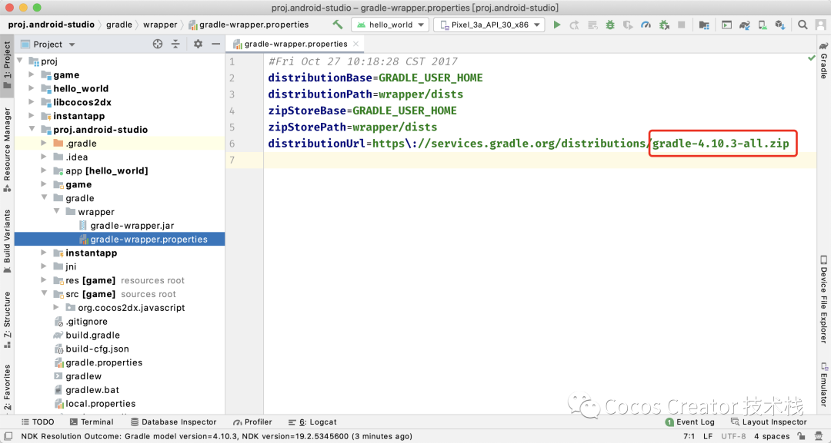
Configuring Gradle
Generally speaking, the default Gradle is the one that matches after the Creator build, there is no need to modify it manually.
Cocos Creator 2.4.x supports Android Gradle version 4.10.x, which corresponds to Gradle Tool version 3.x (v3.2.0 is recommended). If prompted to upgrade the Android Gradle extension when compiling with Android Studio, please do not upgrade.
If the version of Gradle or Gradle Tool is too recent, it will cause an error.
Gradle Tool:
Gradle:
After downloading, select the project to run (which is the name of the game we filled in the build panel of Cocos Creator) (instantapp will package the game in App Bundle format for uploading to the Google Play store):
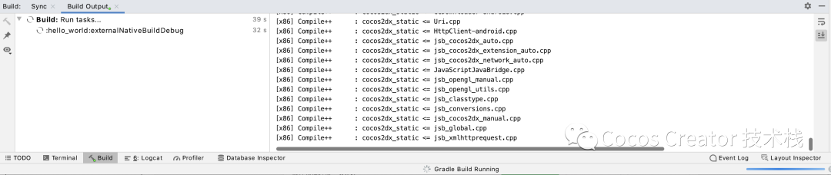
After clicking Run, the first run will compile the Cocos source code, so please be patient:
Once the build is complete, the game is ready to run:

Windows
Installation
-
Install the Oracle JDK
-
Visit Oracle’s Download site.
-
Select Windows x64 and download.
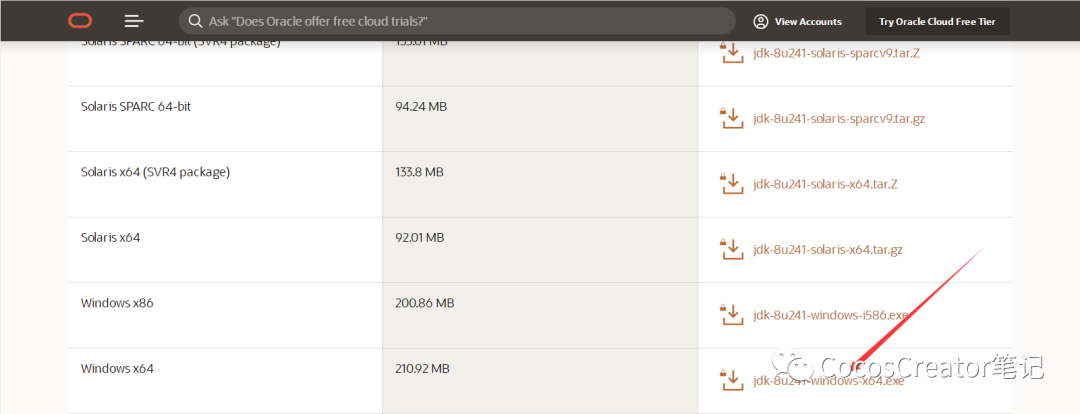
-
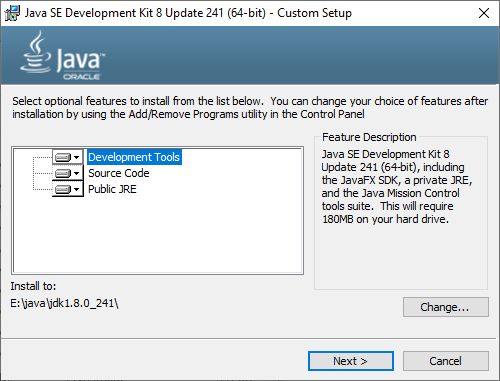
Choose the installation directory for jdk:
After the JDK installation is complete, a JRE installation prompt will pop up, continue to click Change to modify the installation location, the same as the JDK installation process:

After the installation is complete, the directory structure is as follows:

-
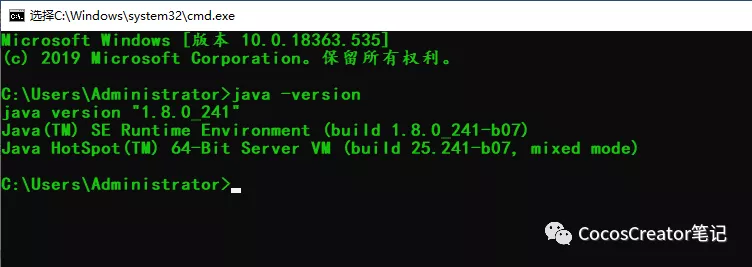
Testing
Test for successful installation by entering the following command in the terminal:java -versionIf the following message shows, the installation is successful:
-
-
Setting Environment Variables
-
Create a new system variable:
Variable name: JAVA_HOME
Variable value:D:\Java\jdk1.8.0_241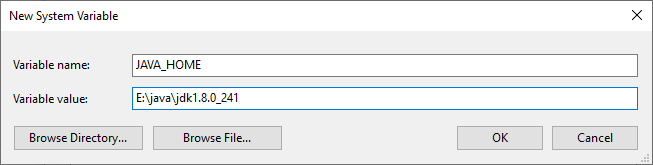
-
Edit environment variable
Variable name: Path
New:%JAVA_HOME%\bin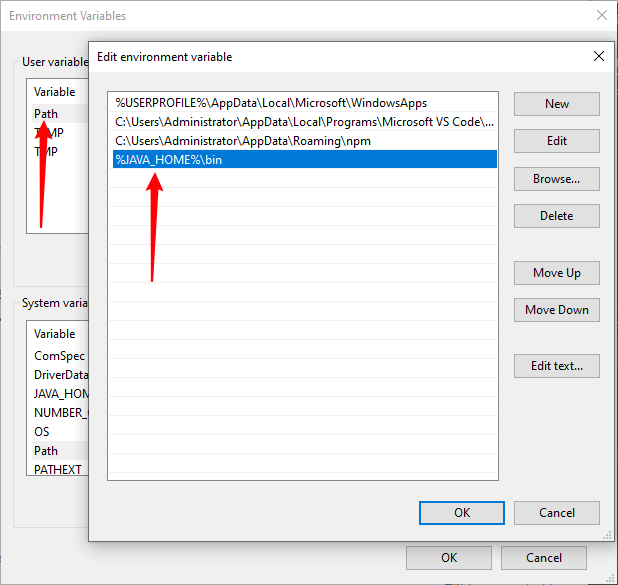
-
Create a new system variable
Variable name: CLASSPATH
Variable value:.;%Java_Home%\bin;%Java_Home%\lib\dt.jar;%Java_Home%\lib\tools.jar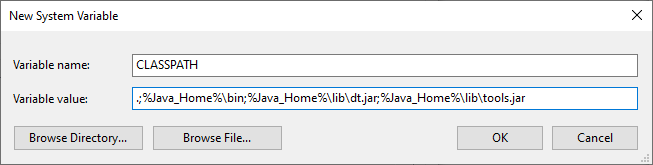
-
Restart
After modifying the environment variables, restart your computer to take effect.
-
-
Installing Android Studio
-
Install Android Studio
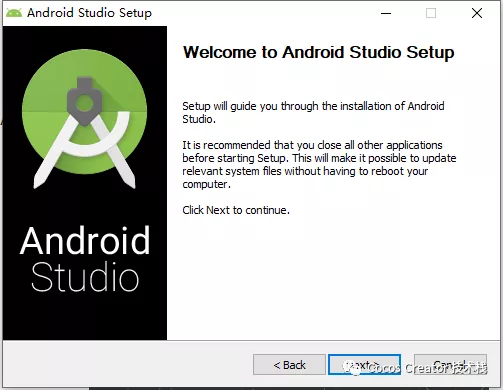

-
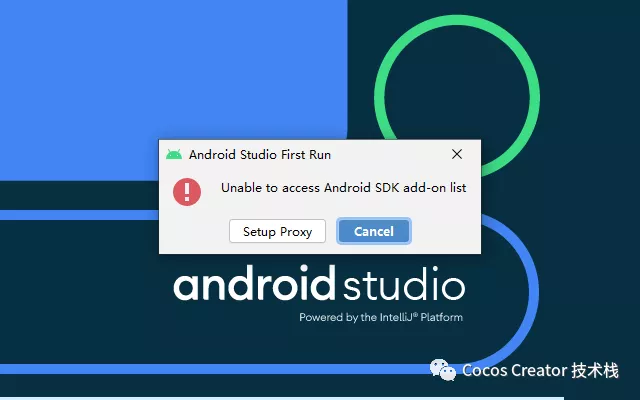
Run Android Studio - Select whether to import the configuration as needed:

If the following prompt appears, click Cancel:
-
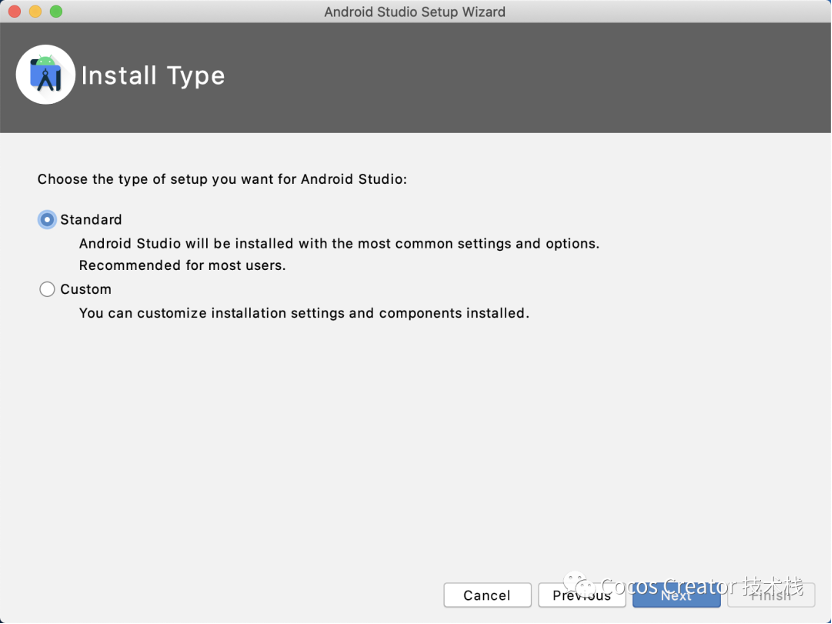
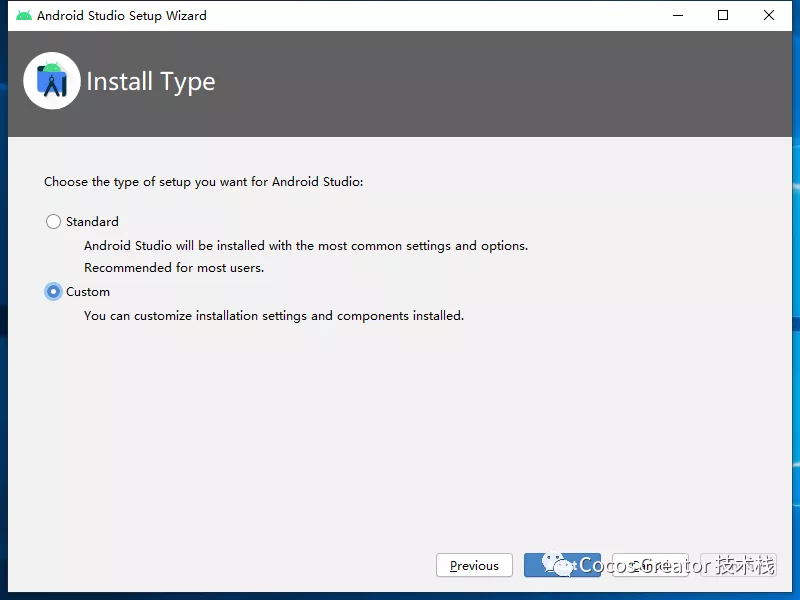
Choose standard or custom installation:
-
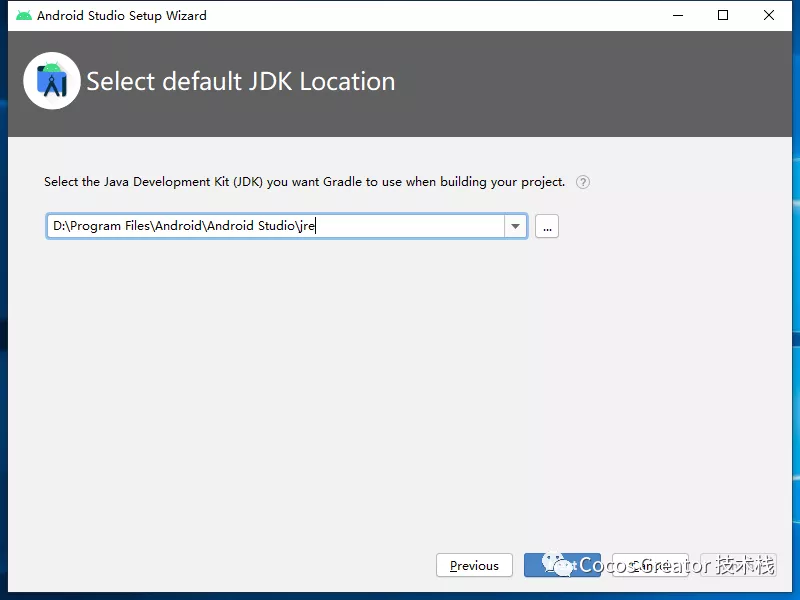
Completed

-
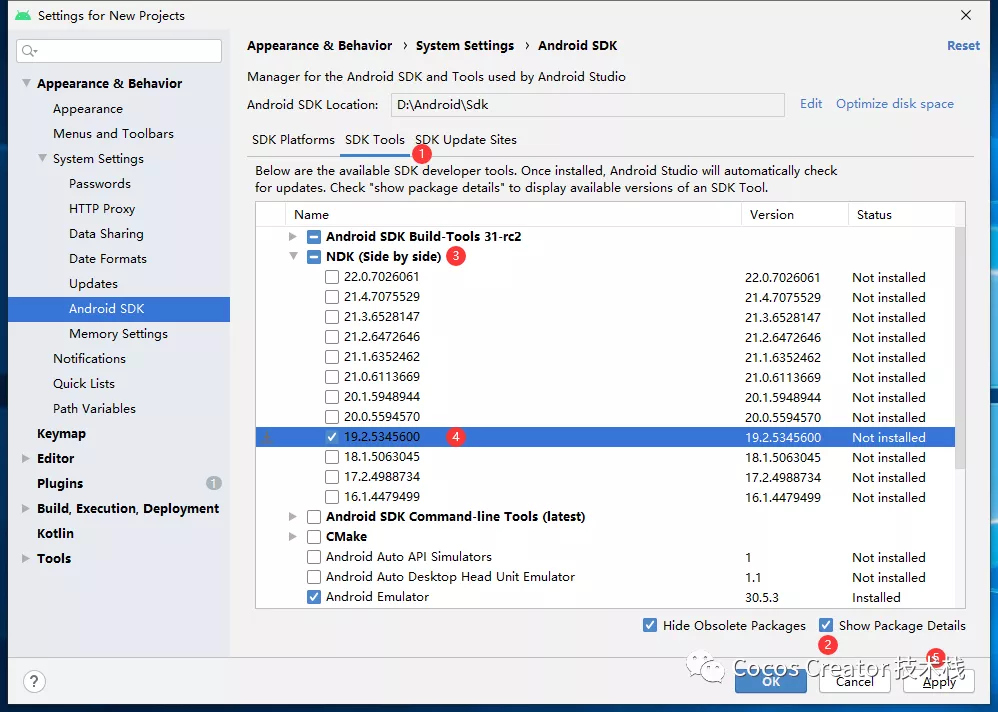
Install SDK and NDK
-
Open the SDK Manager in the welcome panel:

Later on, it is also open the SDK Manager from the menu bar or toolbar and download the required version of the SDK or NDK.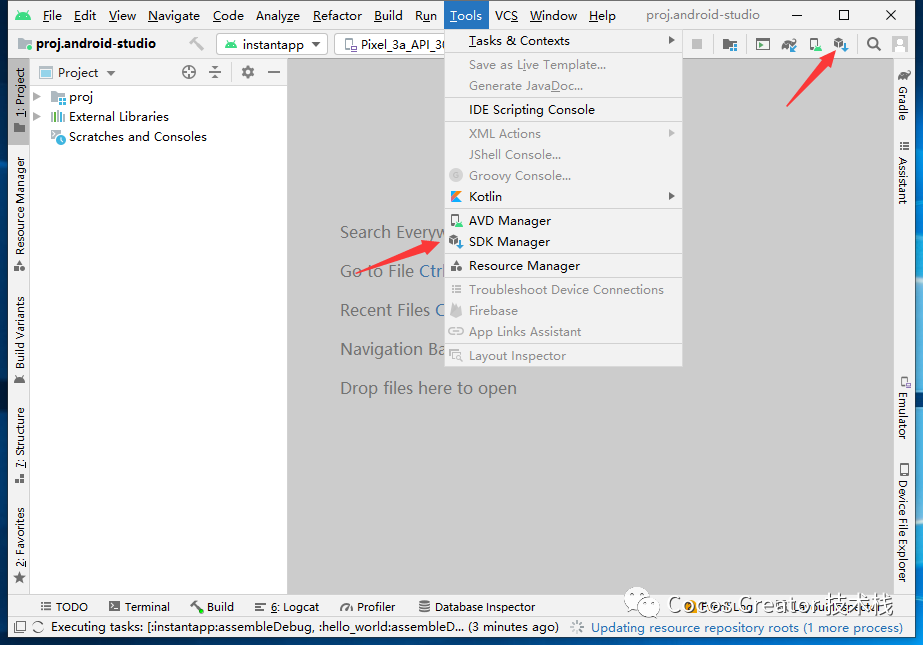
-
Install the SDK
-
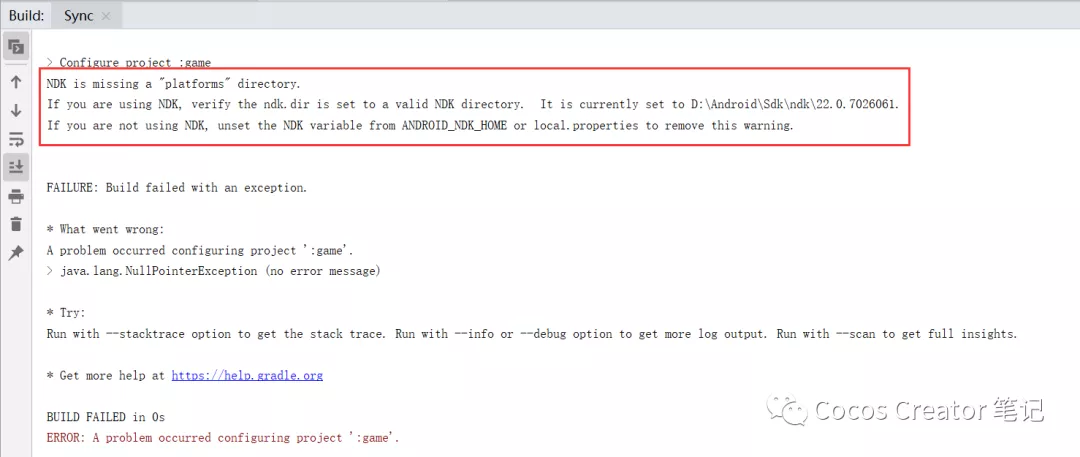
Install the NDK
The NDK needs to be selected according to the Cocos Creator version, the official recommended version is r17 - r19.If the NDK version is too high and the Cocos Creator version does not support it, compilation errors will occur.
-
Configuring Cocos Creator
Once the SDK and NDK are downloaded, configure the native development environment of Cocos Creator.
Pay special attention to the <NDK path> and select the root directory of the NDK:
Building from Cocos Creator
Open the build panel from within Cocos Creator and set the relevant parameters:
For more information about the parameters, please refer to the Publish Native documentation.
Start the build:
Running the project
After the build is finished, open the project’s Android project (i.e. the proj.android-studio directory) with Android Studio. Android Studio will automatically download the required Gradle and other dependent libraries:
Configuring Gradle
Generally speaking, the default Gradle is the one that matches after the Creator build, there is no need to modify it manually.
Cocos Creator 2.4.x supports Android Gradle version 4.10.x, which corresponds to Gradle Tool version 3.x (v3.2.0 is recommended). If prompted to upgrade the Android Gradle extension when compiling with Android Studio, please do not upgrade.
If the version of Gradle or Gradle Tool is too recent, it will cause an error.
Gradle Tool:
Gradle:
After downloading, select the project to run (which is the name of the game we filled in the build panel of Cocos Creator) (instantapp will package the game in App Bundle format for uploading to the Google Play store):
After clicking Run, the first run will compile the Cocos source code, so please be patient:
Once the build is complete, the game is ready to run: