
Tutorial: Cocos Creator: 2D real-time shadows through one-dimensional textures
The Cocos evangelist team shares another great tutorial on building realistic shadows in 2D games with very minimal requirements and a small footprint. So please check this out and share any comments about this and any other tutorials.
Shadows play a vital role in enhancing the realism and texture of the scene. Cocos Creator supports two ways to implement 3D shadows: Planar and ShadowMap.
-
Planer: Create shadows by projecting the shadow generator onto the plane of the shadow receiver.
-
ShadowMap: Achieved by placing a camera at the position of the light source to shoot a ShadowMap (shadow map).
These two methods are simple to operate and achieve good results. But for 2D games, we can’t use these methods. The shadows of many 2D games are achieved through patches. But today, we are going to introduce another implementation based on Cocos Creator 3.3.2: generating 2D real-time shadows through one-dimensional textures.
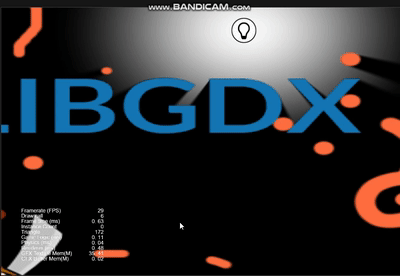
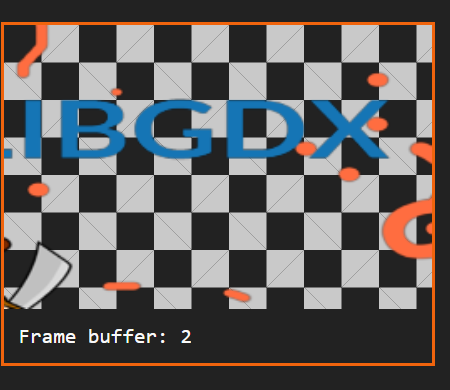
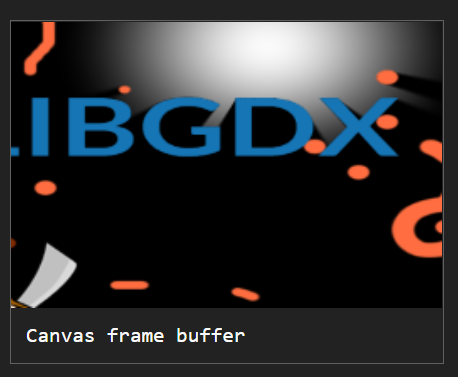
Demo effect preview
The demo implements dynamic shadows based on 2D point light sources, and all opaque pixels in the demo are shadowed. The edges of light sources and shadows are also softened, which is in line with our observation of shadows.
Next, the developer may select a portion corresponding to watch everyone achieve the dismantling step-by-step and in-depth look at the implementation principle.
How to use
-
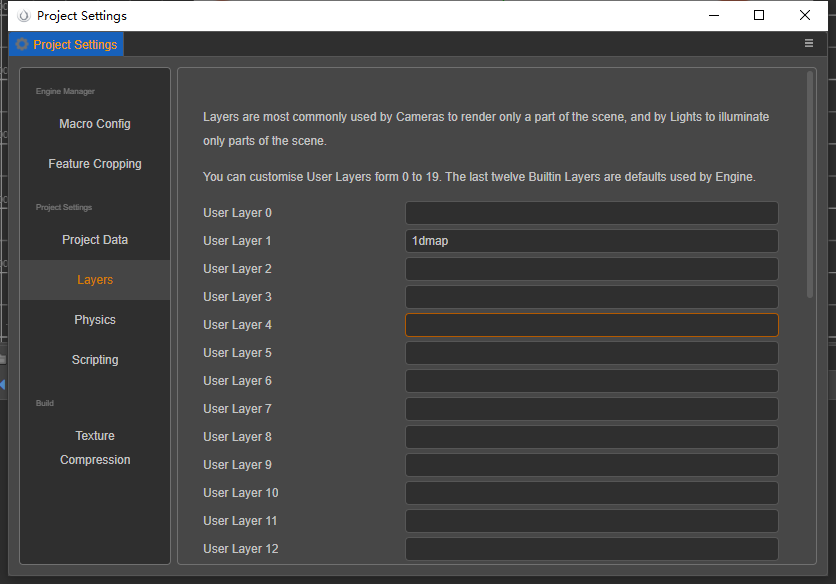
Create a custom layer: 1dmap
-
Create render textures: rt_1dmap and rt_picture
-
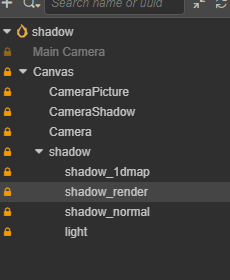
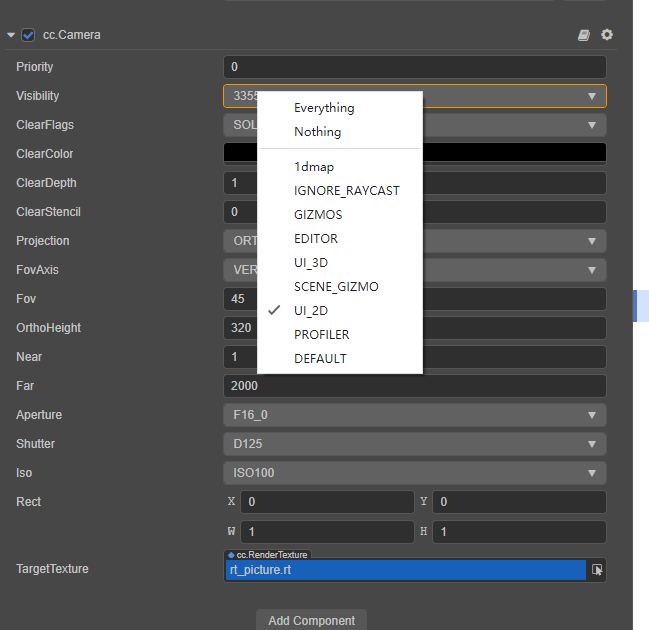
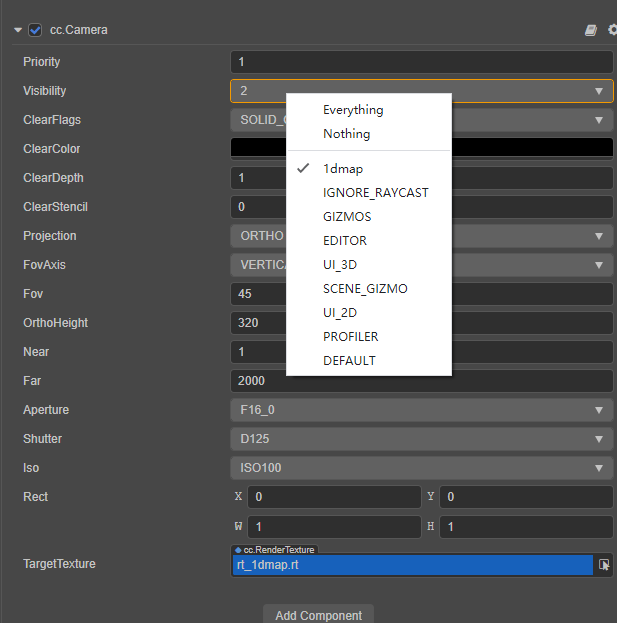
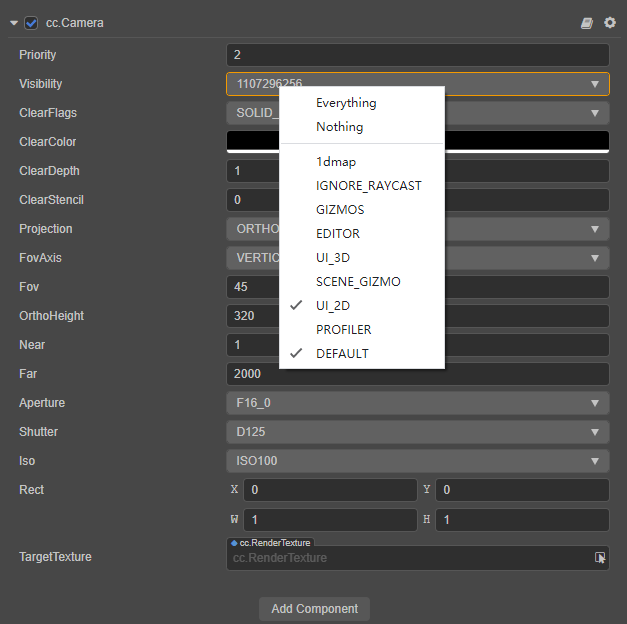
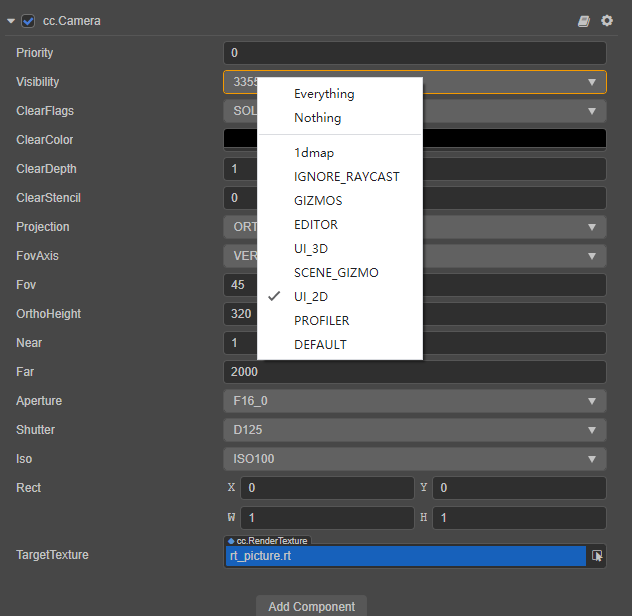
Create 3 cameras:

-
CameraPicture: Use rt_picture as TargetTexture
-
CameraShadow: Use rt_1dmap as TargetTexture
-
Camera: as the default camera when Cocos Creator creates the UI
- Create a scene
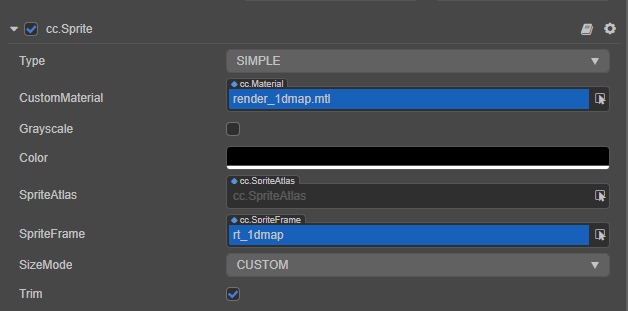
Create a scene sprite: rendered to the shadow map shadow_1dmap.
Note: its Layer must be 1dmap, which is used to render the scene to the shadow map. The specific principle will be explained later.
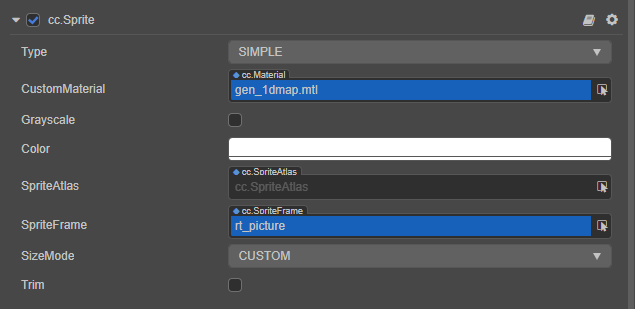
Make a full-screen blank sprite and use rt_shadow as a sprite frame.
Create a normal scene, copy shadow_1dmap and rename it shadow_normal, modify its level of attention to UI_2D.
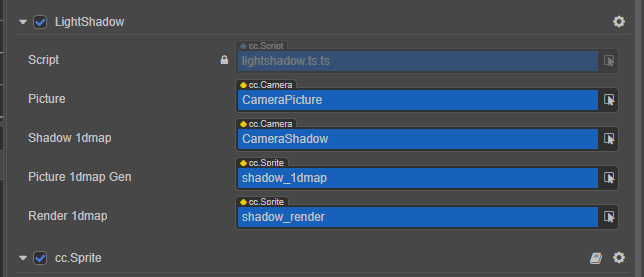
Create a light source node (Sprite) Light: Add a LightShadow node to light and associate the corresponding information.
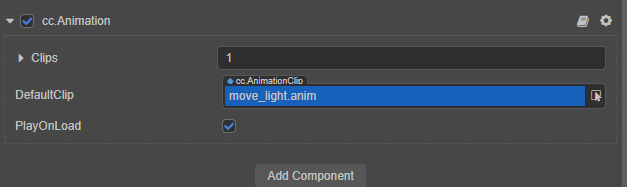
The rest of the demo adds animation to the light source. You can refer to the animation production process in the demo and isn’t needed for this tutorial, so I won’t go into details here.
If you see this and are not confused yet, you can continue to the next steps.
Implementation Principle
Algorithm flow
First, draw a normal scene and the scene to draw rt_picture on.
Then, traverse the entire texture map to find the point closest to the position of the light source, record this, and write it on 1d_map. Here, we judge whether it needs to be written into the shadow texture by comparing the alpha value.
Then, using rt_picture a full-screen shadow texture mapping shadow_render. When rendering, sample in rt_picture to determine whether the distance from the current position to the light source is less than the distance recorded in rt_picture. If it is, draw the lighting effect. Otherwise, draw the shadow effect.
Finally, the normal drawing scene is overlaid onto the shadow sprite.
The overall drawing process is like this:

To learn this way of implementation, you need to understand some pre-knowledge. Next, let’s briefly understand the four aspects of polar coordinates, render target and render texture, UV space, shadow, and lighting principles. Those who are more familiar with this part can skip it directly.
Introduction
Polar coordinates and Cartesian coordinates
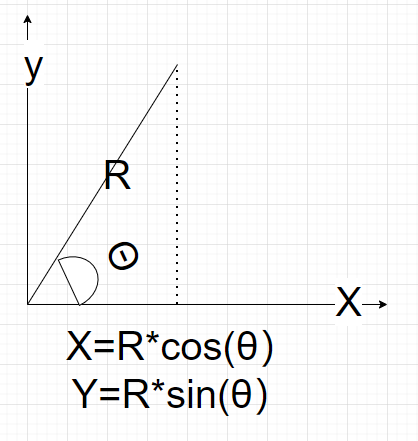
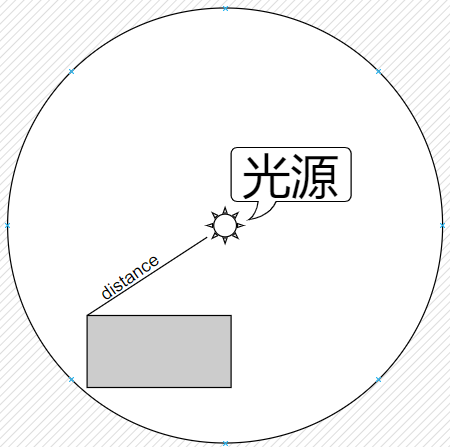
Polar coordinates describe the position through the radius and the included angle. For the plane coordinate system, any point (X, Y) can be described by their vector length R and the included angle θ, so that our coordinate system is transformed into a circle with a radius of R.
The use of polar coordinates can conveniently describe the nature of point light sources:
-
Emit a light source from a certain point in all other directions
-
According to the change of distance, the intensity of light will attenuate
-
Shadows in places that cannot be illuminated by light
Cartesian to polar coordinates:
> r = \sqrt(x^2+y^2)
>
> θ = asin (y / r)
Polar coordinates to Descartes:
> x = r * cos (θ)
>
> y = r * sin (θ)
RenderTarget
Usually, when we perform rendering, we will display the output result directly on the screen. Modern graphics cards allow us to output the content on the screen to a texture. This texture is called RT (render texture) or RTT (render target texture), which is no different from ordinary textures when used.
In graphics, the render texture can be sampled like ordinary textures, so we will use it when creating many special effects, such as the various common PostEffects, which are all made using render texture.
The production method is to add a camera to draw only the layer you need and then assign an RT to the camera’s RenderTarget.
Use textures to save data
There are different formats for textures, such as A8R8G8B8, which is a texture with 32 bits, and every 8 bits represents a color component. If Float_A8R8G8B8 is added, it becomes a 32-bit floating-point texture.
It is too wasteful to use 32 bits to store a floating-point number when high precision is not required. It is completely possible to use 1 channel and 8 bits to store 1 floating-point number, so 4 channels can store 4 floating-point numbers. At this time, you can store the value within the interval [0,1] in the texture.
If the value exceeds this range, some simple mathematical transformations are required.
The value range of the trigonometric function is in the range of [-1, 1], then use simple mathematical operations to transform it to the range of [0, 1], for example:
[-1,1] === > [-0.5, 0.5] == > [0, 1]
In graphics, textures can store any data you want. In the animation system of Cocos Creator, bone data is also stored in textures.
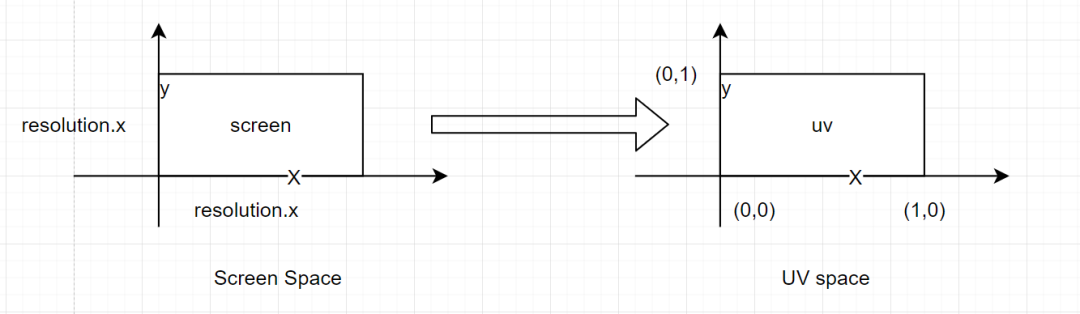
UV space
UV space transforms the world coordinate to the UV coordinate system through the abovementioned principle.
The significance of this conversion is that only the value of [0,1] can be stored in the texture. For those outside this range, some processing needs to be done to the coordinates:
// rectangular to polar filter
vec2 norm = vec2(uv0.x, y/resolution.y) * 2.0 - 1.0; // polar coordinates

// Here y/resolution.y then changes the y value to the interval [0, 1].
// Multiplying by 2 converts to the interval [-1, 1] after subtracting 1.
Principles of ShadowMap
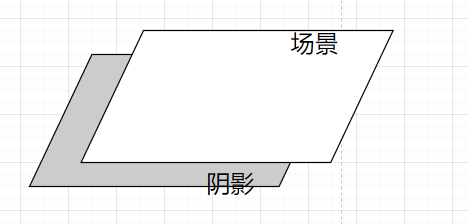
Anything without light is shadow. The so-called shadow is the place where the light cannot reach. In other words, for a 2D light source, we only need to find a point on its radius, the light passing through this point will end at this point and the shadow beyond this point.
The demo uses an alpha value greater than a certain value to mark an opaque object. In the gen_1dmap.effect record:
// the current distance is how far from the top we've come
float dst = y/resolution.y;

// if we've hit an opaque fragment (occluder), then get a new distance
// if the new distance is below the current, then we'll use that for our ray
float caster = data.a;

if (caster > THRESHOLD) { // An alpha greater than this value indicates that there is an object blocking the light

distance = min(distance, dst); //Write to 1D texture

}
After finding this point, we record the radius between it and the center of the light source, then when drawing, draw the shadow beyond this radius, and draw the light source within the radius. Take the distance in render_1dmap.effect:
//sample from the 1D distance map

float shadow_sample(vec2 coord, float r) {

return step(r, texture(cc_spriteTexture, coord).r);

}
This solves the problem of 2D light sources. To achieve this goal, we need to draw the scene once. In the obtained rendertarget, if the alpha value is higher than the set value, it is considered that it will produce shadows, and then this distance is written into the texture as the final Shadow map. After finishing all the fragment operations, start to draw the shadow phase.
Attenuation
In reality, some characteristics of light sources and shadows can be observed: as the distance increases, the energy attenuates, and the result is that the brightness becomes darker, and where the light and shadow alternate, it will produce a fuzzy look.
In the demo, a Gaussian mixture is used to simulate the attenuation:
//now we use a simple gaussian blur
float sum = 0.0;

sum += shadow_sample(vec2(tc.x - 4.0*blur, tc.y), r) * 0.05;

sum += shadow_sample(vec2(tc.x - 3.0*blur, tc.y), r) * 0.09;

sum += shadow_sample(vec2(tc.x - 2.0*blur, tc.y), r) * 0.12;

sum += shadow_sample(vec2(tc.x - 1.0*blur, tc.y), r) * 0.15;

sum += center * 0.16;

sum += shadow_sample(vec2(tc.x + 1.0*blur, tc.y), r) * 0.15;

sum += shadow_sample(vec2(tc.x + 2.0*blur, tc.y), r) * 0.12;

sum += shadow_sample(vec2(tc.x + 3.0*blur, tc.y), r) * 0.09;

sum += shadow_sample(vec2(tc.x + 4.0*blur, tc.y), r) * 0.05;

//1.0 -> in light, 0.0 -> in shadow

float lit = mix(center, sum, 1.0);
The realization of the Gaussian mixture is to take a certain proportion of the sampled values of the left and right points near the texture coordinates and do a weighting. The scientific name of this method in computer graphics is convolution.
Such shadow edges will not have abrupt transitions and simulate an effect similar to reality.
Shader rendering analysis
We have analyzed the entire rendering algorithm before, and now we are gradually analyzing the key code of these Shaders.
Capture shadow map
The first step is to perform a normal rendering of the scene to obtain the pixels that need to be shadowed.
In lightshadow.ts the light source position and screen resolution:
let uitrans = this.picture_1dmap_gen.node.getComponents(UITransform)[0];

let lpos = uitrans.convertToNodeSpaceAR(wpos);

let lpos_offset = new Vec2(lpos.x / uitrans.width, lpos.y / uitrans.height);

// Set the position of the light source
this.picture_1dmap_gen.customMaterial.setProperty('light_position', lpos_offset);

// set resolution
this.picture_1dmap_gen.customMaterial.setProperty('resolution', new Vec2(_size.width, _size.height));
After the gen_1dmap.effect has time for the normal rendering of the scene, the minimum radius of the recording light:
float caster = data.a; // An alpha greater than this value indicates that there is if (caster > THRESHOLD) {

distance = min(distance, dst); // Write to 1D texture
}
Render shadow
It represents shadows using sprite render_1dmap.effect drawing shadows and lightmaps.
Sample from within the shadow texture:
//sample from the 1D distance map

float shadow_sample(vec2 coord, float r) {

return step(r, texture(cc_spriteTexture, coord).r);

}
The meaning of step(edge, x) is: when x <edge, it returns 0, otherwise it returns 1.
Draw the light:
// The current point pixel is obtained by interpolating center (the result of shadow texture sampling) and sum (the result of Gaussian blending)

//1.0 -> in light, 0.0 -> in shadow

float lit = mix(center, sum, 1.0);

// The distance to the light source is interpolated to calculate alpha, the closer the light source is, the less alpha

return vec4(vec3(shadowColor.r, shadowColor.g, shadowColor.b), lit * smoothstep(1.0, 0.0, r));
Render a normal scene
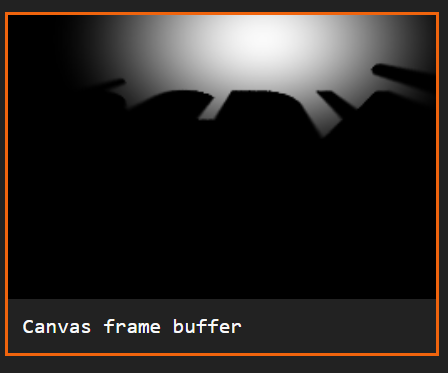
After rendering the shadow, we only need to redraw the current scene again and overlay it on the shadow layer to complete the final effect. Here are all the RT and final rendering results:
Performance impact
RT will definitely add DrawCall, so the scene needs to be drawn multiple times.
In the demo, our scene is drawn twice,
DrawCalls = scene DrawCalls*2
A resolution-based loop is made in the Shader, which also has an impact on performance:
// The higher the resolution, the higher the number of cycles and the greater the performance loss

for (float y = 0.0; y < 2048.0; y += 1.0)

if (y > resolution.y) break;
Gaussian blur requires multiple samples of the texture. The more samples, the lower the performance:
sum += shadow_sample(vec2(tc.x - 4.0*blur, tc.y), r) * 0.05;