
Tutorial: Building Water Reflections For Your 3D Games in Cocos Creator
Introduction
Thanks to Cocos Chinese community member, regocxy, for this fantastic tutorial.
In this tutorial, you will learn how to use sky cube maps for reflection, use noise maps for texture disturbances, build foaming water effects, create fog effects, and more.
Water rendering effects are among the more challenging effects in a game, and it isn’t easy to achieve realism. Simple and efficient methods are used to achieve a beautiful and straightforward stylized water effect. The code in this tutorial achieves excellent performance, working perfectly on modern mobile devices.

1. Sky reflection
The reflection of the sky requires:
-
An environment cube map
-
A noise map
-
A Fresnel reflection
1.1 Environment cube map
Many methods are used to simulate the sense of flowing water. The easiest and best way to get performance is for the program to have the majority of its practices using a normal map for uv scale and offset, and for the light and shadow calculations to show the flowing water surface.
This scheme can indeed make a pretty good stylized water effect, but this tutorial will not demonstrate building the entire effect. This tutorial directly samples the environment cube map to show a simple water surface reflection effect. Example:
vec3  v = normalize(v_view);
vec3  r = -v;
vec3  reflectColor = texture(envTexture, r).rgb;
In the above code, the reflection uses the reflection’s calculation optimization and directly reverses the view angle vector, i.e., r = -v.
The usual practice is r = reflect(v, n) and reflect(v, n) = v - 2.0 * dot(n, v) * n.
By the reflect expression, the drawing efficiency is much higher than the conventional approach, making less multiplication to calculate. The reason why this calculation optimization is for the reflection of the sky. If we only make it look like a reflection, we don’t need to care about the reflection direction’s correctness, and readers can create a detailed picture in their mind. Example:
vec4 frag () {

    vec3  n = normalize(v_normal);

    vec3  v = normalize(v_view);

    vec3  r = -v;

    vec3  reflectColor = texture(envTexture, r).rgb;

    return vec4(reflectColor, mainColor.a);
}
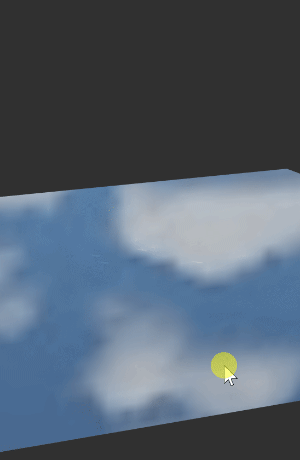
At this point, a mirror-like water surface occurs. But, without any aesthetic feeling, it looks nothing like the ocean water.
1.2 Noise map
There are two points at the core of making good water animation: one is the sense of flow, and the other is distortion. Both of these points can be achieved by uv offsetting the noise map.
This noise map will be used in this article:
IMAGE
Example:
vec4 vert() {

    StandardVertInput In;

    CCVertInput(In);

    mat4 matWorld, matWorldIT;

    CCGetWorldMatrixFull(matWorld, matWorldIT);

    vec4 worldPos = matWorld * In.position;

    v_uv.xy = worldPos.xz * 0.1 + cc_time.x * 0.05;

    ...
}

vec4 frag () {

    float t = texture(noiseTexture, v_uv.xy).r;

    vec3  n = normalize(v_normal);

    vec3  v = normalize(v_view);

    vec3  r = -v + t * 0.03;

    vec3  reflectColor = texture(envTexture, r).rgb;

    return vec4(reflectColor, mainColor.a);
}
The above code using uv offsetting is based on the world coordinate offset by simply doing v_uv.xy += cc_time.x * 0.05.
This is based on the world coordinate offset and can be adjusted for the size of the water without stretching the noise map, which results in distortion.
Another point to note here is that the noise mapping wrap mode needs to be set to repeat.
1.3 Fresnel reflection
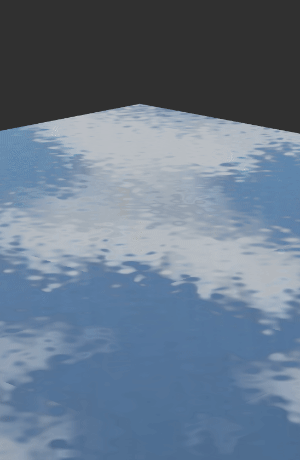
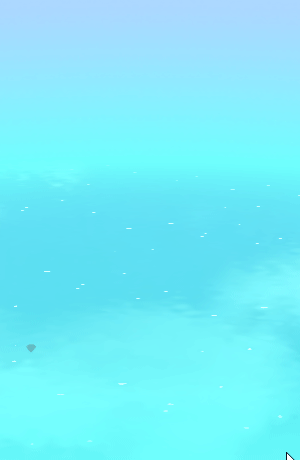
After adding a sense of flow and distortion, the body of water finally looks like water.
But, there is still a problem: the reflection of any viewing angle on the water surface is the same, which is incorrect.
A phenomenon needs to be drawn here called a fresnel reflection. Simply put, when the line of sight is perpendicular to the surface, the reflection is weaker, and when the line of sight is less perpendicular to the surface: the smaller the angle, and the more pronounced the reflection.
Example:
float fresnel = mix(0.15, 1.0, pow(1.0 - dot(n, v), 3.0));
The conventional fresnel reflection formula is fresnel = pow(1.0 - dot(n, v), x), the x is the exponential coefficient.
Using the mix function, map the fresnel values from 0.15 to 1.0 to ensure that the viewing angle is perpendicular to the water surface and allows for the presence of reflections.
mix(x, y, a) is a mixing function, equivalent to x^×(1−a)+y×a.
The complete code is as follows:
vec4 frag () {

    float t = texture(noiseTexture, v_uv.xy).r;

    vec3  n = normalize(v_normal);

    vec3  v = normalize(v_view);

    vec3  r = -v + t * 0.03;

    vec3  reflectColor = texture(envTexture, r).rgb;

    float fresnel = mix(0.15, 1.0, pow(1.0 - dot(n, v), 3.0));

    vec3  color = mix(mainColor.rgb, reflectColor, fresnel);

    return vec4(color, mainColor.a);
}
Comparison before and after adding a Fresnel reflection:
2. Foamy Water
Although the water surface has some sense of flow, it is not obvious enough. Creating some foam on the water surface will highlight water flow.
Floating foam has several characteristics:
-
The location is not fixed.
-
The size is also not fixed.
Observing the noise map, you will find some white patterns on the noise map that just meet our needs. We just need to figure out a way to extract it. Example:
vec4 frag () {

    float t = texture(noiseTexture, v_uv.xy).r;

    ...

    color = mix(color, vec3(1.0), step(0.9, t));

    ...
}
First, use the step function to make the noise function. If it’s greater than 0.9, the noise is extracted out, and use the mix function, water color and the white (vec3 (1.0) is white) obtained by mixing water with white cream.
Step (edge, x) is a step function, which is equivalent to x <edge? 0:1.. Most times step is used, the extracted patterns are all jagged, so anti-aliasing is needed, and then we need to use the smoothstep function. It’s amended below:
vec4 frag () {

    float t = texture(noiseTexture, v_uv.xy).r;
    ...

    color = mix(color, vec3(1.0), smoothstep(0.9, 0.91, t));

    ...
}
It changes minimal, just step(0.9, t) is replaced with smoothstep(0.9, 0.91, t). The role for t is [0.9, 0.91] made within the scope of smoothing processing. When t < 0.9, the time taken is 0. When t > 0.91, the time taken 1.
Smoothstep(edge0, edge1, x) is a cubic smoothing step function, which can make a smooth transition between x and [edge0, edge1]. Most of the time, it is used to eliminate aliasing.
The complete code is as follows:
vec4 frag () {

    float t = texture(noiseTexture, v_uv.xy).r;

    vec3  n = normalize(v_normal);

    vec3  v = normalize(v_view);

    vec3  r = -v + t * 0.03;

    vec3  reflectColor = texture(envTexture, r).rgb;

    float fresnel = mix(0.15, 1.0, pow(1.0 - dot(n, v), 3.0));

    vec3  color = mix(mainColor.rgb, reflectColor, fresnel);

    color = mix(color, vec3(1.0), smoothstep(0.9, 0.901, t));

    return vec4(color, mainColor.a);
}
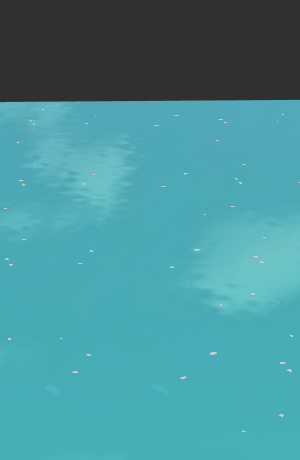
The effect is as follows:
3. Join the sky box
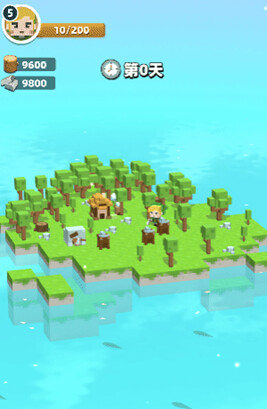
The sky box built now is useless because, with the sky box, it is difficult to eliminate the edge of the water surface, so instead a sphere is used.
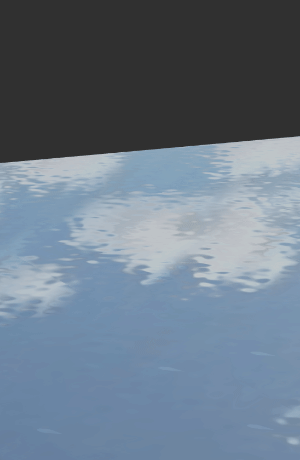
The effect is as follows:
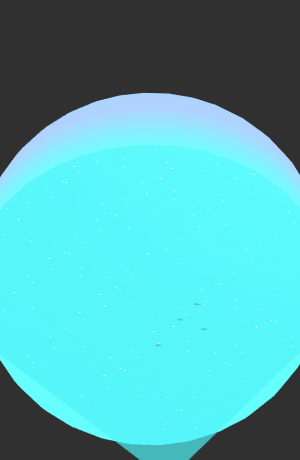
Notice an obvious edge line at the junction of the water and the sky, and we will eliminate this edge line now.
To eliminate this borderline, the first thing we thought of was to use fog to blur the distant water surface and sky box. But the use of conventional fog effects will bring about a problem: when the camera moves far and near, the fog effect will change, and the edge of the water surface is still not be resolved. Solving this will require a change in thinking.
The idea of eliminating this border is very simple. Make the color of the distant water surface consistent with the sky box.
Example:
vec4 vert() {

    ...

    v_uv.zw = a_texCoord;

    ...
}

vec4 frag() {

    ...

    vec2 d = v_uv.zw - vec2(0.5, 0.5);

    color = mix(color, rimColor.rgb, rimColor.a * smoothstep(0.0, 0.27, dot(d,d)));

    ...
}
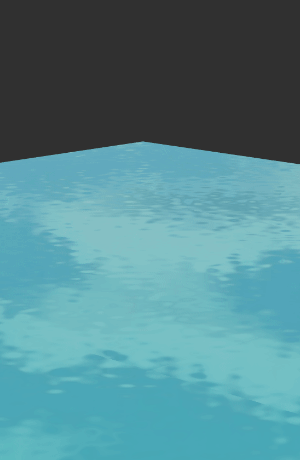
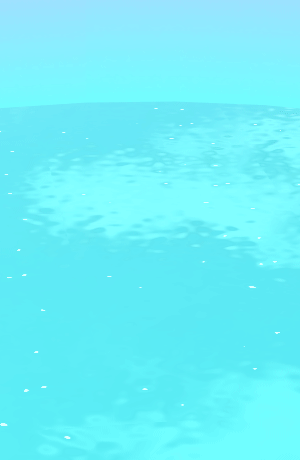
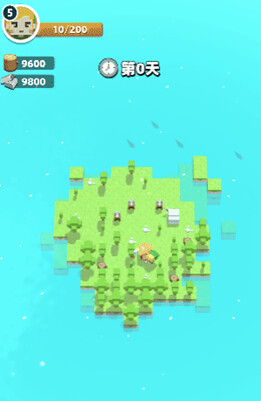
The effect is as follows:
It perfectly solved the problem with the idea that we set the color of the area whose distance from the center of the water surface is more significant than a specific range to rimColor (the color of rimColor is basically the same as the color of the sky box) and uses smoothstep to smooth the distance value within a certain range.
But in the actual calculation, one optimized calculation was made by not directly using the distance value sqrt(dot(d,d)) but used the square value of the distance dot(d, d). The reason is that the square root isn’t great on performance. If it is only the ratio, there is no need to use the square root.
The complete code is as follows:
vec4 vert() {

    StandardVertInput In;

    CCVertInput(In);

    mat4 matWorld, matWorldIT;

    CCGetWorldMatrixFull(matWorld, matWorldIT);

    vec4 worldPos = matWorld * In.position;

    v_normal = normalize((matWorldIT * vec4(In.normal, 0.0)).xyz);

    v_view = cc_cameraPos.xyz - worldPos.xyz;

    v_uv.xy = worldPos.xz * 0.1 + cc_time.x * 0.05;

    v_uv.zw = a_texCoord;

    return cc_matProj * cc_matView * worldPos;
}

vec4 frag () {

    float t = texture(noiseTexture, v_uv.xy).r;

    vec3  n = normalize(v_normal);

    vec3  v = normalize(v_view);

    vec3  r = -v + t * 0.03;

    vec3  reflectColor = texture(envTexture, r).rgb;

    float fresnel = mix(0.15, 1.0, pow(1.0 - dot(n, v), 3.0));

    vec3  color = mix(mainColor.rgb, reflectColor, fresnel);

    color = mix(color, vec3(1.0), smoothstep(0.9, 0.91, t));

    vec2 d = v_uv.zw - vec2(0.5, 0.5);

    color = mix(color, rimColor.rgb, rimColor.a * smoothstep(0.0, 0.27, dot(d,d)));

    return vec4(color, mainColor.a);
}
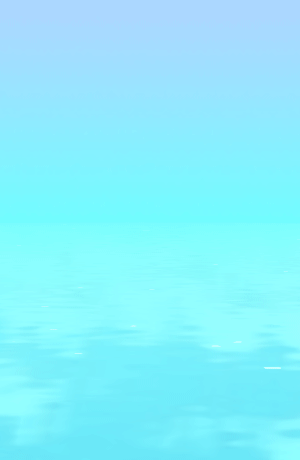
Finally, put some particles in front of the camera to set off the atmosphere:
3. Conclusion
Developers are welcome to view the original post and exchange questions with the author! The author will continue to explain how to create shore bubbles and waves in the community!