
Tutorial: Building custom plug-ins for Cocos Creator 3.0
Preface
One of the great things about the new Cocos Creator is the ability for developers to add their plug-ins. This allows developers to build games using your technology yet gain some control as to the workflow process. Learning to create plugins takes some work, yet this tutorial will likely get you far along your way. This tutorial was inspired by one of the top Cocos Creator developers, Xu Yanfeng. Xu has built some fantastic plug-ins already, including:
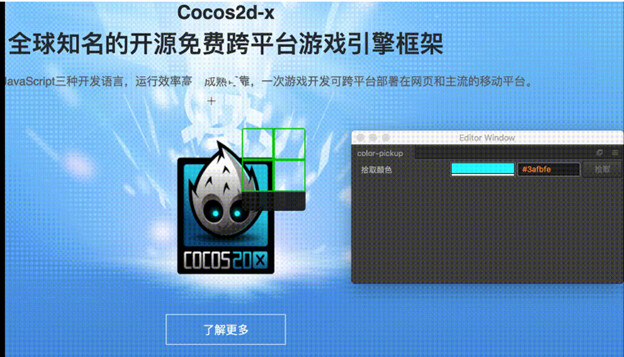
A color picker:
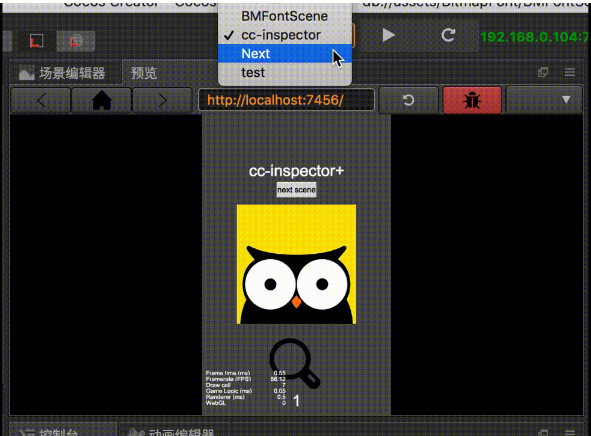
and a scene preview plug-in:
Hello World
Before beginning to build expansive plug-ins, it’s always great to get the basics using a HelloWorld style project. The process to construct this plug-in will be relatively fast, please read every step!
Create a plug-in project
Using the Cocos Creator 3.0 Tech Preview. First, create and open an empty project named HelloWorld.
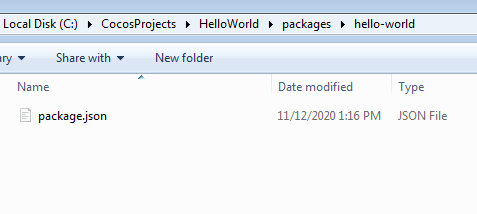
Second, find the package directory of the project and create a folder inside the packages directory named hello-world. Add package.json into it as shown in the following figure:
(For Cocos Creator 3.0 please use the folder ‘extensions’ instead.)
Third, set the necessary information of the plug-in. This plug-in information is defined in the package.json that was created in the step above. For example, plug-in name, version number, author, description, etc.:
{
  "name": "hello-world",
  "version": "1.0.0",
  "author": "xu_yanfeng",
  "description": "creator3d hello-world"
}
View the plug-in in the editor
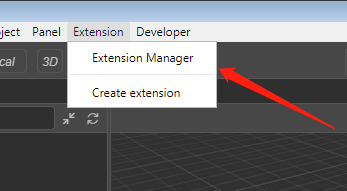
Going back to the Cocos Creator 3D editor, click Extension in the menu bar and select Extension Manager.
Open to the project section, and you’ll see the newly created hello-world extension. You may have to refresh to display or restart the editor.

There isn’t any logic added to the plug-in, so nothing will happen when you enable it. But congratulations, you’ve built your first plug-in!
Add a menu to your plug-in
Now that it can be added successfully, let’s give it a spot on the menu bar and some commands for developers to choose to use.
Open the package.json file again. This time we need to add a bit more code to the file. Example:
{
    "name": "hello-world",
    "version": "1.0.0",
    "author": "xu_yanfeng",
    "description": "creator3d hello-world",
    "contributions": {
    "menu": [
      {
        "path": "Plug-in",
        “label”: “Custom Menu”
      }
    ]
  }
}
path: The name of the menu item. Cocos Creator supports a/b/c multi-level menus.
Save, to enable the plug-in in the Extension Manager and restart Cocos Creator. When you go back to your project, and a new item has popped up on your screen
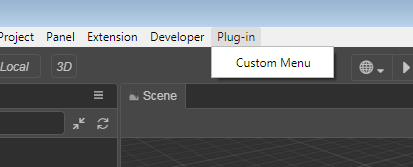
Now, it’s time to add functionality to the plug-in. Let’s make the plug-in pop up a message when it’s clicked. To do this, add a message call to onMenuClick that will release the message, log. Example:
// ...
  "menu": [
    {
      "path": "Plug-in",
      "label": "Custom Menu",
      "message": "onMenuClick"
    }
      ],
    "messages": {
      "onMenuClick": {
        "methods": [
          “log”
        ]
      }
    }
  }
}
Save this and restart Cocos Creator. Whenever you click on the Custom Menu label, a message attribute tells the messages attribute (which controls all messages) what happened, the onMenuClick is called, and the methods are called to activate the logic (aka log). Now, we know that we need to put in all the actions inside this log area to have things happen in your plug-in or within Cocos Creator.
Write Specific Logic Of A Message
To take this to the next level and have it actually log in to the console hello-world. Go back to the package and add a new file called main.js and have it make the call. Example:
exports.methods = {
    log () {
        console.log('hello-world')
    }
}
Save and now go back to package.json and add the main.js file to the code.
 "name": "hello-world",
  "version": "1.0.0",
  "author": "xu_yanfeng",
  "main": "./main.js",
  "description": "creator3d hello-world",
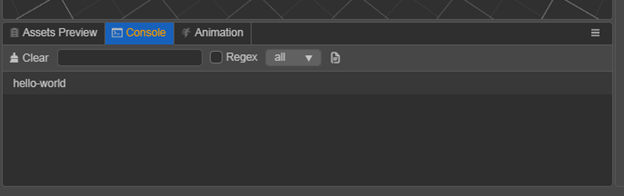
Restart Cocos Creator, and click on the Custom Menu; you should see hello-world in the console.
Great! Congrats, all steps have been completed to build a very simple plug-in for Cocos Creator. Proceed to the next steps!
Add shortcut keys to plug-ins
Adding a shortcut key is pretty easy to do. Add them using shortcuts to the contributions inside package.json.
//...
"messages": {
      "onMenuClick": {
        "methods": [
          “log”
        ]
      }
    },

"shortcuts": [
     {
       "message": "onMenuClick",
       "win": "ctrl+z",
       "mac": "cmd+z"
     }
   ]
shortcuts shares the action just like messages. Adding a message does the same as the previous action, and Win/macOS gives you the binding. Save this, restart Cocos Creator and test.
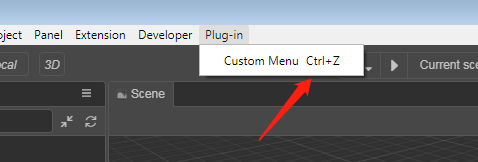
Note: make sure you are using shortcuts not used by Cocos Creator, and you are done!
Concluding Code
Here is the final code for package.json
{
  "name": "hello-world",
  "version": "1.0.0",
  "author": "xu_yanfeng",
  "main": "./main.js",
  "description": "creator3d hello-world",
  "contributions": {
  "menu": [
    {
      "path": "Plug-in",
      "label": "Custom Menu",
      "message": "onMenuClick"
    }
      ],
    "messages": {
      "onMenuClick": {
        "methods": [
          “log”
        ]
      }
    },
    "shortcuts": [
      {
        "message": "onMenuClick",
        "win": "ctrl+z",
        "mac": "cmd+z"
      }
    ]
  }
}
And for main.js:
exports.methods = {
    log () {
        console.log('hello-world')
    }
}