How to implement the 2D lighting?

Hi, cocos community! ))

I’ve started to dive deep into the cocos-creator-based development several months ago. Currently, I’m using version 3.1.1. The majority of the things are straightforward with the typescript version of the engine. Creating sprites, animations, work with vectors, graphics, physics, etc. But when it comes to 2D lighting there is a “fog of war” situation.

From what I’ve got, it seems that cocos creator does not support 2D lighting at all. According to documentation currently, only 3D light is supported, meaning that only 3D objects would be impacted by the currently available lighting sources. Sprites, spine animations, and other 2D objects are out of scope.

Thus, I’ve tried to figure out how to implement my own lighting.

I’ve found quite a useful topic, which explains the math behind the 2D lighting:

Also, I’ve done a basic tutorial regarding the GLSL shaders within the engine. Creating material, effect, developing a shader. That was quite a simple implementation of the partially wiped sprite.

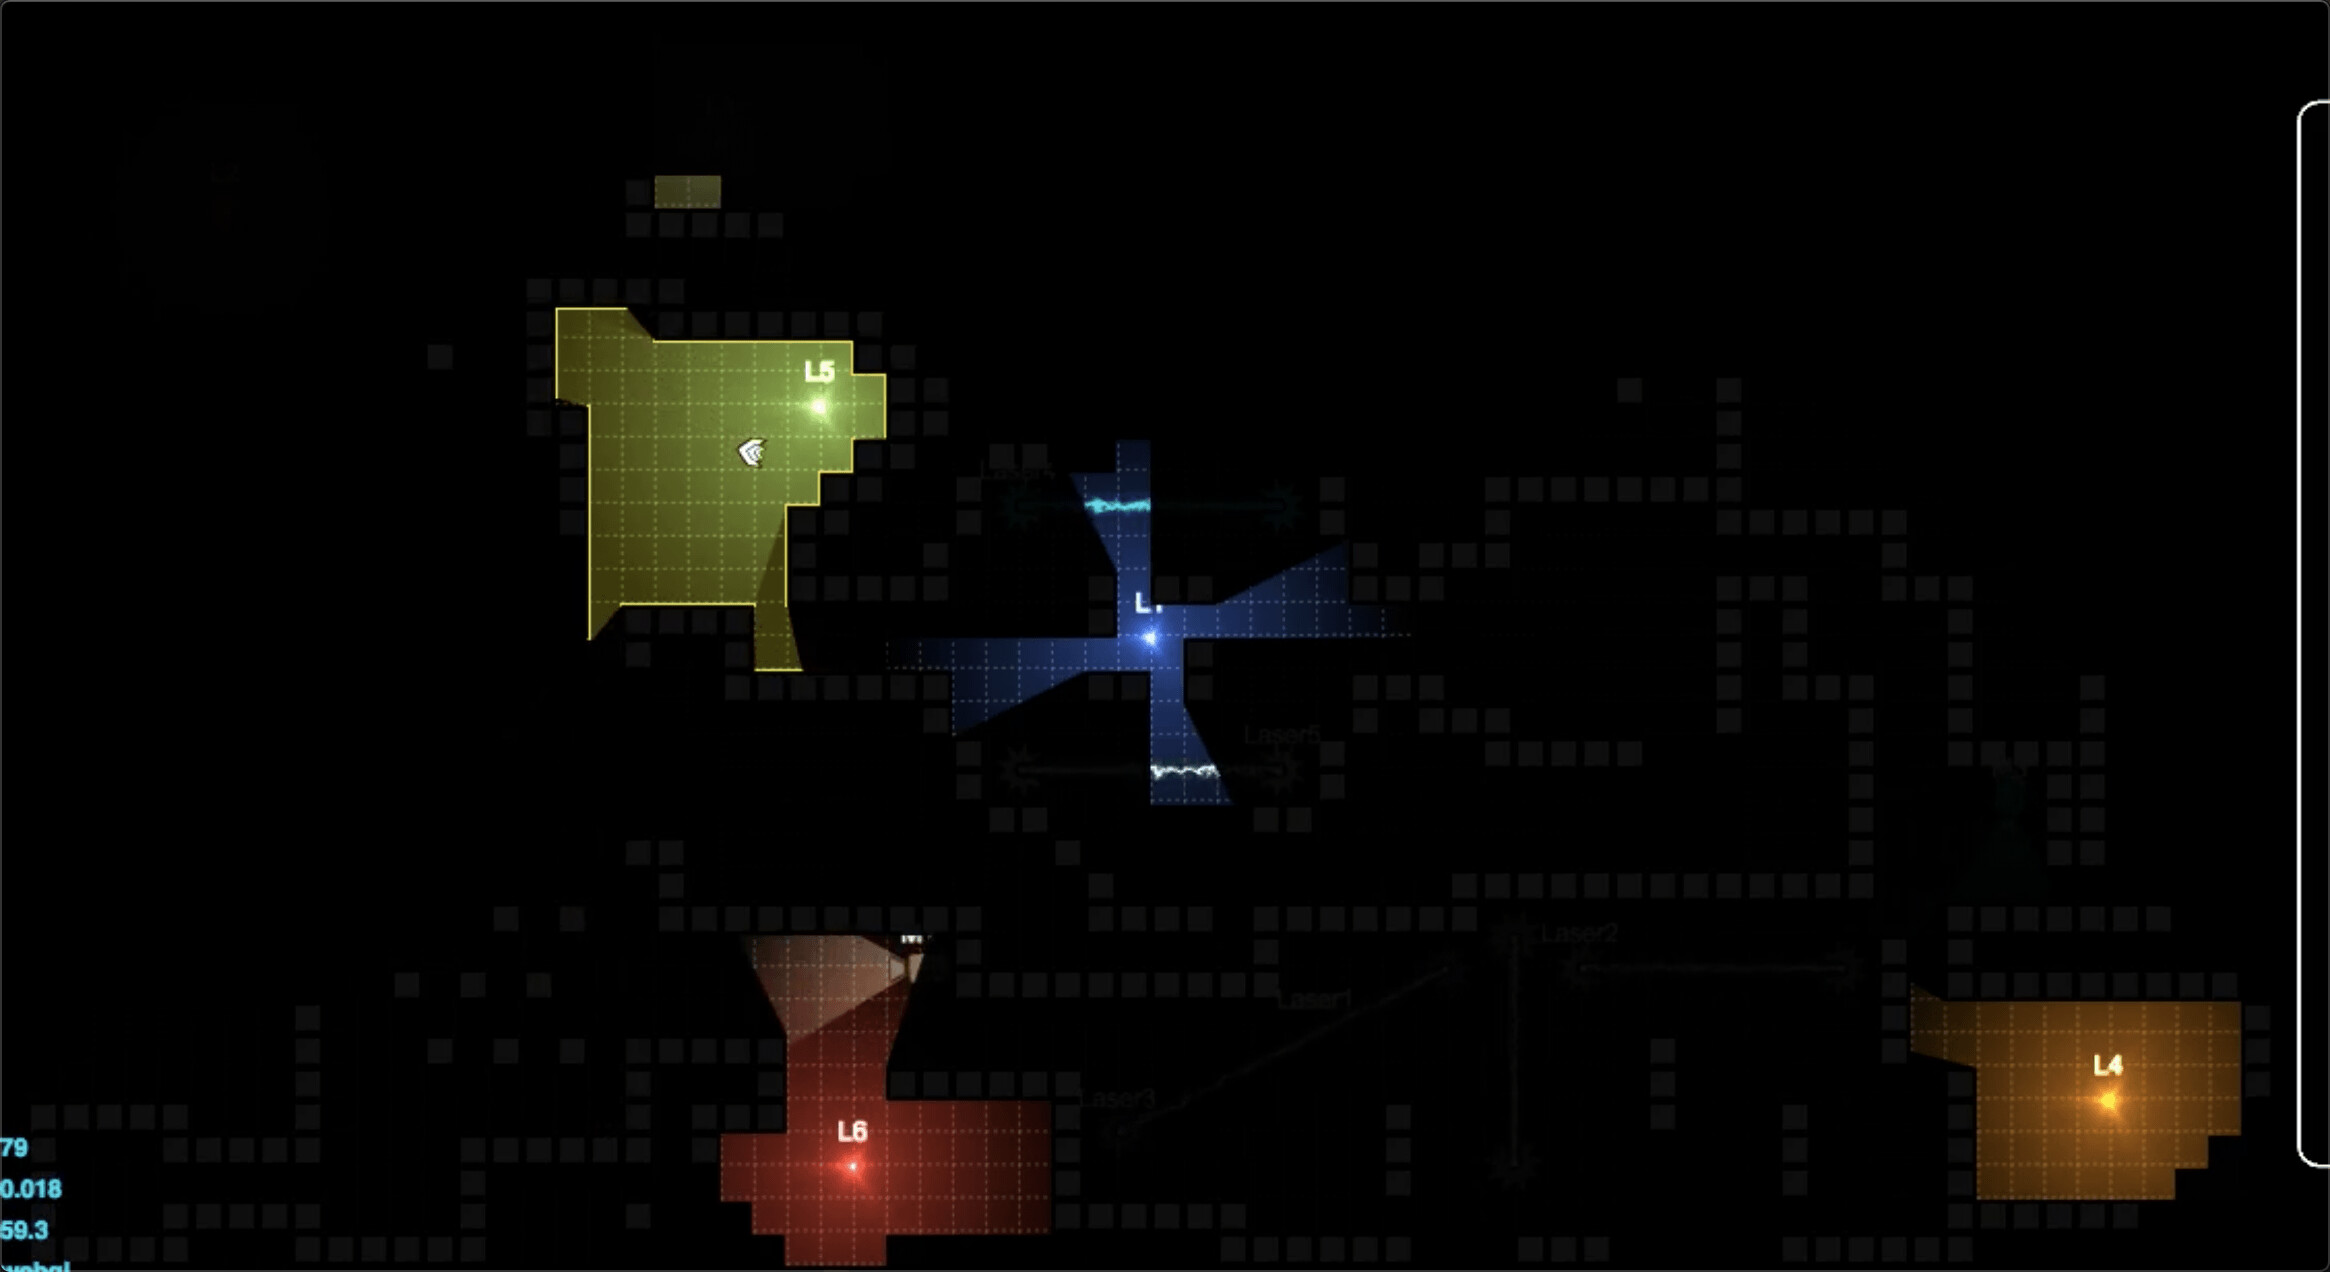
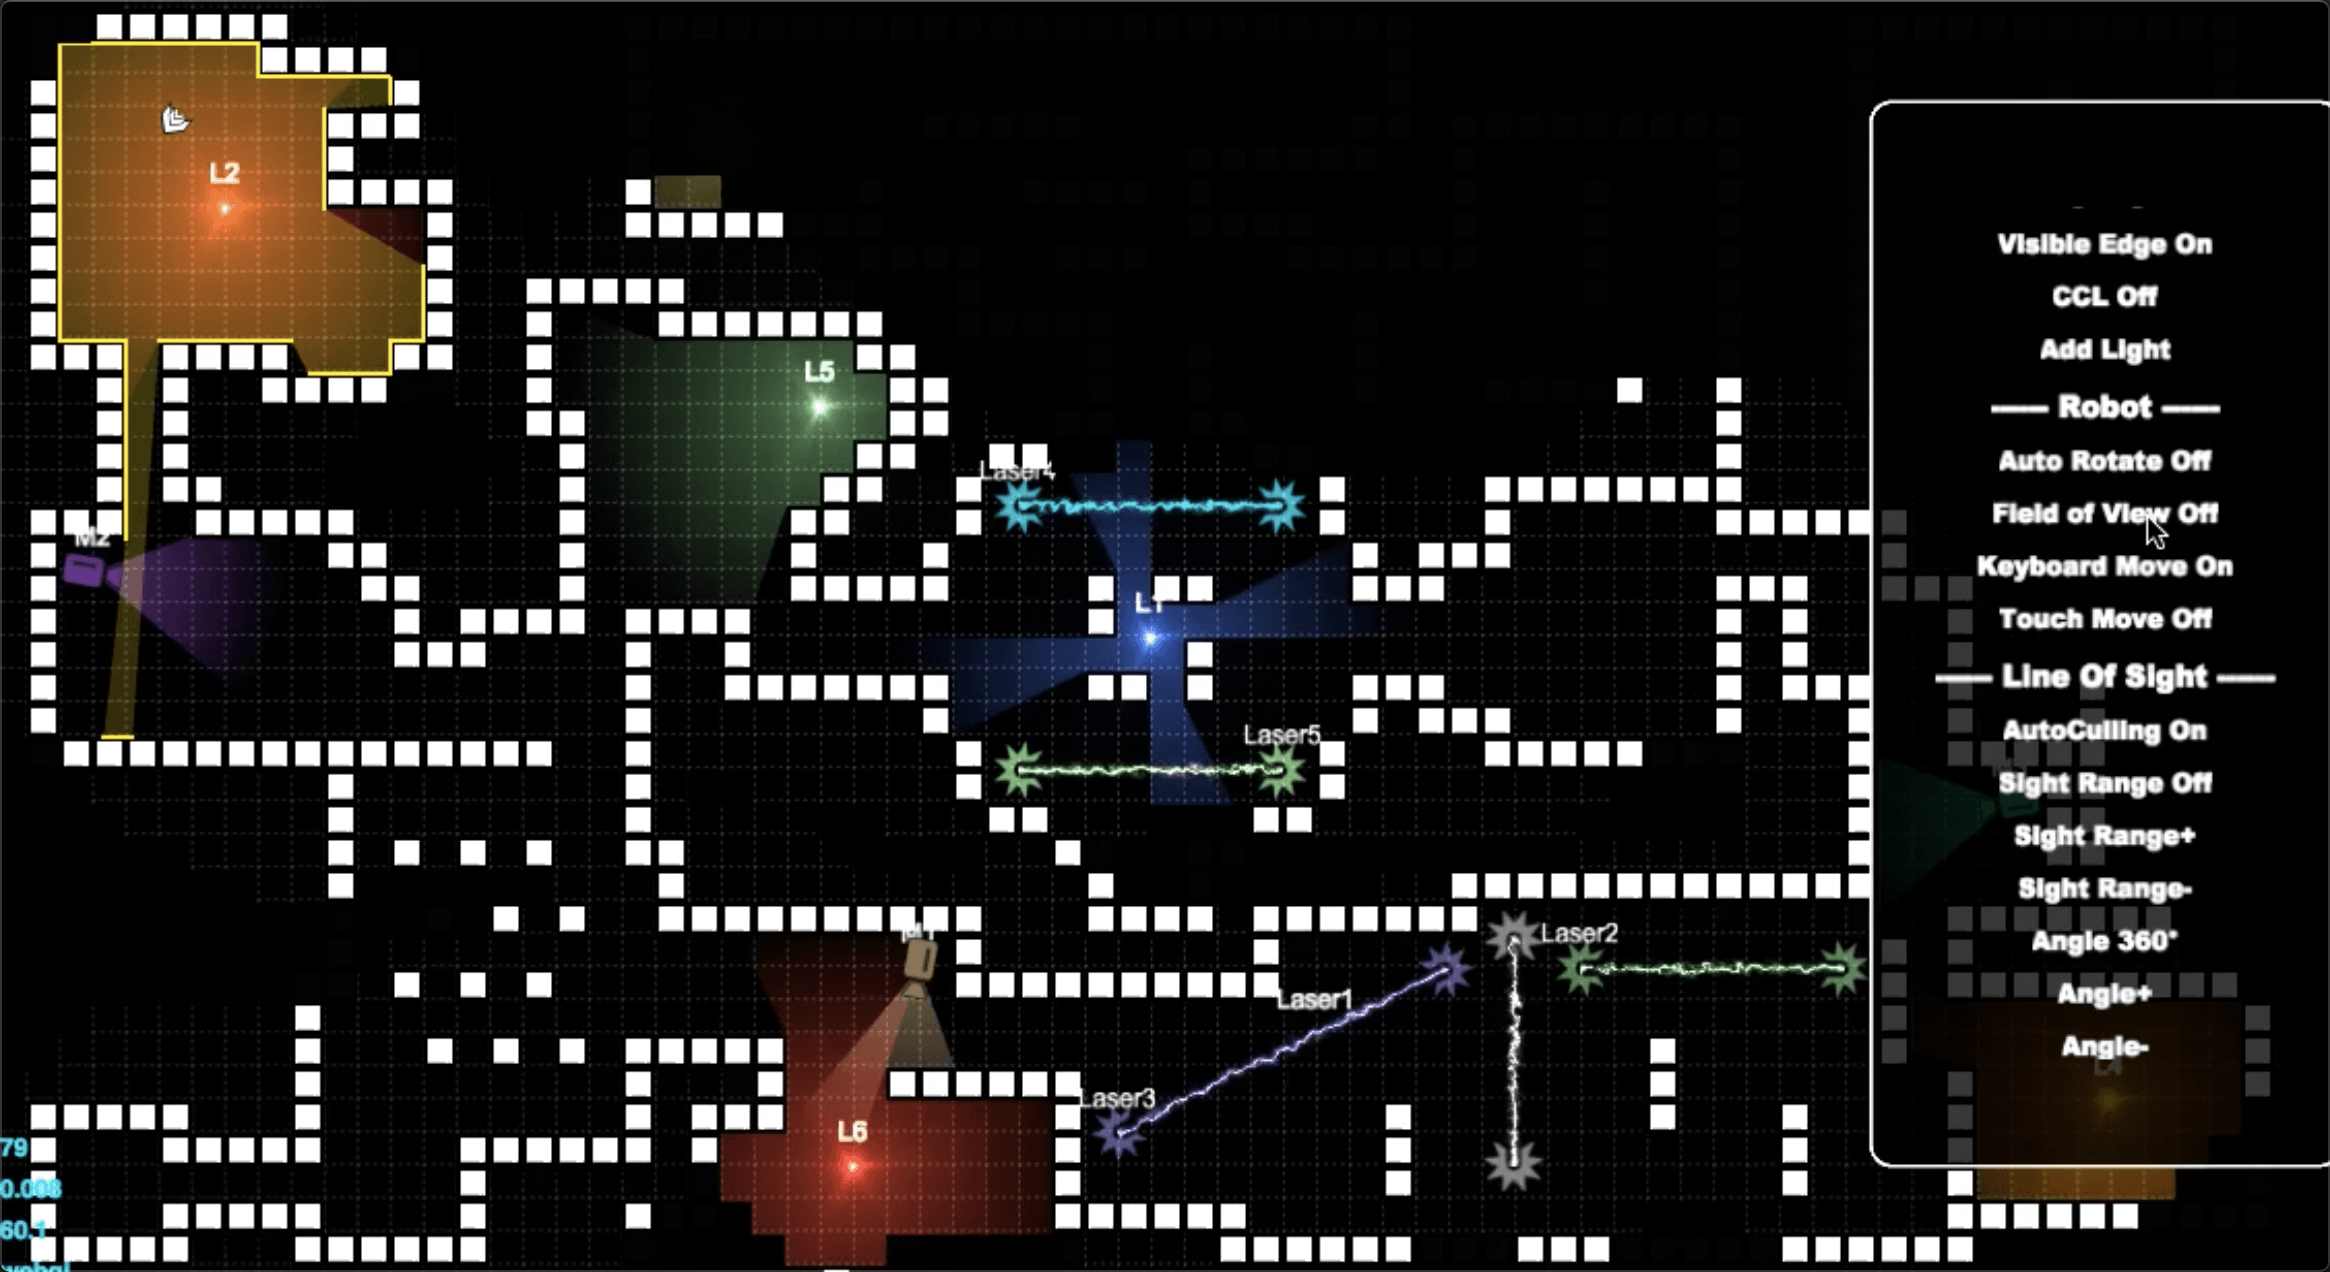
But, it seems, that I still do not have enough knowledge. It is not complex to do raycasting, using the raycast method of the PhysicsSystem2D class, and form a polygon that would contain a highlighted area. But what should I pass to the vertex and fragment shaders? Would form of that polygon be enough?

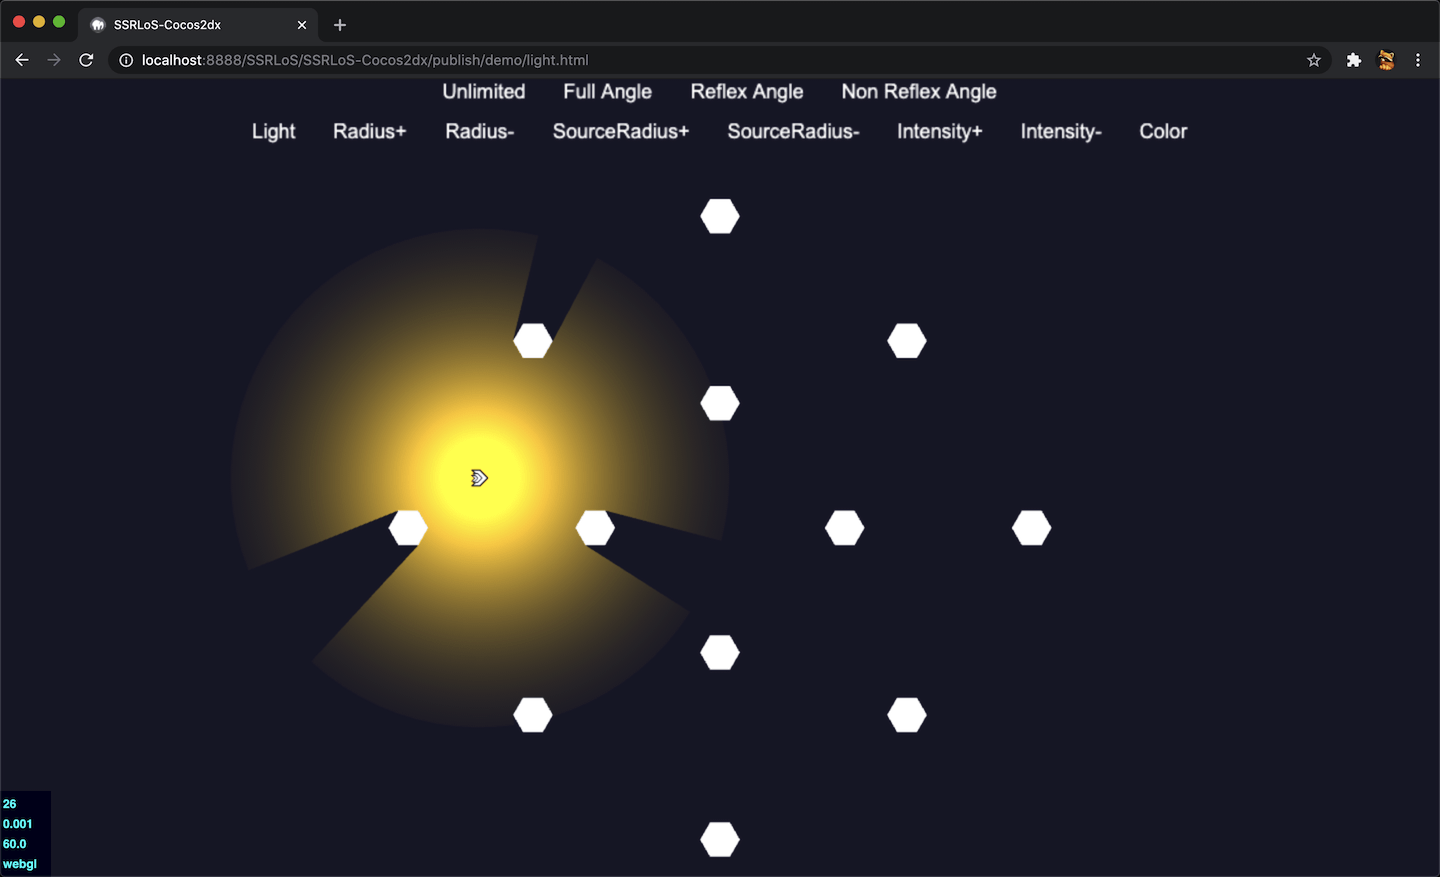
What does light mean in terms of the shaders? Does light mean changing the pixel color based on the distance from the source of light? All not highlighted areas could be black in the simplest case. All highlighted - not impacted or slightly brighter. Also, it is possible to pass the radius of the lighting source, and implement a gradient-based light, meaning that the light strength would be lower depending on how far are you from the light source. Right?

Also, how should I implement the lighting for multiple sources of light? Should then the shader get all polygons of all highlighted areas? Or it is somehow the other way around?

I’m not quite sure how should I support 2D lighting for all the objects, which I’m currently using in my project. Those are Graphics, Sprite, Spine animations. Should I implement different shaders for each of the objects? Or it will be enough to implement one shader and assign it to all these objects in order to have them all highlighted by the lighting source?

I’ve found evidence, that there is some task in cocos creator’s Trello regarding the 2D lighting:

Is it planned to provide support of 2D lighting to the engine any time soon?

Or, maybe, there exists a cocos creator typescript project, which contains 2D lighting implementation? The one which I could use as a reference?

Please, help me to figure out how should I move on in this area. ))

Here is a post and project I have been working on in the Chinese forum:

Maybe you can check it out with google translate and if you are interested you can tell em and I will send you the latest code of this project.

1 Like

Hi @supersuraccoon1, thanks for the feedback!

That is exactly the thing, which I want to achieve. I see, that your post contains references to the runnable examples, which do contain a source code inside. I’ll certainly have a look at the ssr.min.js and implementation of the ssr.LoS. As I see, it has all the implementation, including the shaders. That should be enough for me to get a basic idea of it.

Still, the architecture of the solution for my case is not yet being built in my mind. In your examples, all the things you draw are based on cc.DrawNode. And the light does not actually have an impact on the objects of the scene ( e.g. on the flying robot ). It mainly participates in shadow casting. But in my case, I need the sprites, animations and etc., which are not within the highlighted area to become black.

I’ll either need to write specific shaders, which will consider lighting for those types of objects, or… I can simply make a lighting system with all its lighting sources an additional layer on top of all the other drawn elements. In non-highlighted areas that layer would be non-transparent black. That should also work, despite it is a workaround.

In case if the direction of my thoughts is wrong - let me know.

And once again, thank you for your feedback.

There is a component in my project named ssr.LoS.Mask which will make all the objects that is out of the sight black. You might check this out.

The thing which I was able to achieve this week:

I’ve used raycasting from the light source to each obstacle’s vertex, which is within the lit radius. I’ve implemented my own casting algorithm, because the one used by box2d was too slow. Mine algorithm does the grid raycast ( which is quite fast ), and when meets the wall does a line cross check of all its esges, returning the closest collision.

Also, there was no possibility in cocos createor’s API to filter out only the nearest colission of the certain collision group. When using mask filtering, the raycast stopped on any first collision of non-searched group, giving me 0 matches in majority of the cases. And fetching of all the collisions was too heavy.

In addition I’ve added 360 rays from the lighting source all over the circle in order to achieve “limiting by radius”. That leads to +360 raycasts even in case if my obstacles are generated as squares. That might be the thing which makes processing quite slow. But I’m not sure what else I can optimize there.

My map is quite a big one - 50x50 - it contains 2500 squares. But the algorithm is agnostic to the size of the map. It becomes slower only with the extension of the radius, as in that case more rays should be casted, as more edges are within the radius.

One more thing which makes thinigs works slow is the Graphics-based debug polygon, which I’m currently using instead of the shader. That takes ~20% of raycast processing time.

Next step would be to transfer that polygon to the lighting manager, which will pass information regarding all visible lighting sources into the shader and will draw the lighting sources and the “nothing-visible” mask. I’m still thinking regarding how to form mask polygons, while having only the visible polygons in my hands. Let’s see.

I’ll leave another update here once I will achieve more impressive results. Once again, thanks for support ))

Hi @supersuraccoon1, I’ve done enough optimizations in order to have the lighting calculation for obstacles with 25 edges at the 120 FPS for 1 light source.

Now I’m back to the shaders. Any idea regarding how this could be implemented? I mean that I need to apply the shader to the whole scene, and not to a single sprite or spine animation.

My current understanding is that I can create material and assign the effect to it. And the effect will contain the implementation of the vertex and fragment shaders. But, as of now, I see that material can be assigned to the dedicated component, e.g. to sprite. Is my understanding correct, that there is no straightforward way to assign material to the whole scene or to the canvas?

In my case, I want to have a shader, which would modify the content of the whole visible screen, and not only of dedicated objects.

If my understanding is correct, the only option I see to implement what I want is to:

  1. create a render texture ( RT )
  2. render the whole scene to the RT, via assigning it to the camera ( C1 )
  3. assign that RT to a sprite ( S )
  4. assign the material ( M ) to the S, which will contain the effect ( E ), which will add the lighting post-processing to the texture
  5. create the second instance of the camera ( C2 )
  6. assign C2 to the canvas
  7. use C2 to pass the final content of the RT to the canvas

Is that one of the possible ways? Or have I missed something and there is a much more straightforward way?

Also, when I’m thinking of the shaders which I’ll need to implement, I have the following questions:

  • From my understanding lighting will be contained only in the fragment shader, as I’m not modifying any vertices. Is that assumption correct? Or I would need to pass some data from the vertex to the fragment shader?
  • Is it Ok to pass “visible polygons” of all the lighting sources as the uniform into the fragment shader? Or that would be too much data transfer and the whole raycast calculation should also take place inside the shader itself?

P.S. Steps 1-7 worked for me, so I think that I’m moving in the right direction. If no - please, let me know ))

This is what I was able to achieve this week:

  • calculations of the visible polygon are still done on the CPU side. The light manager gets all visible polygons of all the light sources ( in the video there is only one light source ) and forms the lit/unlit screen, which is being rendered to the shadow texture ( ShT ). Actually, I form this screen using the extended Graphics class, which does triangulation of the visible polygons. The need to extend the graphics class is related to the following issue - drawPolygon / drawSolidPoly doesn't properly support concave polygons - #2 by anon98020523. Still, I’m going to switch away from using graphics, as usage of it is not smooth enough. You can see it on the video.
  • That ShT is being passed as a uniform to the shader, which is assigned to the other render texture - scene texture ( ScT ). ScT contains all objects of the scene beside the walls. In other words, it contains everything which can be shadowed.
  • Inside the fragment shader, which contains the ScT & ShT the lit/unlit pixels are filtered. Lit ones simply get the original color. Others do get the shadow color - the black one.
  • On top of that, I place the walls, which are rendered to the third render texture - walls texture (WT). WT is being placed on the top of the ScT.

With the current approach I see 2 obvious disadvantages:

  • Lags and artifacts caused by the usage of the Graphics
  • Not enough efficiency of the algorithms, as I’m getting less than 120 FPS with 5+ light sources.

The thing, which I’m going to try next is to implement the following approach, which would do majority of the things on the GPU:

I’ll let you know about the progress. ))

Hi all.

Unfortunately, I’ve given up. Implementation of the shadow map required modifying the rendering pipeline, which is way too deep for me. I want to concentrate more on the game content, than on the engine’s implementation.

Finally, I’ve migrated my project to Unity, which supports 2D lighting & shadow casting almost out of the box. Here is the result, which I was able to achieve with Unity:

This topic can be closed. Hopefully, it will help someone, who will have the same questions as me, to figure out things faster. Once again, I really want to emphasize - it is not impossible to achieve the same with cocos creator. But it will require much more knowledge and development time from you.

Once again, tmany hanks to the cocos-creator community for the support.

2 Likes